English
_61
RAID mode setting
1.
Click on the <
Enable
> or <
Setup
> button.
2.
In the use RAID window, select settings of RAID and click on the <
OK
> button.
●
Enable : You can select whether or not to use the RAID mode.
●
Shows the RAID types supported by each product.
Product
RAID type
32-channel model
64-channel model
Level 5, level 6
3.
It will show the list of HDDs that compose a RAID. In the RAID screen, click on <
OK
>.
4.
The data deletion and system rebooting message window will appear. You can click on the <
OK
> button to
reboot the system for RAID mode setting.
5.
When RAID building is complete, select "
Setup
>
Device
>
Storage
device
>
RAID
” to check the build.
■
If you disable the RAID mode at RAID level 5 or 6, then every RAID array will be canceled. If you want to cancel only one of RAID arrays in
use, then go to the setup window and disable that specific RAID array.
■
If the Status of HDD is displayed as Check or Replace under <
Management
>, you cannot use it when configuring RAID.
■
When the RAID mode is in use, it is recommended to use HDDs with the same storage space from the same manufacturer.
■
If you enable or disable the RAID mode, existing data will be deleted. If you need to keep your old data, export it first.
■
RAID Array capacity calculation
–
When you build the RAID in level 5, the available capacity of a RAID is (the least HDD capacity) x (total number of HDDs -1).
–
When you build the RAID in level 6, the available capacity of a RAID is (the least HDD capacity) x (total number of HDDs -2).
■
If you use HDDs with different capacity, the HDD with the smallest capacity will be used to build a RAID.
Recovering RAID Array
1.
If the HDD number whose <
Status
> is shown as Faulty or Check is recognized, check the location of HDD to
be replaced on the HDD map.
2.
Replace the malfunctioning HDD from the recorder with a new HDD.
3.
When the recovery starts, the LED of the replaced hard disk lights up in yellow.
In the "
Setup
>
Device
>
Storage device
>
RAID
" menu, you can check the recovery progress.
■
Replace it with the same model of HDD or an HDD of the same capacity from the same manufacturer.
■
A HDD used to build the RAID should be one of the recommended models.
If it's not possible to use the same model of HDD, then use the HDD with the same capacity from the same manufacturer should be used.
■
If you remove the power cord while using the RAID, it can damage it, so be careful.
For reliable power, it is recommended you use the UPS.
■
A new HDD to be replaced should be one that is not RAID configured.
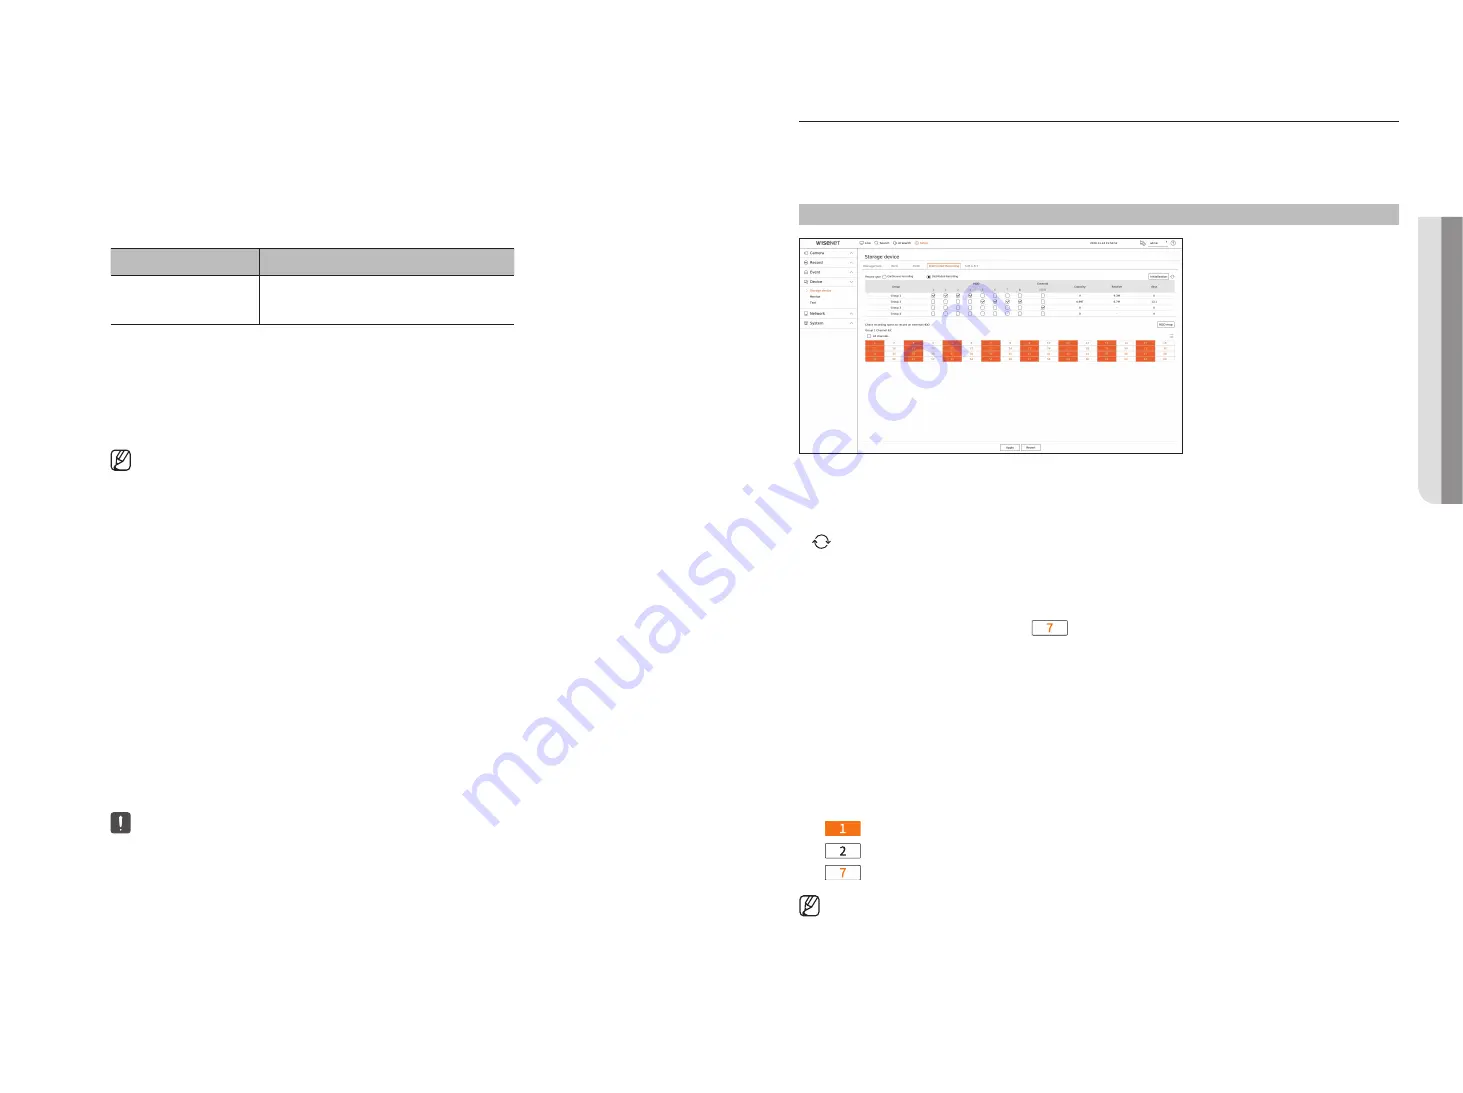
Distributed Recording
This function is only available for products that support distributed recording. For products that support
distributed recording, see page 4 “
Products supporting each feature
” of the Product Specification Manual.
You can save recordings in a distributed manner by distributing HDD(s) of each group.
Setup > Device > Storage device > Distributed recording
●
Record type : Select a storage type from <
Continuous recording
> or <
Distributed recording
>.
●
Initialization : Settings that are provided when <
Distributed recording
> is selected are configured as the
default settings.
●
: Update values such as hard disk capacity, input, and storage date to the latest data.
●
Group : Select a group to distribute the recording. If you select a group, a list to select a camera to assign opens
below.
●
HDD : The number and kind of currently available HDDs are activated.
■
Example)
A channel number that is activated like <
> is an available HDD.
●
External : Select an external storage device on which recordings will be stored.
●
Capacity : Displays the currently used capacity and entire capacity of an HDD that is selected in the group.
●
Receive : Displays the recording data volume of a channel selected in the group.
■
If the input value exceeds 200 Mbps, it will be displayed in red.
●
Days : Displays the number of storable days for the input from the selected channel in the group on the HDD.
■
Example)
3 days and 12 hours is displayed as 3.5.
●
HDD map : You can check the location according to the assigned number for the HDDs installed inside.
●
Channel list : The button state of the channel list is as follows.
–
: Channel selected in the current group.
–
: Channel selected in other group.
–
: Channel that is not currently selected. Please add this channel to the group.
■
Recording cannot be performed while saving changes in distributed recording settings.
■
To add more HDDs for distributed recording, install them in the order of 1, 5, 2, 6, 3, 7, 4 and 8.
•
SE
Tu
P
Summary of Contents for LRN-810S
Page 1: ...NETWORKVIDEO RECORDER User Manual Wisenet NVR ...
Page 123: ......


