44
WPS-100-DVR-8CH Installation and Users Manual
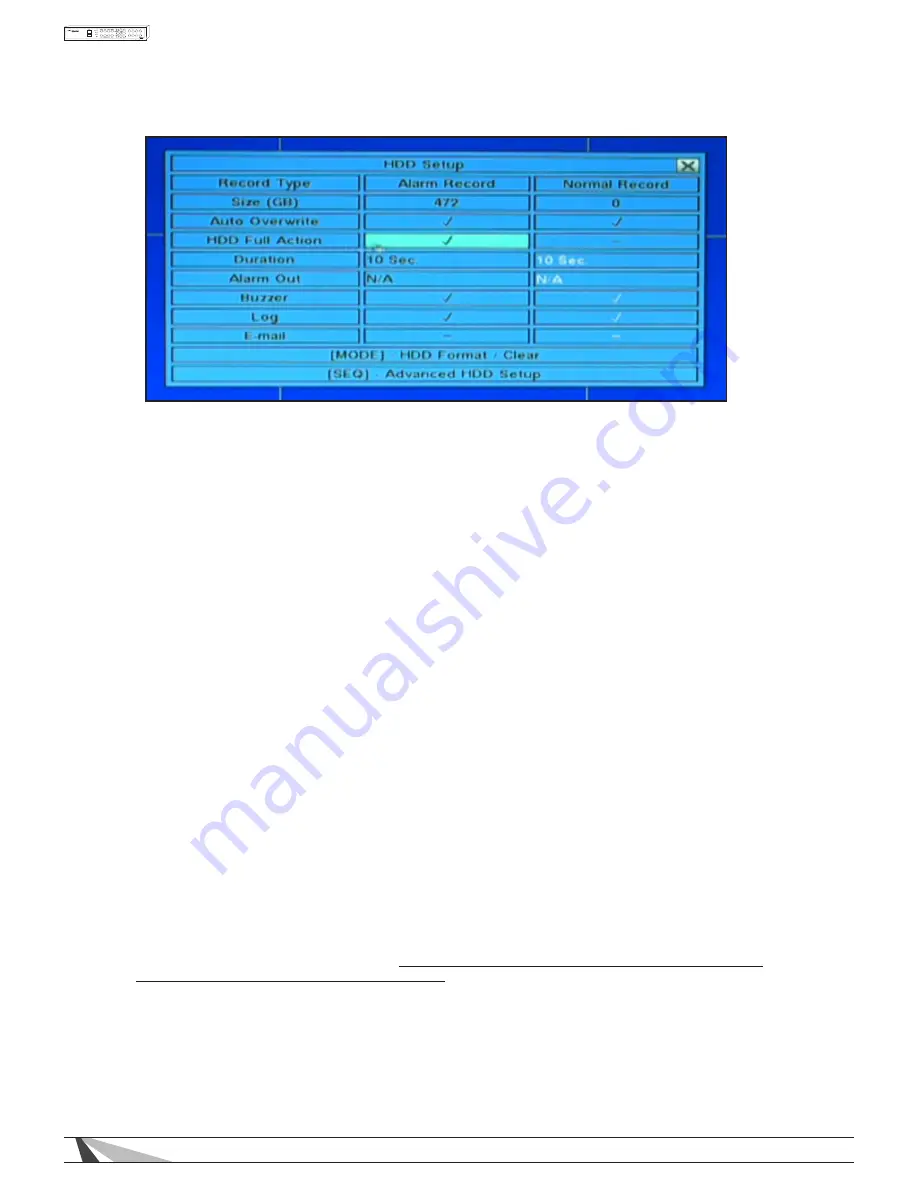
To navigate and operate this menu:
• ▲▼◄►
Press these buttons on the front panel of the DVR or remote control to select an item.
Alternatively use the mouse to select an item.
• MODE
Press this button on the front panel of the DVR or the remote control to Format/Clear the HDDs as described
in Section 6.6.1. Alternatively use the mouse to select this option.
• SEQ
Press this button on the front panel of the DVR or the remote control to enter Advanced HDD Setup as
described in Section 6.6.2. Alternatively use the mouse to select this option.
• ESC
Press the ESC button on the front panel of the DVR or remote control to escape from this menu and
return to the main menu. Alternatively use the mouse to exit the sub menu by clicking on the “X.”
If the contents in this menu have been modified, a Save dialog box will be displayed requesting the
user to save the changes. Press ENTER on the front panel of the DVR or remote control to exit and save,
ESC to exit without saving. Another method to escape is to use the mouse to “right-click,” and exit the
sub menu.
The following is a brief description for each item in the sub menu and its specific operations:
• Size (GB)
The total hard drive storage capacity in GBs (gigabytes) for the Alarm Record partition and Normal
Record partition respectively. Refer to Section 6.6.1 for more detailed information and setup of
each individual hard drive partition.
Note: if the total Alarm Record partition size is zero, alarm video and audio will be recorded in Normal
Record partition. Conversely, if the total Normal Record partition size is zero, normal video and audio
will be recorded in Alarm Record partition.
• Auto Overwrite
By default, the DVR will automatically overwrite recorded video and audio hard drive reaches its capacity.
WARNING - If Auto Overwrite is disabled and the hard drive capacity reaches its maximum, the system will
NOT overwrite recorded video and audio. Therefore the DVR will NOT record Alarm or Normal video or
audio until the user presses the Alarm Reset button.
Press ENTER or +/- on the front panel of the DVR or the remote control to disable this setting. Alternatively
use the mouse to make this change.
• HDD Full Action
If Auto Overwrite is disabled, the DVR can sound the buzzer, log the event and email an alert when the
hard drives reaches its maximum capacity. Press ENTER or +/- on the front panel of the DVR or the remote
control to disable this setting. Alternatively use the remote control to make this change


