23
WPS-100-DVR-8CH Installation and Users Manual
© 2012 Wirepath Surveillance
• CALL
Press this button on the front panel of the DVR or remote control to reset the video settings for all cameras
to factory default values.
• MODE
Press this button on the front panel of the DVR or remote control to restore the values.
• ESC
Press the ESC button on the front panel of the DVR or remote control to escape from this menu
and return to the main Menu display. Alternatively use the mouse to exit the sub menu by clicking
on the “X.” If the contents in this menu have been modified, a Save dialog box will be displayed
requesting the user to save the changes. Press ENTER on the front panel of the DVR or remote control
to exit and save, ESC to exit without saving. Another method to escape is to use the mouse to “right-click,”
and exit the sub menu.
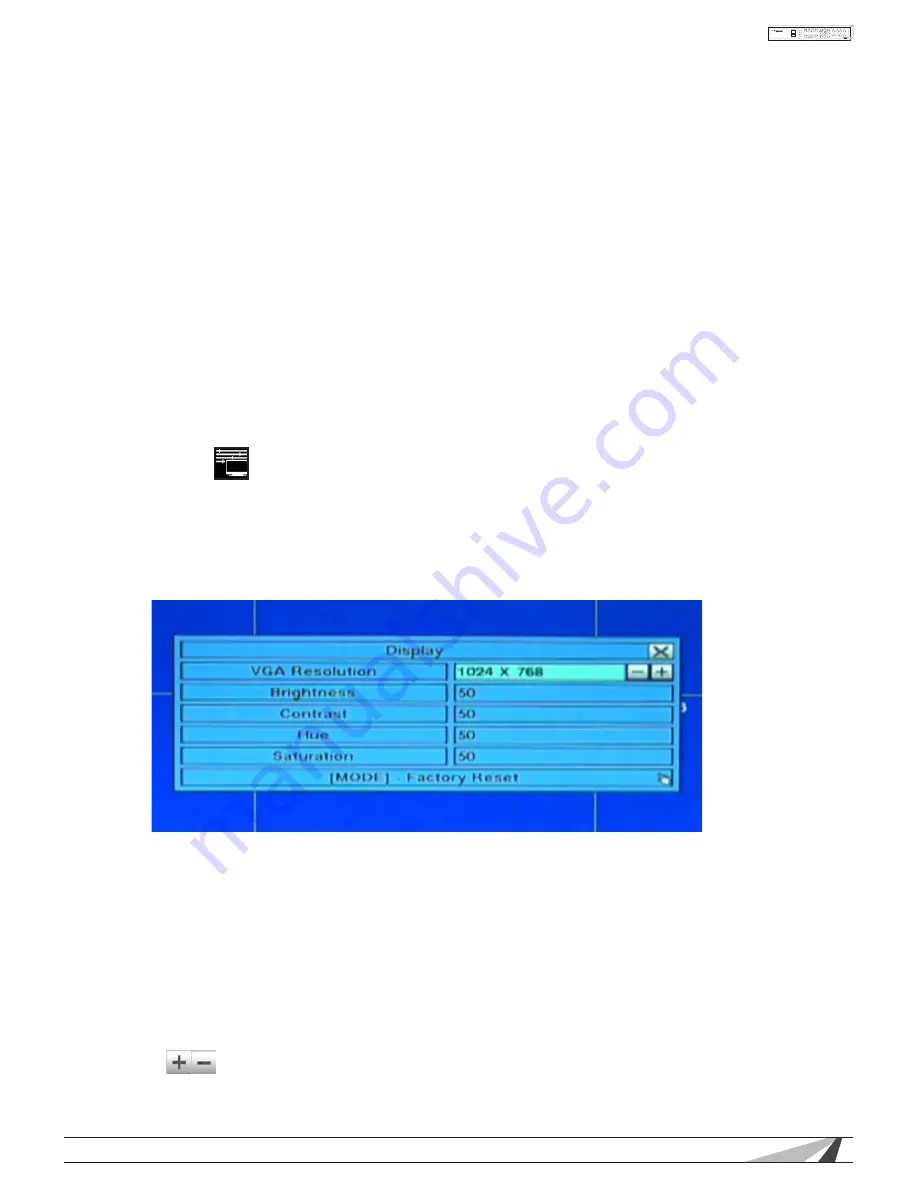
5.4 DISPLAY
The VGA Display menus allows for adjustment to the VGA output of the DVR.
Once in the Main Menu display, press ▲▼◄► on the front panel of the DVR or remote control to select VGA
Display and then press ENTER to display the menu as shown. Alternatively use the mouse to click on the VGA
Display icon.
Use the operations listed below to adjust Resolution, Brightness, Contrast, Hue, and Saturation.
Warning – Be sure the connected VGA monitor can accept the desired resolution before selecting it. If a
resolution is selected that is not supported by the monitor and video is lost at the VGA monitor, continue to
use the +/- buttons on the front panel of the DVR or the remote control to select a setting that is supported. An-
other option would be to temporarily connect a composite video monitor to the Video Out BNC to
properly set the VGA resolution.
• ▲▼◄►
Press these buttons on the front panel of the DVR or remote control to select an item. Alternatively
use the mouse to select an item.
• +/-
Press these buttons on the front panel of the DVR or remote control to change the settings. Alternatively
use the mouse to make these changes.


