Page 3-13
3-13
Cooking Products Service Manual
Original July, 1996
4321893
© 1996 Whirlpool Corporation
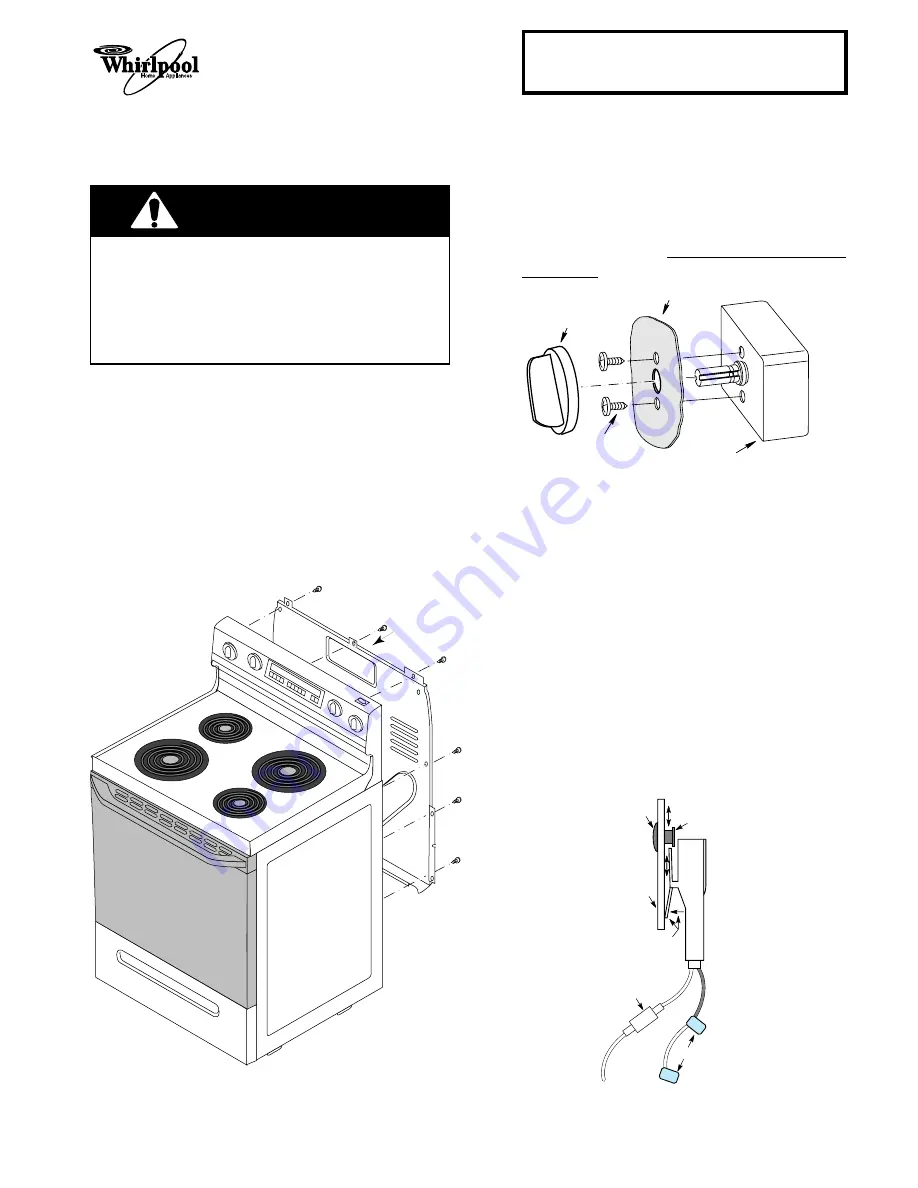
REMOVING A SURFACE ELEMENT CONTROL
& AN INDICATOR LIGHT
9.
Reassemble the range.
LENS
SLIDE LIGHT
HOLDER CLIPS
OVER/OFF SHOULDER
CONSOLE
PANEL
QUICK-DISCONNECT
SURFACE ELEMENT
CONTROL TERMINAL
CONNECTORS
PRESS UP
TO ENGAGE
CLIPS WITH
LENS SHOULDER
5.
Verify that the new surface element control is
rated the same as the old one.
6.
Position the new control the same as the old
one you just removed, mount it to the console
panel, and install the knob on the shaft.
7.
Disconnect each wire, one at a time, from the
terminals of the defective surface element
control, and reconnect it to the same terminal
location on the new control.
8.
Slide the old indicator light off the lens on the
console panel, disconnect the wires, and re-
move it.
9.
Install the new indicator light to the console
panel lens and connect the wires to the quick-
disconnect and the surface element control
terminals.
1.
Pull the range away from the wall so that you
can access the back.
2.
Turn off the electrical supply to the range.
3.
Remove the screws from the back panel and
remove the panel.
REMOVE
BACK PANEL
WARNING
Electrical Shock Hazard
Disconnect from electrical supply before servic-
ing unit.
Failure to do so could result in death or electrical
shock.
CAUTION:
When you work on the electric range,
be careful when handling the sheet metal parts.
Sharp edges may be present, and you can cut
yourself if you are not careful.
4.
Remove the knob and the two screws from the
defective surface element control. Note the
orientation of the control and remove it from
the console panel.
Do not disconnect the
wires yet.
SURFACE
ELEMENT
CONTROL
CONSOLE
PANEL
CONTROL
KNOB
MOUNTING
SCREW


