34
and, if that signal is connected to an output,
the Destination levels. A drop down list in the
Listen section allows you to choose which PC
audio destination to use to listen to the signal.
Click Listen to Source to listen to the audio.
Use the Volume control to adjust your listening
level.
This feature allows one to remotely monitor
the system audio by installing a remote access
app (like TeamViewer) on the admin PC—and
having a second NIC on that PC that’s
connected to the Internet.
Salvos/Macros Tab
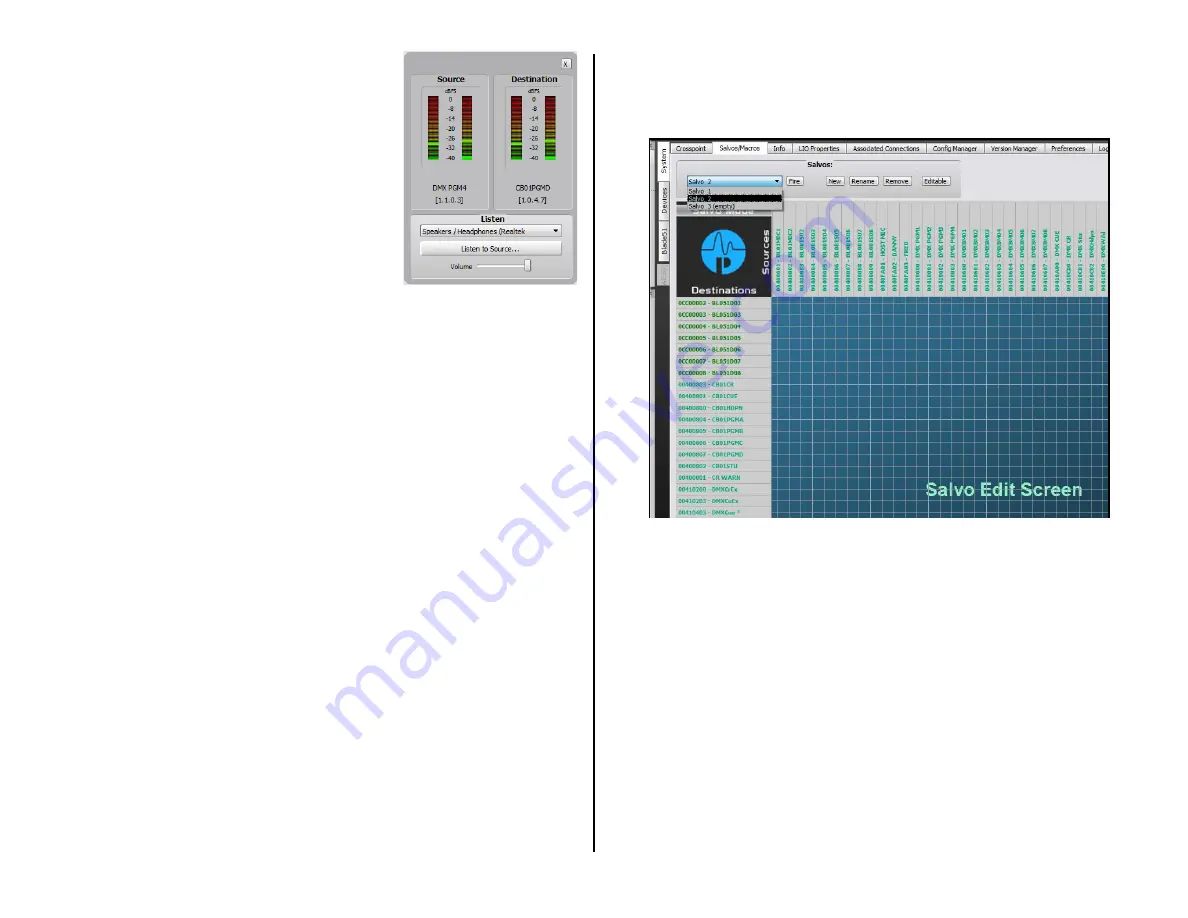
Clicking the System > Salvos/Macros tab
opens a display that looks like an unpopulated
Crosspoint grid. The difference is that this grid is
not “live.” In the Salvo grid (Figure 3-18) you are connecting the signals
needed for a future show or event. These connections are then saved as a
Salvo, which means that all of these connections get taken when the Salvo
is later “fired.”
Dozens of audio and logic crosspoint connections can be set and saved
in dozens of Salvos. Each Salvo begins life as a number (Salvo 1, Salvo 2,
and so on) which doesn’t mean much so you’ll want to rename any Salvos
you create (select the Salvo in the drop down list then click Rename) so
you can use a name to remember what each Salvo was created to do.
Even though you can enter a name with an almost unlimited number of
characters, only about 25 characters are shown in the Salvo drop down
list. When you assign a salvo using the LIO tab, only the first eight
characters are shown, so it is best to use names with up to eight
characters like: DanceRMT; SuperPre; or GrdnShow.
Click New to create a new Salvo with the name Salvo X (empty), with X
being the next unused Salvo number. Any existing connections from the
previous Salvo are removed so you have a clean slate. As soon as you
make a connection “(empty)” is removed from the name indicating that
Salvo is in use. There is no Save Salvo button since the active Salvo is
updated with each edit.
When you select a Salvo from the drop down list its connections are
shown in the Salvo Edit Screen in read-only mode. The Details Dock also
lists that Salvo’s connections using their destination and source names. To
make further changes, click the Editable button to allow connections to be
added or removed.
To take the Salvo, select it from the drop down list then click Fire. The
crosspoints assigned in the Salvo are all immediately connected—except
for connections on locked destinations (e.g., channels that are on), their
connections are not made. To make those connections, turn off the
channel(s) and fire the Salvo again. You can also assign one of the spare
buttons on the Monitor Control panel, or a button on a programmable
button panel, to fire a salvo as well.
Figure 3-18 Salvo/Macro Tab
Info Tab
This tab’s main use is to set the date and time shown on the console
Monitor Control panel displays (highlighted in Figure 3-19 on page 35).
Check Use this PC’s time then click Apply to adjust the clock and time on
the EMX monitor control panel displays. When the admin PC is also
connected to the internet, click NTP to assign a remote time server to
automatically keep the system time synchronized.
The only other setting that one may want to change is the Clock master
sample rate, which can be set for 44.1 or 48 kHz. The other section’s
settings should be left at their default settings.
LIO Properties Tab
This tab is used to set the default configuration of the User-set logic
functions (User 1 – User 500) in their unconnected state between High,
Low, or leave it in the Last State. The default setting is Low (Figure 3-20
on page 35). This tab also shows the settings for the pre-assigned logic
but does not allow any of those settings to be changed.
Figure 3-17 Signal Monitor
Pop-Up Window
Summary of Contents for EMX
Page 4: ...4 ...


