24
The AutoDim Level setting is used with the AutoDim Timeout entry.
When the AutoDim Timeout is reached the OLED displays dim to the
assigned Dim level setting. If the AutoDim level is set to 1 the displays are
basically turned off. The default entry is 4 for this setting.
The AutoDim Timeout entry sets how many minutes, from one to 59,
must pass after a Surface control was last touched before switching the
OLED displays from the Normal Level to the AutoDim Level. The default
setting is 2, which means that after no Surface control has been touched
for two minutes, the OLED displays dim down to the AutoDim Level.
Touching any control immediately returns the dimmed OLED brightness to
the Normal Level.
Setting the timeout to 0 defeats dimming and the Normal Level setting is
used all of the time. Although this is OK for console configuration, we
recommend setting the AutoDim Timeout to between 2 and 10 minutes
and setting the AutoDim Level so the dimmed displays still show a dim
image (settings of 2–4).
Time Display Format
The left monitor OLED display shows a date while the middle monitor
display shows the time-of-day, in either standard USA 12-hour format
(AM/PM) or in military/European format (24 hours). The date and time are
set using PR&E Navigator (see page 34 for details). Until this is done, the
date will show a default date starting in the year 2000. The date is always
shown as Month Day Year.
Note: The date and time must be reset, using PR&E Navigator,
each time the EMX is power cycled.
Source Select
The default selection is Source Names. When the channel encoders are
used to select a new channel source, all visible source names are listed
alphanumerically with the name of the Blade they’re connected to listed in
white above the white line.
When Location Names is selected, rotating the channel encoder first
shows a list of Blade names. Clicking a Blade name then shows all of the
visible sources from that Blade. To view signals on another Blade, select
<< locations to step back to the Blade list so another device can be
selected.
Needless to say most users leave Source Names selected.
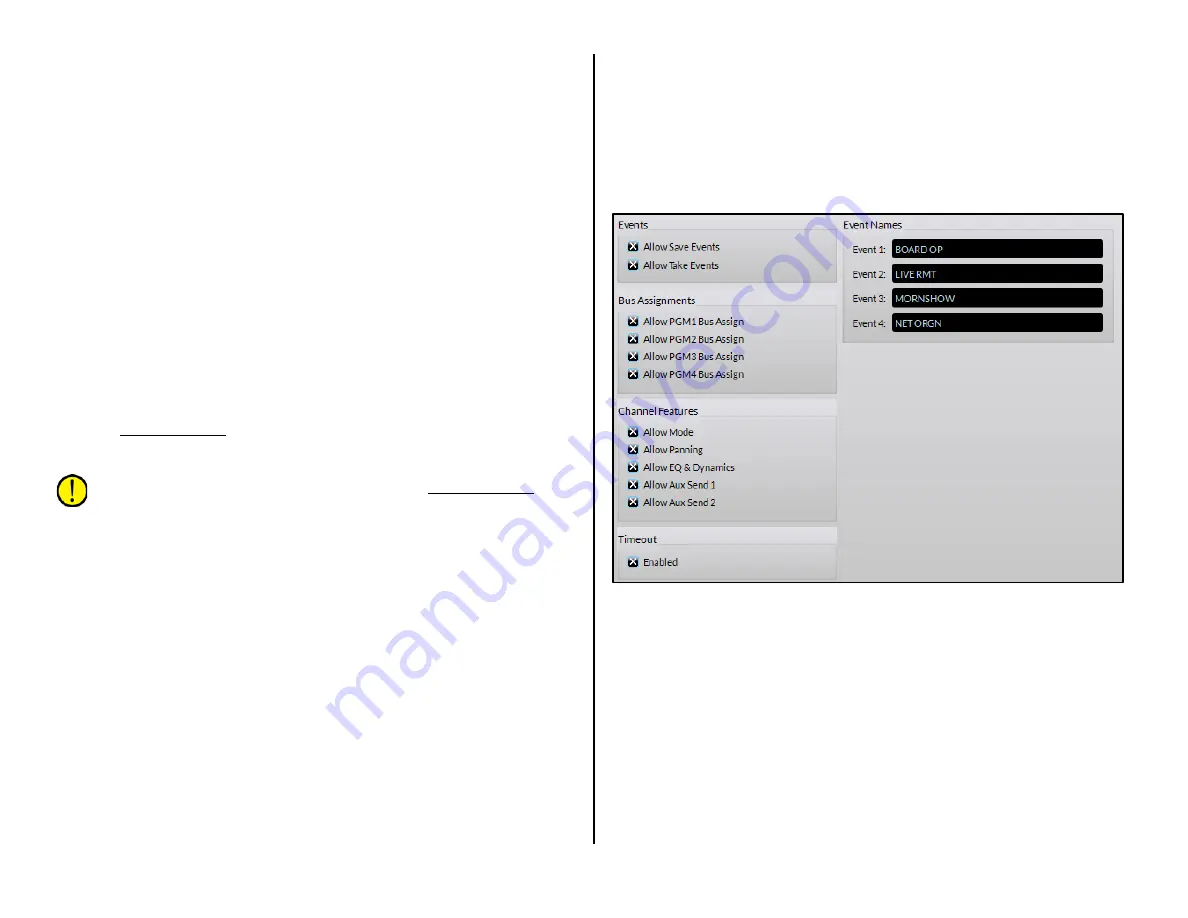
Talent Access Page Tab
This page tab (Figure 3-7) has five sections: Events; Bus Assignments;
Channel Features; Timeout; and Event Names.
During console configuration all settings are typically checked, but
settings should be selectively unchecked—prior to releasing the console for
daily operations, to prevent unauthorized access. This is especially
important when it comes to saving events and having access to the EQ &
Dynamics controls.
Allow Save Events is typically disabled once the four console events are
assigned during console configuration. Likewise, Allow EQ & Dynamics in
the Channel Features section should be disabled to prevent board
operators, without the requisite knowledge, from using the controls to set
up channels with some “strange sounding” audio!
Figure 3-7 Talent Access Page Tab
Events
These two settings control access to the very powerful Event controls
on the Monitor Control panel. The Save button is used with the Event
encoder to save, for later recall, up to four console setups. Each event
saves the current monitor settings, the current channel sources and
channel button settings, and the Advanced Channel Feature settings, so
that the four most-commonly-used board setups can quickly be recalled
using the Take button and the Event encoder.
When Allow Save Events is checked anyone can save a new event,
overwriting any existing settings for that event. When unchecked, the
Save button is not active. This selection is typically unchecked once the
four events are saved by engineering during console configuration.
Summary of Contents for EMX
Page 4: ...4 ...


