Note
Use the radio buttons to select the 24-hour or 12-hour
format. The available wireless networks appear on the
Select
a Wi-Fi connection
screen.
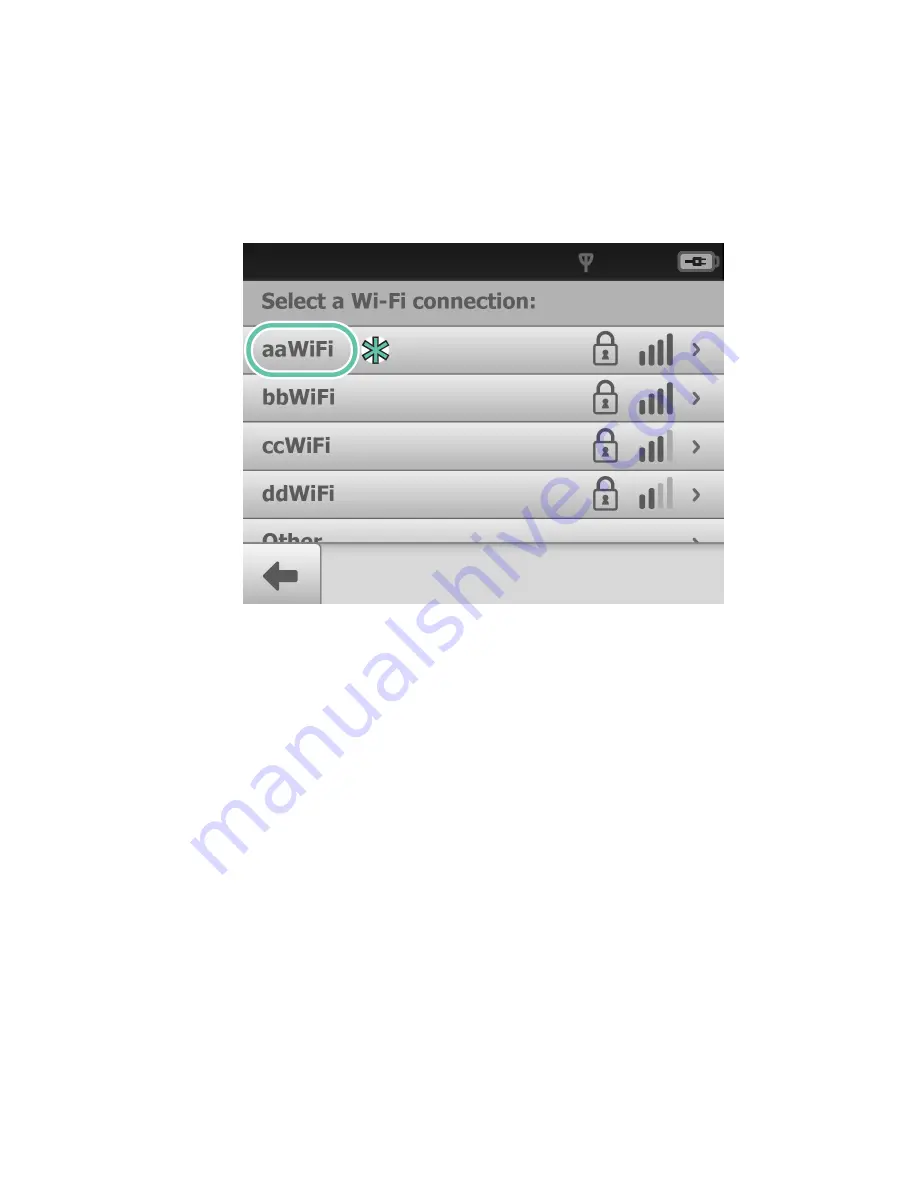
5. From the list of available networks, touch on the Wi-Fi connection that you want to
connect to.
Note
*Wi-Fi network names shown here are examples.
Note
If you don't see the desired Wi-Fi network that you want to
connect to, you may need to scroll down.
Note
During Wi-Fi communication, the RetinaVue 100 Imager
camera only supports the use of the following secure
authentication types: WPA2, WPA2-PSK, WPA2-Enterprise
(EAP-PEAP), and IEEE 802.11i. Open networks from public
access points are not supported. See the the
Device radio
section for further information. If you don't see the network
name in your list it might be a hidden network. Select "Other"
and enter the network name. See the
Troubleshooting
section for further information.
6. Using a secured network, enter your network Wi-Fi Username and Password or a
Passphrase and touch
Connect
.
a. (Optional). Touch
Remember this connection
and touch
Connect
to use the
selected network for subsequent Wi-Fi connections.
7. To continue setup, launch an internet browser from a computer and enter the
following address: https://www.retinavue.net/RN_CustomerPortal/.
8. On your RetinaVue 100 Imager camera, touch
Next
.
9. On the RetinaVue Network Customer Portal, enter your RetinaVue Network
Username and Password then click
Log In.
22 Using the RetinaVue 100 Imager
Welch Allyn RetinaVue™ 100 Imager
Summary of Contents for RetinaVue 100 Imager
Page 1: ...Welch Allyn RetinaVue 100 Imager Directions for use Software version 6 XX...
Page 8: ...4 Symbols Welch Allyn RetinaVue 100 Imager...
Page 14: ...10 Introduction Welch Allyn RetinaVue 100 Imager...
Page 59: ...Directions for use Using the RetinaVue 100 Imager 55...
Page 86: ...82 General compliance and standards Welch Allyn RetinaVue 100 Imager...
Page 112: ...108 Appendix Welch Allyn RetinaVue 100 Imager...
Page 114: ......
Page 115: ......
Page 116: ...Material No 411492...


