


Configuration...
Personalisation of pull-down menus
Edge 580 - Edge 550
4-113
⇒
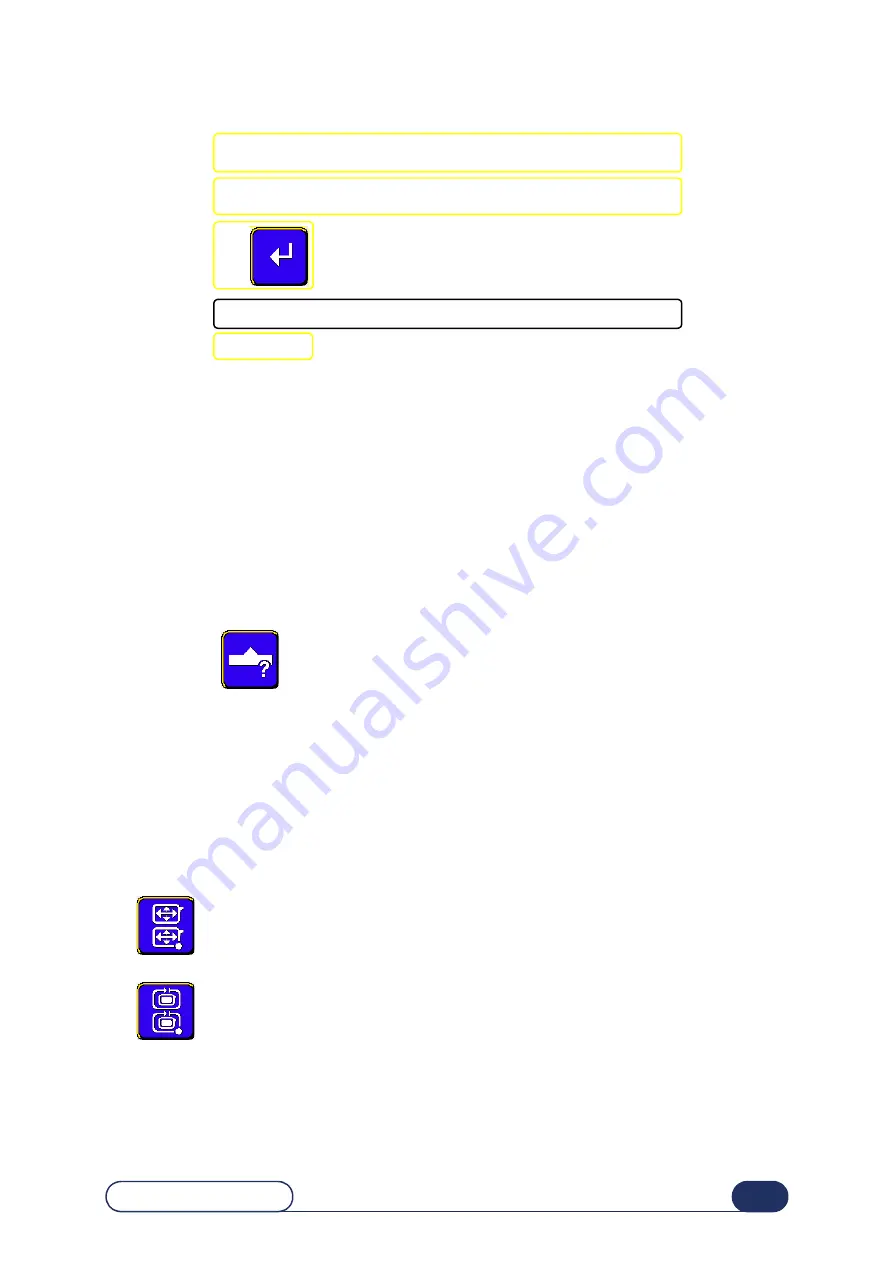
Follow the procedure below :
Flow chart 4-2 : Personalisation of a pull-down menu
4.3.3 S
AVING
OF
THE
NEW
PERSONALISATION
When the message, "Do you wish to save the new personalisation ?" is displayed, you have three possibilities :
>
confirm
the message : the personalisation is registered and you return to the menu buttons configuration
screen.
>
do not confirm
the message : the personalisation is not registered and you return to the menu buttons
configuration screen. The previous setting is retained.
>
cancel
the personalisation : you return to the personalisation screen for the menu-button concerned.
Reselect the elements you wish to screen.
4.3.4 C
OMMENTS
4.3.4.1 B
UTTON
T
O
BE
DEFINED
Each pull-down menu can include a button whose icon has a question mark on it.
Exemple :
⇒
Select this type of button if you wish the user to consult all the possibilities of a menu for each new job.
⇒
To start an edging operation, all the job criteria must have been selected. No "To be defined" button can
be maintained.
NOTA : If you call up for a job including drillings with different drilling angles, the multi-angles
icon appears on the screen. Any selection of an other orientation will erase all the indi-
vidual datas of the drillings.
Because of its function, this type of button can only be defined as a base-button.
4.3.4.2 R
ETOUCH
/ O
VERSIZING
MENU
>
To boxing width : Reduction/Increase of the boxing width of the entered value. The proportions
of the shape are retained.
>
To the circumference : Reduction/Increase of the finished lens circumference according to the
entered value. The proportions of the shape are retained.
Exemple : Take a lens for which A (width) = 40 and B (height) = 20
With a retouch of 0.2 in boxing width, its dimensions will be :
. A = 39.80 (reduction of 0.2 in width)
. B = 19.90 (reduction of 0.1 in height for a constant A/B ratio)
#1 Select the function that you wish to see in the base of the pull-
down menu.
#2 Select the function(s) that you wish to see in the pull-down
menu.
#3
#4 "Do you wish to save the new personalisation ?"
#5 YES
Summary of Contents for Edge 550
Page 2: ...Edge 580 Edge 550...
Page 5: ...Edge 580 Edge 550 1 5...
Page 10: ...1 INSTALLATION...
Page 13: ...Installation Unpacking the machine Edge 580 Edge 550 1 12...
Page 15: ...Installation Removing external clamps Edge 580 Edge 550 1 14...
Page 17: ...Installation Removing the shipping rails Edge 580 Edge 550 1 16...
Page 21: ...Installation Removing the internal clamps Edge 580 Edge 550 1 20...
Page 27: ...Installation Water connections Edge 580 Edge 550 1 26...
Page 29: ...Installation Electrical connections Edge 580 Edge 550 1 28...
Page 32: ...2 SAFETY PRECAUTIONS...
Page 33: ...2 32 Edge 580 Edge 550...
Page 35: ...Safety precautions Safety Edge 580 Edge 550 2 34...
Page 37: ...2 36 Safety precautions Useful hints Edge 580 Edge 550...
Page 38: ...3 UTILIZATION...
Page 39: ...3 38 Edge 580 Edge 550...
Page 51: ...Utilization General principles of use Edge 580 Edge 550 3 50...
Page 79: ...Utilization Normal use Edge 580 Edge 550 3 78...
Page 97: ...Utilization Special cases Edge 580 Edge 550 3 96...
Page 104: ...4 CONFIGURATION...
Page 105: ...4 104 Edge 580 Edge 550...
Page 117: ...Configuration Adjustment of the setting values Edge 580 Edge 550 4 116...
Page 122: ...5 MAINTENANCE...
Page 123: ...Maintenance Edge 580 Edge 550 5 122...
Page 127: ...Maintenance Visualize the components Edge 580 Edge 550 5 126...
Page 129: ...Maintenance Task list Edge 580 Edge 550 5 128...
Page 134: ...Maintenance Regular maintenance of the edger Edge 580 Edge 550 5 133...
Page 138: ...Maintenance Regular maintenance of the edger Edge 580 Edge 550 5 137...
Page 141: ...5 140 Edge 580 Edge 550 Illustration 5 4 Cleaning and replacing the removable visor 3 4 5 6 7...
Page 149: ...5 148 Edge 580 Edge 550 Ecran 5 3 Working in partial mode To quit...
Page 151: ...Maintenance Regular maintenance of the edger Edge 580 Edge 550 5 150...
Page 155: ...5 154 Edge 580 Edge 550 Ecran 5 5 Lens feelers adjustment...
Page 157: ...5 156 Edge 580 Edge 550 Illustration 5 10 Size adjustment Screen 1...
Page 162: ...Maintenance Adjustments Edge 580 Edge 550 5 161...
Page 163: ...5 162 Edge 580 Edge 550 Ecran 5 6 Adjustment of the flush of the mill bit...
Page 165: ...5 164 Edge 580 Edge 550 Ecran 5 7 Adjustment of the axis setting with the Alta XL...
Page 168: ...Maintenance Adjustments Edge 580 Edge 550 5 167...
Page 169: ...5 168 Edge 580 Edge 550 Ecran 5 8 Adjustment of the axis with the tool...
Page 171: ...5 170 Edge 580 Edge 550 Ecran 5 9 Adjustment of the touch screen...
Page 175: ...Maintenance Adjustments Edge 580 Edge 550 5 174...
Page 199: ...Edge 580 Edge 550 5 198 Maintenance...
Page 200: ...6 TESTS...
Page 201: ...6 200 Edge 580 Edge 550...
Page 207: ...6 206 Tests Operating principle Edge 580 Edge 550...
Page 208: ...7 CHEMISTRIE...
Page 209: ...7 208 Edge 580 Edge 550...
Page 211: ...Chemistrie Presentation Edge 580 Edge 550 7 210...
Page 214: ...8 TECHNICAL SPECIFICATIONS...
Page 215: ...8 214 Edge 580 Edge 550...
Page 217: ...Technical Specifications Characteristics Edge 580 Edge 550 8 216...
Page 221: ...Technical Specifications Technical Specifications Edge 580 Edge 550 8 220...


