Chapter 7
Adjustment and initial operation
32708885 Geset 100
Version: 16.07.13
Page 43 of 77
GB
Requirements
¥
Power supply is turned off.
¥
One or more sample products.
¥
No transportation of products.
Instruction
Please adjust the top conveyor as follows.
Step
Procedure
1
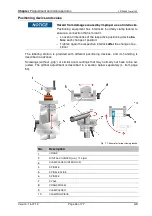
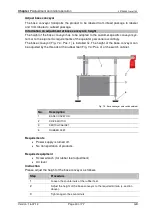
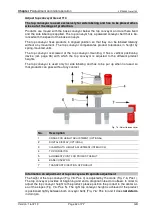
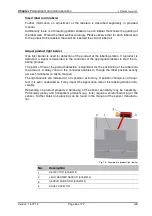
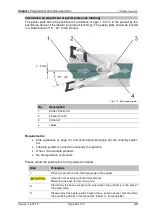
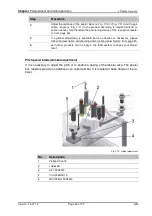
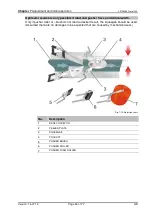
Loosen the interlock (clamping lever Pos. 3 Fig. 7-6).
2
Open the top conveyor with the crank (Fig. 7-6: Pos. 1), until a product can
be placed between top- and base conveyor.
3
Adjust the top conveyor to the required criteria (s. section above).
4
Tighten again the interlock (clamping lever Pos. 3 Fig. 7-6).
5
Remove the product.
6
Arrange several sample labelings to check the adjustments.
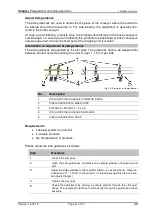
Information on adjustment of top conveyor without spindle adjustment
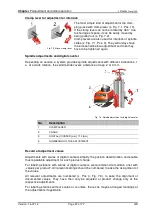
The top conveyor provides at beginning and end a diagonal infeed or outfeed. In order to
adjust the top conveyor height to the product, please position the product in the center ar-
ea of the slopes (Fig. 7-6: Pos. 5). The right top conveyor height is achieved if the product
is positioned tightly between both conveyor belts (Fig. 7-6: Pos. 6) and it does
not deform
in doing so.
Requirements
¥
Power supply is turned off.
¥
One or more sample products.
¥
No transportation of products.
Instruction
Please adjust the top conveyor as follows.
Step
Procedure
Crushing hazard!
After loosening the clamping device, the top conveyor will lower in direction
to the base conveyor.
-
Maintain a distance from top- and main conveyor.
1
Support the top conveyor with a suitable device to avoid a lowering of the
top conveyor to the base conveyor.
2
Loosen the interlock (clamping lever Pos. 3 Fig. 7-6).
3
Lift the top conveyor until one product can be placed between top- and base
conveyor.
4
Remove device from pos. 1.
Summary of Contents for Geset 100
Page 2: ...Blank page ...

