


Brine fog maker, Type Solfog V2
Index: 01
Change date: 12/12/2017
Operating instructions no.: BA DW 018-01 Solfog V2 EN.docx
Page 15 of 39
4.5
Electrical installation
DANGER DUE TO HIGH VOLTAGE !
The electrical installation may only be performed by appropriately trained specialist
staff! The brine fog maker must be switched off and secured against re-operation
before any electrical work is carried out!
Assembly:
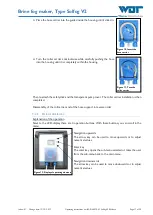
The brine fog maker is connected by means of a protection socket (230V, 50Hz) on the power
supply.
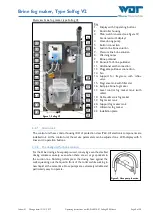
The brine fog maker is connected and disconnected by means of the main switch
.
Electrical wiring See terminal plan in
Section 9.2
Connect button (option)
Additional works for the connection to an external control system
Connection of the external control signal 230VAC on the terminal SL3 or 24VDC on the terminal
SL4, according to the supplied terminal plan.
Connection of the potential free accumulative error message on the ZLT (central control system)
on the terminal SL5.
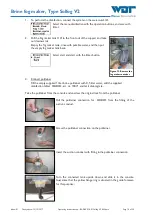
Reset to factory settings
Disconnect the device on the main switch!
To avoid the presence of tension in the control
casing.
Open the casing, put the DIP switch SW2-5 in the position ON, close the casing
Connect the device on the main switch and wait until the start menu is displayed.
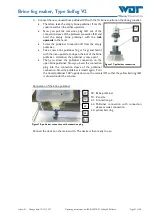
Disconnect the device on the main switch!
To avoid the presence of tension in the control
casing.
Open the casing, put the DIP switch SW2-5 in the position OFF
The factory settings are
recovered.
Notice: If the DIP switch SW2-5 stays on ON, new adjustment are saved!


