21
The Retriever and Pups should be configured before
deployment. Configuration should be done while communicating
in Setup mode (see
Configuration
, pp. 10 - 17).
Tools recommended for installation
7/16-inch (11-mm) wrench
Phillips screwdriver for tightening the mounting bracket
screws on back of units
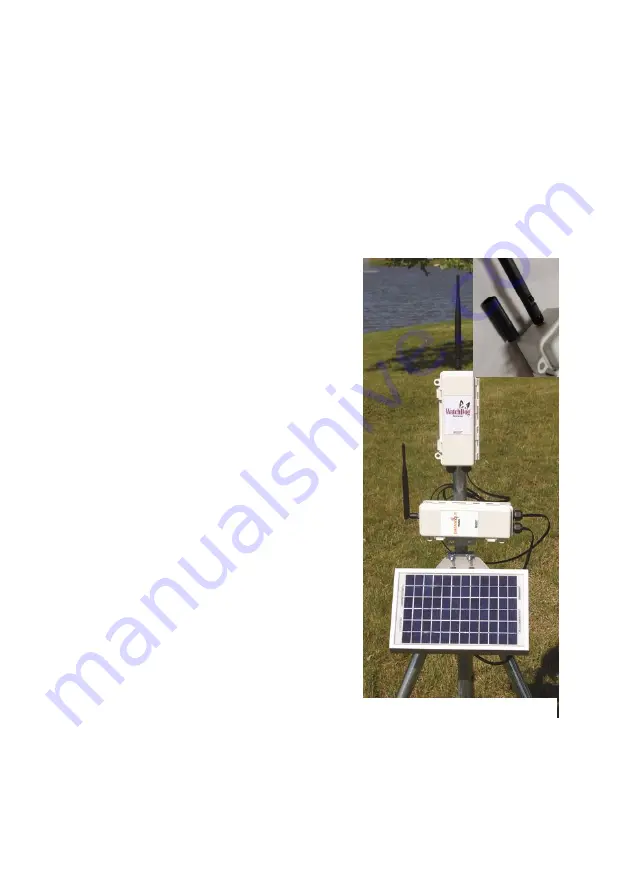
Antenna stabilizer (included) prevents antenna from bending
when mounted vertically but can be removed to allow a bent
antenna for horizontal mounting
(see fig. 9).
Deploy the Retriever
1. It is important that the Retriever
antenna be placed as high and clear
of obstructions as possible, since all
Pup data is routed to the Retriever.
2. Mount using provided hardware
(bracket, u-bolt, nuts, screws).
3. Mount solar panel (if being used).
Connect to Retriever with DC
adapter (see p. 6).
Deploy the Pups
1. It is recommended to start with the
Pup that will be nearest to the
Retriever and move outwards to
create the mesh network.
2. Upon arrival at each desired
location, attach an antenna to the
Pup.
3. Check the signal strength of the
Pup at the location by holding the
Pup’s button for 2 seconds until the
LED turns on (see
Retriever/Pup
Operation
, pg. 18).
4. If signal strength is poor, move
closer to either the Retriever or
nearest Pup, use an antenna
extension, or add a Repeater.
Figure 9. Retriever and
DataScout setup with
solar panel. Stabilizer
shown in inset photo


