Basic Features
17
Managing Settings
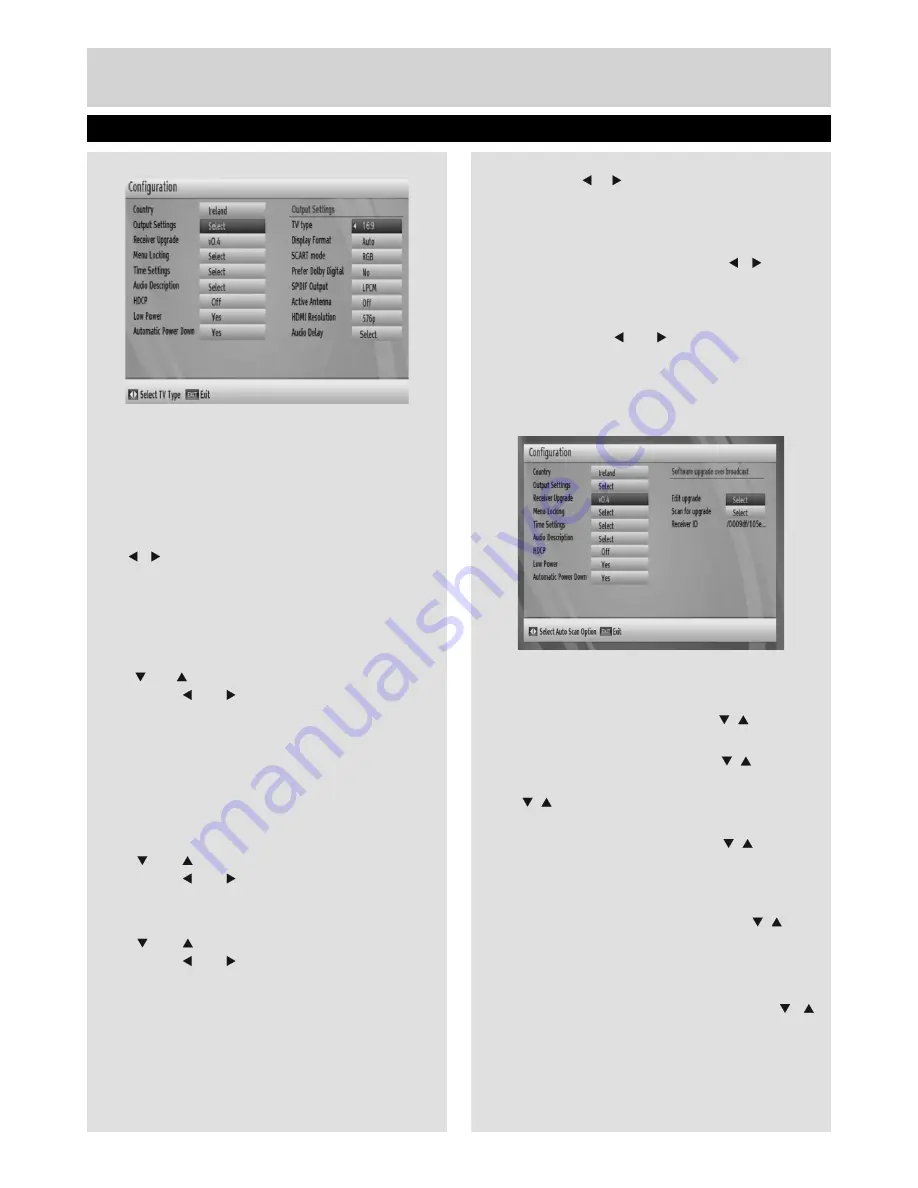
Output Settings
TV Type
Channels can be broadcast in a widescreen
format whose output can be different for normal
and widescreen TV sets. This function enables to
change the screen format of the TV connected, so
that broadcasts are displayed correctly. Highlight
the TV Type line in the Con
fi
guration menu and use
the “ ”/“ ” keys to select 4:3 if you have a standard
TV set connected or 16:9 if it is a widescreen TV.
This function duplicates the selection made at the
time of
fi
rst installation and can be used if you
change TV sets.
Display Format
Use “ ” or “ ” button to select Display Format and
then press “ ” or “ ” button to set this setting as
Auto, Pillar box or zoom.
Scart mode
The receiver can output RGB and CVBS signal
from the TV SCART on the rear panel. Although
the RGB format results in a better quality picture,
not all equipment can cope with an RGB signal.
Prefer Dolby Digital
Use “ ” or “ ” button to select Dolby Digital and
then press “ ” or “ ” button to set this setting as
Yes or No.
Spdif Output
Use “ ” or “ ” button to select Spdif Output and
then press “ ” or “ ” button to set this setting as
LPCM or Dolby D.
Active Antenna
This feature enables or disables the use of active
antennas. When antenna power option is set as On,
+5V will be transmitted to the antenna output.
IMPORTANT
: Antenna power should be Off when
standard antenna is used instead of the active
antenna.
HDMI Resolution
By pressing “ ”/ “ ” on the remote control, you
can change to HDMI resolution as 576P, 720P or
1080i.
AUDIO Delay
First press
OK
and than by pressing “ ”/“ ” buttons
on the remote control, you can set to Audio Delay
to desired value. You can use this setting when
there is a synchronization problem in the received
broadcast . Press “ ” or “ ” button to change the
delay.
Note:
This function will be available while using Optical
Audio out only.
Receiver Upgrade
To ensure that your STB always has the most up to
date information. Please ensure that after use it is set
to its standby mode.
• Press Menu button and using the “ ”/“ ” buttons to
choose Setup and press the
OK
button.
• Highlight Con
fi
guration menu with “ ”/“ ” keys and
pres
OK
.
• Use “ ”/“ ” buttons to choose “Receiver Upgrade” and
press
OK
button.
• Highlight “Edit upgrade” menu with “ ”/“ ” keys and
press
OK
to change upgrade options. Please enter
your available satellite information and save all values
all select reset and press OK to re enter.
• Highlight “Scan for upgrade” menu with “ ”/“ ” keys
and press
OK
to commence upgrade.
Menu Locking
• This setting con
fi
gures menu locking.
• Select Menu Locking option by using “ ”/“ ”
buttons.
• Press
OK
button to enter the menu.
• To display parental lock menu options, PIN number
should be entered. Factory default PIN number is
01_TS7100_[GB]_DVB645_PVR_2712UK_10078521_50216711.indd Ksm1:17
05.04.2012 17:02:12


