


G-602
16
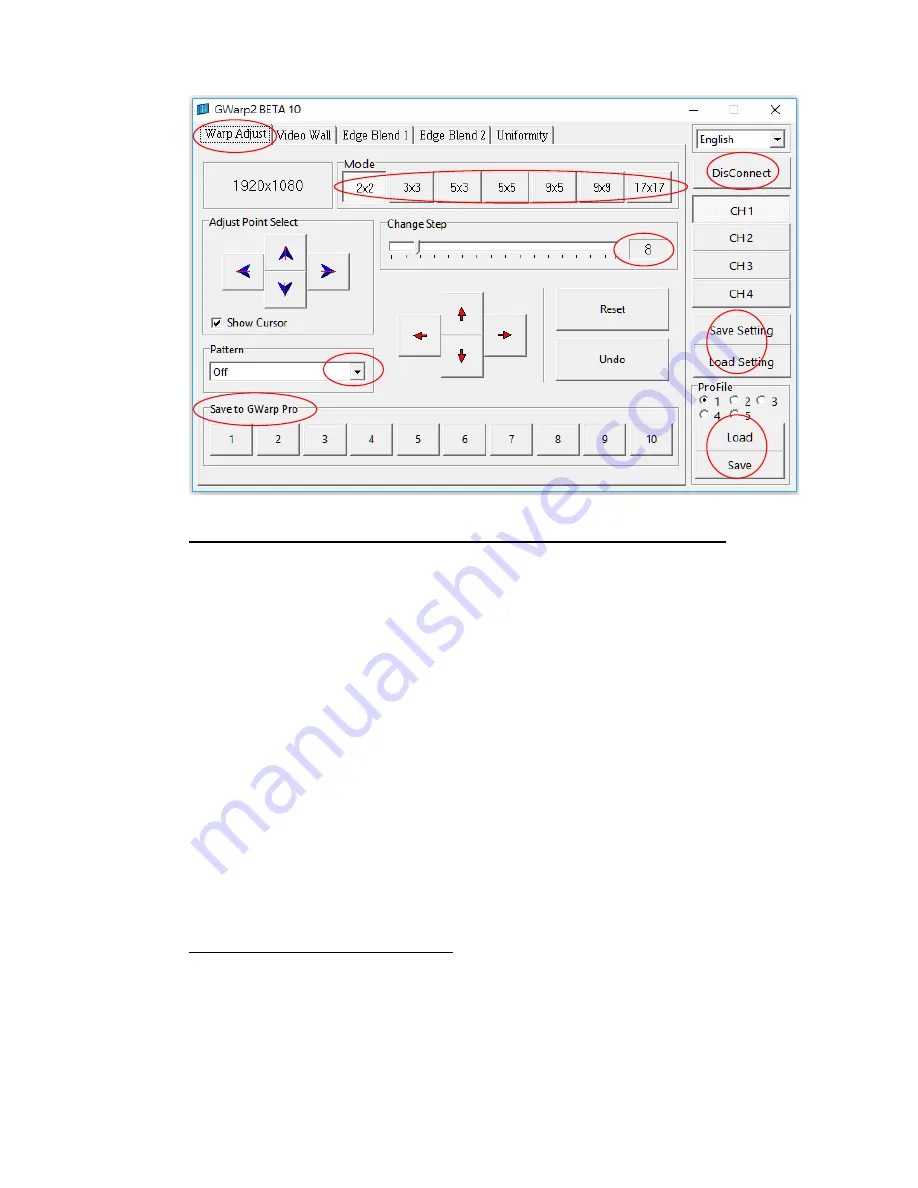
5.2 [Warp adjust] (hotkeys are available through keyboard and mouse)
a
、
Before [Warp Adjust] operation, please enable [Pattern] (1) and select one color and Enable the
pattern to show grid pattern on the screen. The pattern default grid size is 32x32 pixels.
b
、
Select [Warp adjust], grid type and adjusting Step (2) (default is 8 pixels) for the adjustment.
BLUE direction keys are for control point selection and RED direction keys are for value
adjustment.
c
、
[2x2] alignment is for quick image corner alignment. Usually, user needs to apply [2x2]
geometry alignment first to draw image 4 corners to the required positions, then go to [3x3] or
[5x5] for further geometry alignment. After [5x5] or [9x9] alignment, if user want to re-adjust 4
corners position, user can go back to do [2x2] alignment.
d
、
For most of the applications, we propose to follow [2x2]
[3x3]
[5x5]
[9x9]
[17x17]
sequence for geometry alignment. Please note that if user executes [9x9] or [17x17] and back
to [5x5], it will only keep data under [5x5] and reset all the rest.
e
、
For edge blending application, please align all the grids in edge blending area stacked together
to ensure clear image can be obtained.
5.3 Save [Gwarp] result into GeoBox
a
、
User can save [Warp Adjust] result in PC through [Save setting] (4) and load back for further
modification or copy to other channels.
b
、
After finish Gwarp alignment, please select the number and press [Save to Gwarp Pro] (3) to
store [Warp Adjust] result into GeoBox.
To select # key to save the result to Gwarp Pro #. (11)
1
2
3
4
5


