VNS GeoBox G-602 Quick User Manual Download Page 13

G-602 


12 

a

  Click [INFO] to check if correct input and output timing modes are set in the system. If no input 

signal is connected, the system will assume the input signal is the same as output signal during 

Overlap value setting. User needs to apply this input/output timing for Overlap Value calculation. 

b

    [Video wall] settings for three projector horizontal edge blending as example 


[Zoom]: all GeoBox set to H=3, V=1 


[Pan]: LH projector (1

st

): H=1, Center projector (2

nd

): H=2, RH projector (3

rd

): H=3 


[Overlap]: select the right edge and apply the value calculated from Excel file 

LH projector: RH edge, Center projector: both RH/LH edges, RH projector: LH edge 


For dual projector edge blending, user can use below equation to calculate overlap pixel. 


  Assumption: Input signal:1080p, Output to projector: XGA, Overlap 224 pixels (7 grids)   


  Overlap value= (1920/2)/(1024-224/2)x(224/2)=118 pixels. 


  User can also adjust [Overlap] value simultaneously and see the image in edge blending 

area comes closer till without double image. Two projectors shall have the same value. The 

difference shall not be over 2 pixels. 

c

  If user still sees some blurred image in edge blending area, please increase or decrease 

[Overlap] value in [Video Wall] setting to improve video quality. If the adjusting value is more than 

“1”, please divide this value for adjacent projectors. For example, if the value should be “2” in 

center projector LH edge, then please add 

“1” in RH edge of the 1st projector and “1” in 2nd 

projector LH edge. 


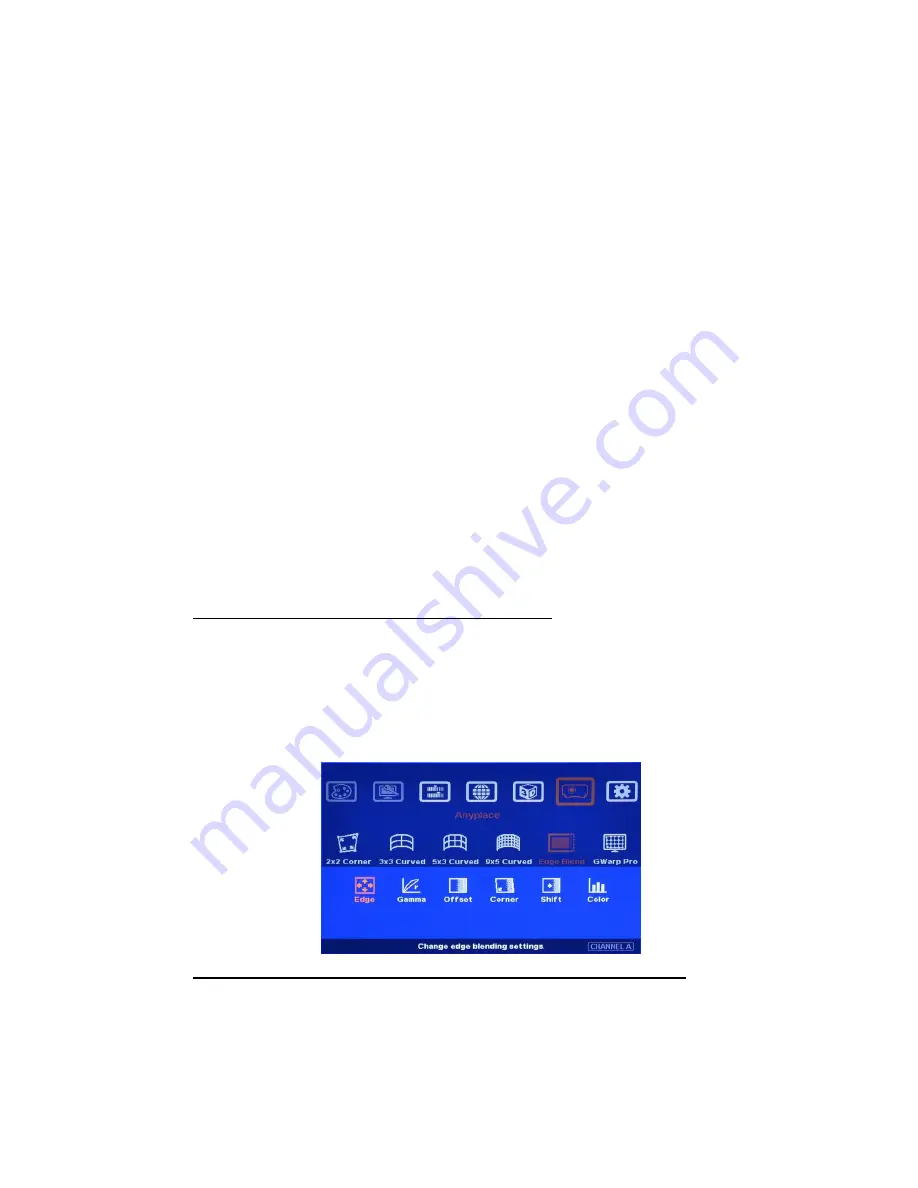
4.10  [Edge Blend] setting (use [E.BLEND] hotkey) 

a

  Select correct Edge for the edge blending: 

LH projector: RH edge, Center projector: RH & LH edge, RH projector: LH edge 

b

  RED and GREEN color indicating lines will appear when increase edge blending pixels.   

c

  User needs to adjust the color indicating lines to match together (green to green, red to red) and 

will see the final result. 


4.11  Overlap region gamma correction (under [Edge Blend] menu) 

a

  Please activate [Gamma] sub-menu under [Edge Blend], select [Transition] and change the 

[Gamma] value to get the optimized video quality. 

b

  [Gain] menu next to [Gamma] can do further gamma curve change in each projector. It is to do 

further edge blending area color fine-tune. User will see significant improvement when each 

projector has different gamma curve. 

Summary of Contents for GeoBox G-602

Page 1: ...G 602 Quick User Guide Dual channel Universal Curved Screen Edge Blender Technical support E mail sales vnstw com Tel 886 2 8751 2785 Cell 886 935 678 033 Skype vns inc Version 3 02 Website www vnstw...

Page 2: ...lity fine tuning 12 4 13 System power ON OFF setting 12 4 14 Enable Black screen while no input signal or mode change 13 4 15 Save all settings into Profile Index 13 4 16 Thermal drift in projector im...

Page 3: ...r does not assume responsibility for consequential damages expenses or loss of revenue inconvenience or interruption in operation experienced by the customer Warranty service shall not automatically e...

Page 4: ...ds Independent color white balance adjustment for each projector overlapped area color correction and non overlapped area black level uplift are also standard functions in G 602 Users can see real tim...

Page 5: ...h During installation setup process please apply FHD signal to the system for easy setup After finish the setup user can select optimized EDID from OSD menu to get optimized video quality i The optim...

Page 6: ...r needs to save the setting into GeoBox through the OSD menu Anyplace Gwarp Pro select UserMap 1 10 to save the settings Then PC can be removed u When Power Off ON GeoBox it will maintain the final se...

Page 7: ...ll the equipment in the signal pipe line should be able to support this resolution or higher It includes signal source output edge blending processor and the total resolution of the projectors after e...

Page 8: ...the same as Excel calculation To apply 1080p signal is recommended After system setup user can use any input resolution i Press INFO hotkey to check if the final in out timings are the same as expect...

Page 9: ...g Excel Spread Sheet calculation user has some flexibility to determine the overlap region size by different projector resolution lumens and number of projector a Please reserve at least 214 overlappe...

Page 10: ...images from two projectors on curved screen with good quality without Gwarp PC Tool 37 5 overlap region The adjusting points in projector A B will be separated in overlap region and increase geometry...

Page 11: ...t port c Select output resolution to be the same as projector native display resolution d Check input output LED indicators to make sure to have correction system connection 4 8 Geometry alignment by...

Page 12: ...l be reset and only keep 3x3 grid point information i In ideal condition all grids in edge blending area between two adjacent projectors should be aligned together In some special case the vertical li...

Page 13: ...e same value The difference shall not be over 2 pixels c If user still sees some blurred image in edge blending area please increase or decrease Overlap value in Video Wall setting to improve video qu...

Page 14: ...of many factors projector characteristics projector setting screen ambient light and GeoBox setting b Banding in overlap area under dark environment is caused by light leakage in the projector optic...

Page 15: ...p to 5 different display profiles Profile menu will save load two channel settings at the same time b After finish all the procedures please power off and power on the system again to check if the res...

Page 16: ...again and cause edge blending issue c Please disable projector VGA input automatic alignment function to avoid image shift d If possible please apply digital signals for both input and output in GeoBo...

Page 17: ...geometry alignment After 5x5 or 9x9 alignment if user want to re adjust 4 corners position user can go back to do 2x2 alignment d For most of the applications we propose to follow 2x2 3x3 5x5 9x9 17x...

Page 18: ...channels from CH1 CH4 Input Output resolution and Profile Index settings will remain the same without reset 6 2 Warp Adjust M Change Adjust mode from 2x2 3x3 5x3 5x5 CTRL Arrow Select control point A...

Page 19: ...int B or press CTRL Arrow to implement A value to continuous points 7 EDID setting Selectable EDID setting and programmable EDID function are added into GeoBox a GeoBox can support big range of input...

Page 20: ...idth issue 5 Once it happens please reset the system and select different settings Once it normally displays no side effect will happen again 9 Screen Selection a Gain value less than 1 5 will be reco...

Page 21: ...est performance Usually Standard or Native display mode will provide easier color fine tune f Please select gamma 2 2 for edge blending Different gamma settings and affect the video quality in overlap...

Page 22: ...y alignment through manual operation without PC via remote controller or front panel keypads Up to 17x17 grid points geometry alignment through Gwarp PC tool Users can see real time geometry alignment...

Page 23: ...ignal source from Blue Ray STB game console media player and PC Auto decode Stereoscopic Player Nvidia 3D Vision 1080p 120Hz 3D format and Blue Ray 1080p 24Hz 3D signal into 720p XGA 120Hz signal for...

Page 24: ...One PC tool can control 2 projectors simultaneously ID for each GeoBox Convenient for system installation and control Selectable Background color 10 different geometry and color uniformity settings 5...

Reviews: