Device Management
DVR User Manual
99
11.1.9 FTP Configuration
Some models may not support this function.
Click Start
à
Settings
à
Network
à
FTP to go to the interface for FTP configuration. Check
“Enable” and enter the server name, port, username and password, max file size and remote
directory.
11.1.10
Platform Access
Some models may not support this function.
This function is mainly used for connecting ECMS/NVMS. The setting steps are as follows.
Click Start
à
Settings
à
Network
à
Platform Access to go to the interface.
Platform Access
�
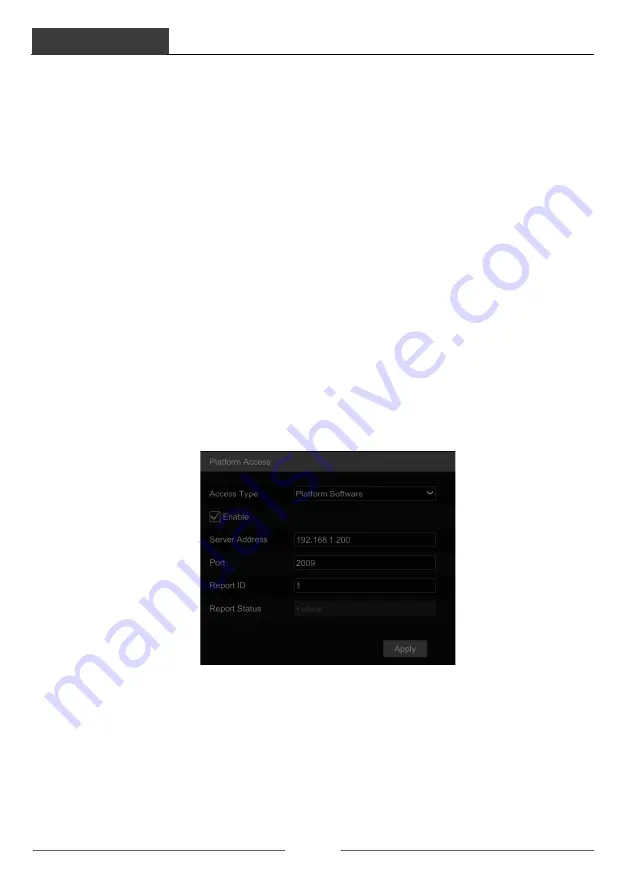
Set “Access Type” as “Platform Software” and select “Enable” as shown below.
�
Check the IP address and port of the transfer media server in the ECMS/NVMS. The
default server port for auto report is 2009. If it is modified, please go to the transfer media
interface to check.
�
Enable the auto report in the ECMS when adding a new device. Then self-define device
ID and fill out the remaining information of the device in the ECMS/NVMS.
�
Enter the above-mentioned server address, port and report ID in the server interface. Then
click the “Apply” button to save the settings. Now the ECMS/NVMS system will
automatically connect this device.
11.1.11
SNMP
①
Click Start
à
Settings
à
Network
à
SNMP to go to the interface for SNMP configuration.
Device Management
DVR User Manual
100
②
Check SNMPv1or SNMPv2 to enable this function.
③
Set the port of the SNMP.
④
Set the trap address and the trap port.
⑤
Click “Apply” to save the settings.
Trap Address: The IP address of SNMP host.
Trap Port: The port of SNMP host.
Tips:
Before setting the SNMP, please download the SNMP software and manage to receive
the device information via SNMP port. By setting the trap address, the device is allowed to
send the alarm event and exception message to the monitoring center.
11.1.12 Wireless
①
Plug in the USB wireless device with SIM card.
②
Click Start
à
Settings
à
Network
à
Wireless to go to the interface for wireless settings.


