Step by Step Operation
77
© 2018 Vision Engraving & Routing Systems
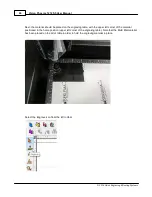
In order to set the engraver up for burnishing, we will need to perform a “Set Surface” function. From the
home screen on the LCD panel, press on the Jog Icon. Use the arrows to move the spindle over the
material that was placed on the T-Slot table. Lower the burnishing tool with the Z down button until the
tip of the burnishing tool touches the material. Move the Z down approximately 0.03 – 0.05 inches (0.5 –
1.0mm) to preload the EZ Rider spring. Select the set surface button. The Spindle will rise to confirm
the surface has been set. Select the go to home button.
.
Summary of Contents for Phoenix 1212 S5
Page 1: ... 2018 Vision Engraving Routing Systems Vision Phoenix 1212 S5 User Manual Revised 12 7 2018 ...
Page 16: ...Vision Phoenix 1212 S5 User Manual 16 2018 Vision Engraving Routing Systems ...
Page 44: ...Vision Phoenix 1212 S5 User Manual 44 2018 Vision Engraving Routing Systems ...
Page 113: ...Step by Step Operation 113 2018 Vision Engraving Routing Systems ...
Page 121: ...Step by Step Operation 121 2018 Vision Engraving Routing Systems ...
Page 123: ...Step by Step Operation 123 2018 Vision Engraving Routing Systems ...
Page 147: ...Optional Accessories 147 2018 Vision Engraving Routing Systems ...
Page 148: ......

