Phantom Miro M & LC Series Camera Manual
40
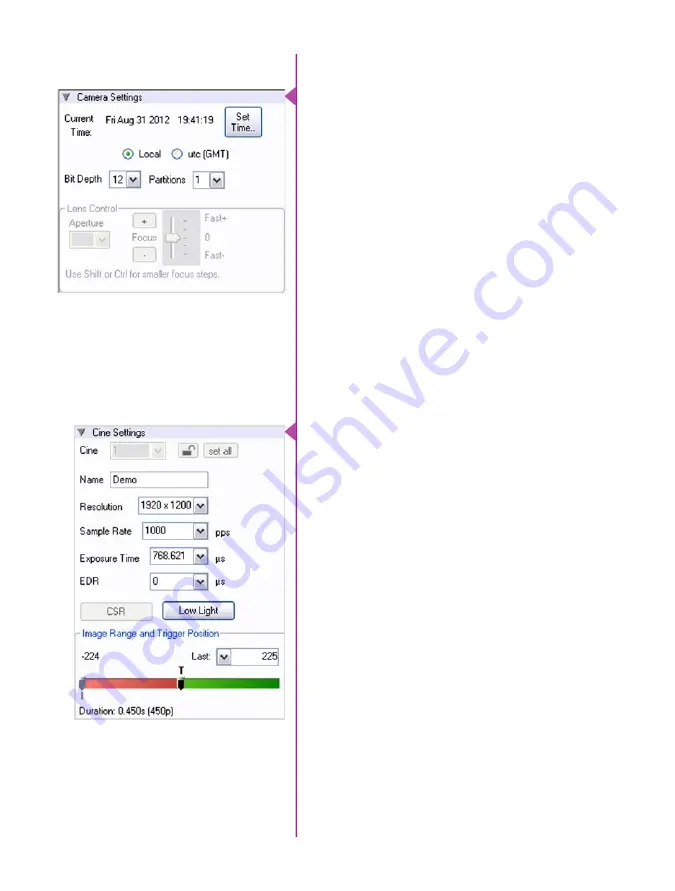
Used to display, reset, or synchronize the time
stamp clock, set the pixel bit depth, and/or partition
(segment) the RAM of the camera.
Click the ‘SetTime…’ button, then click ‘Update
and Set’ in the ‘Set Camera Time’ window to
synchronize the time stamps embedded in the
recorded image data to the computer’s clock.
The Phantom Miro M- and LC-series camera models
operate in 12-bit mode only. No other option will be
available from the ‘Bit Depth’ pull down selector.
Select the number of partitions (evenly divided
memory segements) desired from the ‘Partition’
pull-down selection. Partitioning the memory
allows you record more than one clip to the
camera’s memory at a time. For basic camera
setups, this should be set to one.
Select the required setting from the Resolution
(number of pixels used to capture an image),
Sample Rate (frame rate / speed), ExposureTime
(shutter), EDR (Extreme Dynamic Range) exposure
time, and Last (Image Range and Trigger Position)
pull-down menu. If not displayed type value in the
data entry field (software will round value to the
closest supported value).
A third method can be used to set the ‘Image
Range and Trgger position’. Drag the trigger (T)
slider to the position where the trigger is to occur
in the shot. The visual representation closely
matches the on-screen display of the camera.
Displayed below the ‘Image Range and Trigger
Position’ slider is the ‘Duration’ (total length of
recoding time in seconds), and the exact number
of recordable frames available in the camera’s
internal memory.
One of the most common operations performed is
a CSR (Current Session Reference). A CSR must
be performed after changing the resolution, sample
rate or exposure time.
Camera Settings
Cine Settings


