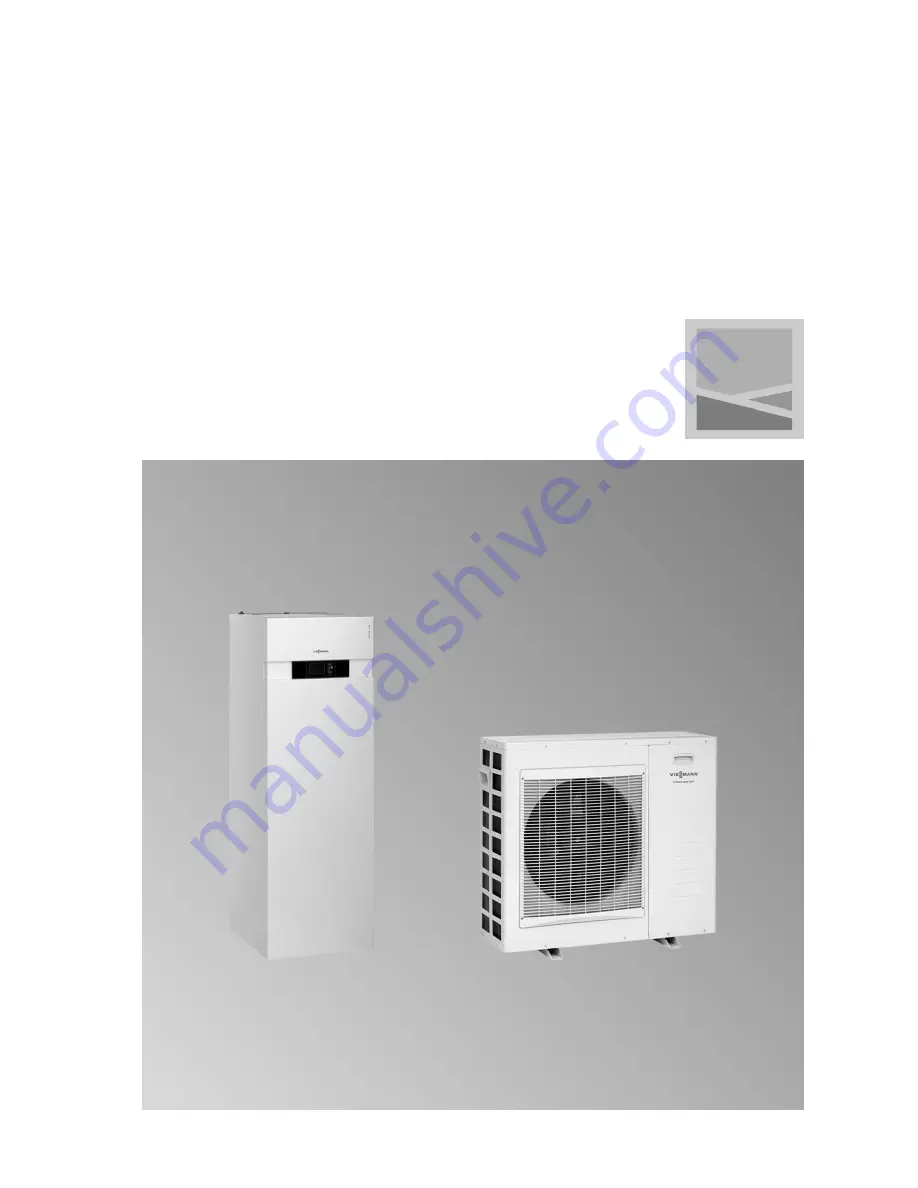
background image

Installation and service

instructions

for contractors

VIESMANN

Vitocal 222-S
Type AWT-AC 221.A04 to A13

Compact heat pumps, split version for heating and cooling opera-
tion

For applicability, see the last page

VITOCAL 222-S

5600 950 GB

10/2011

Please keep safe.

Summary of Contents for Vitocal 222-S

Page 1: ...ructions for contractors VIESMANN Vitocal 222 S Type AWT AC 221 A04 to A13 Compact heat pumps split version for heating and cooling opera tion For applicability see the last page VITOCAL 222 S 5600 95...

Page 2: ...working on this system National installation requirements Legal instructions regarding the pre vention of accidents Legal instructions regarding environ mental protection The Code of Practice of relev...

Page 3: ...place faulty components only with original Viessmann spare parts Auxiliary components spare and wearing parts Please note Spare and wearing parts that have not been tested together with the system can...

Page 4: ...mp 65 Service instructions Commissioning inspection maintenance Steps commissioning inspection and maintenance 66 Further details regarding the individual steps 68 Troubleshooting Repairs 89 Internal...

Page 5: ...hydraulics type AWT AC 221 A10 A13 119 Commissioning service reports Hydraulic parameter report 121 Control parameter report 121 Specification 126 Appendix Heat pump commissioning order 131 Certificat...

Page 6: ...ooling via a heat ing system DHW heating with a built in DHW cyl inder Any other or further use is considered inappropriate Note Vitocal 222 S is intended exclusively for domestic use i e even people...

Page 7: ...nal unit 1800 134 159 454 564 666 680 1803 1829 600 405 147 69 62 300 387 475 29 506 A Opening for LV leads 42 V B DHW Preparing for installation Requirements for on site connections 5600 950 GB Insta...

Page 8: ...a reduction from 10 to 6 mm is necessary down stream of the pipe bend reducer to supplied G Hot gas line 16 mm For type AWT AC 221 A04 a reduction from 16 to 10 mm is necessary down stream of the pip...

Page 9: ...ble length 29 m 25 m 16 m 20 m or or Cable cross section 3 x 4 0 mm2 3 x 6 0 mm2 Max cable length 26 m 30 m Heat pump control unit inter nal unit 230 V Cable cross section Without power OFF contact 3...

Page 10: ...eating water buffer cylinder 0 0 X X X X Cooling only possible via 1 heating cooling circuit or via the separate cooling cir cuit A1 HC1 0 0 0 0 M2 HC2 0 0 0 0 Sep cooling circuit SKK 0 0 0 0 0 0 0 X...

Page 11: ...ing water heater 1 radiator heating circuit without mixer A1 HC1 1 underfloor heating circuit with mixer M2 HC2 DHW heating with heat pump Heating water buffer cylinder Cooling via heating circuit M2...

Page 12: ...83 52 2 KM BUS 20 230V 105 8 145 145 145 145 8 145 8 145 X3 8 3 9 A1 M2 1 29 3 2 F0 6 5 4 KW WW 28 27 2 212 3 2 X3 8 3 9 18 37 30 12 13 F6 Note In cooling mode safeguard the minimum flow rate in the s...

Page 13: ...or STS integral eU DHW circulation pump ZP accessory zP Heating water buffer cylinder zQ Buffer temperature sensor PTS zW System flow temperature sensor VTS Heating circuit with mixer M2 HC2 KM BUS uP...

Page 14: ...ectrical installation scheme For further information an overview of the electrical connections and more details regarding the PCBs see from page 48 and service instructions for the Vitotronic 200 heat...

Page 15: ...2 91 71 Low voltage 1 N PE 1 2 H1 1 2 H2 NTC 2 50W 100W L N 20 211 5 89 89 HK M2 X1 X3 8 X3 9 83 18 KM BUS distributor UV UV 211 2 X2 N X1 UP 6 211 4 X2 N X1 5 UV 130W 130W L3 N L2 L1 137 4 3 N PE 400...

Page 16: ...L1 L1 3 N PE 400 V 50 Hz N L2 4 L3 L1 X3 18 X1 1 X2 1 230 V 400 V Instantaneous heating water heater power supply Heat pump control unit power supply External unit connections C N L 29 4 kW COM 43 V...

Page 17: ...rs for DHW heating 6015 1 Instantaneous heating water heater Electr booster heater Enable instantaneous heating water heater 7900 1 Enable instant heating water heater for central heating 7902 0 Cooli...

Page 18: ...shed by warm air Avoid direct insolation When installing the unit where it is exposed to wind ensure that the wind cannot influence the fan area This could result in an air short circuit between the d...

Page 19: ...Use supports accessories for floor mounting Where such supports cannot be used install the external unit freestanding on a solid base of at least 100 mm height In difficult climatic circumstances temp...

Page 20: ...te electrical cables leads between the internal and external units free of stress Installation only on walls with high weight per area 250 kg m2 in other words not on lightweight walls roof structures...

Page 21: ...rge Type AWT AC Dimensions in mm a b c d Cable entry above ground level below ground level 221 A04 100 100 400 300 1000 221 A07 100 100 400 300 1000 221 A10 100 200 400 300 1000 221 A13 100 200 400 30...

Page 22: ...22 Floor mounting 2 1 4x 4x A B C E D A Support for floor mounting acces sory Installation sequence Installing the external unit cont 5600 950 GB...

Page 23: ...pliance during transportation Never put weight on top of the appliance Installation room requirements Please note The installation room must be dry and free from the risk of frost Ambient temperatures...

Page 24: ...a wall clear ance of approx 80 mm Minimum room height h Installation h in mm Without pre assembly DHW connection set accessory 2000 With pre assembly DHW connection set accessory 2100 Observe engineer...

Page 25: ...25 Removing the cylinder module 5 4 2x 2 1 3 Installation sequence Installing the internal unit cont 5600 950 GB Installation...

Page 26: ...26 7 8 6 P301 P501 P303 P302 F6 Installation sequence Installing the internal unit cont 5600 950 GB...

Page 27: ...27 10 9 11 Installation sequence Installing the internal unit cont 5600 950 GB Installation...

Page 28: ...28 15 2x 16 17 2x 12 14 18 13 X20 Installation sequence Installing the internal unit cont 5600 950 GB...

Page 29: ...29 2x 4x 6x 4x 22 21 20 19 Installation sequence Installing the internal unit cont 5600 950 GB Installation...

Page 30: ...30 26 2x 24 25 4x 23 Note Do not damage sealing tape A when removing the cylinder module Installation sequence Installing the internal unit cont 5600 950 GB...

Page 31: ...ote Make tight hydraulic connec tions between the heat pump module and cylinder module With pipe outlets ensure lock ing tabs C are seated cor rectly see following illustra tion Please note Seal the a...

Page 32: ...ift bends see illustration into the vertical lines in the following cases In heating mode if the internal unit is installed higher than the external unit In cooling mode if the internal unit is instal...

Page 33: ...ntial internal unit external unit 10 m 15 m 15 m 15 m Note No topping up is required for line lengths between 3 and 12 m 5000 5000 B C D E A Example type AWT AC 221 A07 A Internal unit B External unit...

Page 34: ...arately A Pipe bends as vibration compensa tors B Clips with EPDM lining C Cable entry e g drainage pipe with thermal insulation D Electrical cables leads internal external unit Connection to the exte...

Page 35: ...g them Undo the nuts from connections C and D on the refrigerant lines liquid line and hot gas line Type AWT AC 221 A04 Slide the nuts onto the refrigerant lines prepared on site Type AWT AC 221 A07 A...

Page 36: ...A10 Liquid line 7 10 mm UNF 33 42 Hot gas line 7 16 mm UNF 63 77 221 A13 Liquid line 7 10 mm UNF 33 42 Hot gas line 7 16 mm UNF 63 77 Connection to the internal unit Note We recommend the pipe bends s...

Page 37: ...per pipes Therefore hold the pipe open ings downwards or temporarily plug them Note The internal unit refrigerant lines are filled with nitrogen overpressure 2 bar If using Euro flanged adaptors solde...

Page 38: ...ernal unit connections and secure the pipe bends with the short side Insulate them to provide protection from heat and vapour diffusion Note The long side of the pipe bends must point upwards Pipe ben...

Page 39: ...iece twin nipple with union nuts Note Flare the pipe end of the hot gas line by approx 0 5 mm Connection pieces must not be positioned diagonally Check the flared connections for firm seating Installa...

Page 40: ...liquid line UNF for hot gas line over the open end of the refrigerant lines from the exter nal unit Flare the refrigerant lines from the external unit Secure the refrigerant lines from the external u...

Page 41: ...to internal unit Torque in Nm 221 A13 Liquid line 7 10 mm UNF 33 42 Hot gas line 7 16 mm UNF 63 77 Connecting the secondary circuit Opening the door 1 Installation sequence Connecting refrigerant line...

Page 42: ...nds from secondary circuit connection set accessories see separate installation instructions Symbol Meaning Connection Heating water return Cu 28 x 1 mm Heating water flow Cu 28 x 1 mm Installation se...

Page 43: ...n or to the secondary circuit connection set accessory Connection set installation instructions 3 Fill and vent the secondary circuit 4 Thermally insulate pipes inside the building Note For underfloor...

Page 44: ...ts in series Switching contacts as N C contacts Connections on the DHW side For connecting the DHW side observe DIN 1988 and DIN 4753 M A N B C L K D H O N H P R H M O H G F E A DHW B DHW circulation...

Page 45: ...on the safety valve Electrical connection Routing electric cables to the internal unit wiring chamber Danger Damaged cable insulation can cause injury and damage to the appliance Route cables so that...

Page 46: ...afety viewpoint the BUS cable for the internal external unit 12 V or 43 V does not count as an LV lead The BUS cable must be routed together with the 230 V cables Installation sequence Electrical conn...

Page 47: ...2 V 42 V A Control module power cable for instantaneous heating water heater 230 V 400 V B Connecting cables for 230 V func tion components Installation sequence Electrical connection cont 5600 950 GB...

Page 48: ...ble 230 V Overview of connections Internal unit Note Route 230 V cables and LV cables separately and bundle them tightly together at the terminals This ensures that in case of failure for example when...

Page 49: ...49 F13 F14 F0 F4 X31 F101 X3 X2 X1 F1 6 7 8 9 F3 F16 P202 P203 12 V COM COM 43 V Installation sequence Electrical connection cont 5600 950 GB Installation...

Page 50: ...cted load The total output of all components con nected directly to the heat pump con trol unit must not exceed 1000 W e g pumps valves message facilities contactors If the total output is 1000 W the...

Page 51: ...led Connection values Output 130 W Voltage 230 V Max switching current 4 2 A Secondary pump connected at the fac tory the temperature limiter must be connected on site 211 5 AC Cooling activation 3 wa...

Page 52: ...ser ies see following chapter Connection values Output 100 W Voltage 230 V Max switching current 4 2 A Connect on site 212 3 DHW circulation pump Connection values Output 50 W Voltage 230 V Max switch...

Page 53: ...ting the temperature limiter part no 7151 728 7151 729 B to mixer extension kit M 1 C B A s s A Connect plug s to mixer extension kit B Temperature limiter C Heating circuit pump for heating cir cuit...

Page 54: ...230 V 0 15 A Connect on site remove jumper when con necting Note No parameters need to be set The compressor is forced off as soon as the contact opens The supply voltage to the respective components...

Page 55: ...required parameters during com missioning see from page 81 Plugs F11 F17 Connect nothing on site to plugs F11 and F17 Sensors Plugs Sensor Type F0 Outside temperature sensor connect on site Ni 500 PTC...

Page 56: ...100 communication interface X31 Coding card slot AVI PCB Interface internal unit external unit Plugs Components F101 Fuse 1 0 AL slow P202 BUS connection 12 V to external unit for type AWT AC 221 A10...

Page 57: ...4 221 A07 221 A10 and A13 A A A A Wiring chamber BUS connection to the internal unit Note Do not interchange the BUS con nection wires between the internal and external units Compressor power supply I...

Page 58: ...N L C2 C1 12V COM COM 43V A B C A External unit wiring chamber see page 57 B BUS cable between the external and internal units Recommended cable 3 x 1 5 mm2 The cores are not interchangeable C AVI PCB...

Page 59: ...ng in the system can lead to seri ous injury from electrical current if an electrical fault occurs Connect the appliance and pipe work to the equipotential bonding of the house in question Danger Inco...

Page 60: ...eat pump control unit we recom mend using the same fuse MCB Connection to the same fuse MCB provides additional safety when the power is switched off Observe the power consumption of the connected con...

Page 61: ...le 3 x 2 5 mm2 3 x 2 5 mm2 3 x 2 5 mm2 max 16 m 3 x 4 0 mm2 max 20 m or 3 x 4 0 mm2 max 26 m 3 x 6 0 mm2 max 30 m Fuse protection B20 A B20 A B25 A B32 A Economy tariff and power OFF can be used No pa...

Page 62: ...7 x 2 5 mm2 Max fuse protection 16 A Economy tariff and power OFF can be used Power supply with power OFF Power OFF without on site load disconnection The power OFF signal is connected directly to the...

Page 63: ...e chapter Over view of connections Internal unit B Instantaneous heating water heater C Heat pump compressor external unit D Heat pump control unit power sup ply see chapter Heat pump control unit pow...

Page 64: ...ower OFF 790A has no effect Note Observe the technical connection condi tions of the relevant power supply util ity 3 3 4 4 3 3 N 3 N 4 kWh kWh 3 7 5 400 V 230 V X3 7 X3 6 X3 18 X2 1 X1 1 Diagram excl...

Page 65: ...bsence of component earthing in the system can lead to serious injury from electrical cur rent if an electrical fault occurs Attach earth conductor to front panel and side panel 1 Close casing door in...

Page 66: ...ess 73 8 Filling and venting the secondary side 74 9 Checking expansion vessel and heating circuit pressure 76 10 Cleaning the DHW cylinder 77 11 Replacing the magnesium anode 79 12 Checking electrica...

Page 67: ...nit as per external unit type plate 22 Checking the heat pump for unusual noises e g operating noise of fan compressor or pump vent again if necessary 23 Checking the system function e g actuators tem...

Page 68: ...electric shock and component damage in the event of an electrical fault All earth connectors must be reconnected Please note Wait at least 30 min between the installation and commissioning of the app...

Page 69: ...in damage Wear safety goggles and protec tive gloves when working on the refrigerant circuit Please note Before evacuating the refrigerant lines and the internal unit check all connections for tightne...

Page 70: ...iquid line D Fill valve E Service valve Schrader valve For type AWT AC type 221 A07 the service valve is located at the connection of the liquid line F Hot gas line Commissioning inspection maintenanc...

Page 71: ...pen ended spanner 3 Start the vacuum pump At the pressure gauge set open the valve to the vacuum pump and the valve to the hot gas connection 4 After approx 5 min open the valve to the vacuum gauge Le...

Page 72: ...d of the filling hose from the external unit service valve 2 Fit the union nut with copper cap to the service valve of the external unit torque 15 to 20 Nm 3 Unscrew the caps on the external unit fill...

Page 73: ...Uncontrolled escape of refrigerant R410A in enclosed spaces can result in dif ficulties in breathing and suffoca tion Ensure adequate ventilation in enclosed rooms Observe and adhere to regula tions a...

Page 74: ...it with water Only use fill water of potable quality Soften fill water with a hardness above 16 8 dH 3 0 mol m3 e g with the small softening system for heating water see the Viessmann Vitoset pricelis...

Page 75: ...ick into place see diagram 4 Please note To prevent equipment dam age check the flow and return connections of the secondary circuit at the heat pump for leak tightness In case of leaks switch off the...

Page 76: ...DHW heating 1 2 4 3 Checking expansion vessel and heating circuit pressure Observe engineering informa tion Vitocal technical guide Commissioning inspection maintenance Further details regarding the...

Page 77: ...Negative pressure in the DHW cylinder can cause material dam age The air vent valve must always be open when draining with a vac uum pump Please note Pointed or sharp cleaning objects may damage the D...

Page 78: ...ads to corrosion damage on the DHW cylinder Before inserting the electrical cables measure the resistance between terminals A and B If the resistance is significantly less than infinity check whether...

Page 79: ...g the fan with the external unit open can lead to severe inju ries Isolate the external unit from the power supply and safeguard against reconnection Be aware that the fan may run on 1 Type AWT AC 221...

Page 80: ...eat exchanger for deformation and scratches if necessary repair with a suitable tool e g fin comb 4 Close the casing of the external unit Checking electrical connections of the external unit for firm...

Page 81: ...ternal unit voltage 2 Wait 2 min 3 Switch ON internal unit voltage 4 Start internal unit at the ON OFF switch Note If the internal unit is switched on before the external unit or the waiting time is s...

Page 82: ...y Switch on the ON OFF switch on the heat pump control unit The prompt Start commission ing appears automatically on first commissioning Note The commissioning wizard can also be started manually To d...

Page 83: ...inputs Actuator test Commissioning terminated Control mode OK OK OK OK OK OK OK OK OK OK OK NO YES OK Function check Coding level 1 Date set Time set Commissioning without the commissioning assistant...

Page 84: ...heme 6 Alternatively if the service menu was already enabled Extended menu 1 2 Service 3 Select Coding level 1 4 Select parameter group System definition 5 Select parameter System scheme 6 Confirm par...

Page 85: ...Set rotary selector S1 in the extension kit to 2 see extension kit installation instructions Remote control e g Vitotrol 200A Heating circuit 1 Remote control 2003 or Heating circuit 2 Remote control...

Page 86: ...onents System definition System components for external changeover 7011 0 to 10 System definition Operating status for external changeover 7012 0 to 3 System definition Duration of external changeover...

Page 87: ...1 Electr booster heater Output for instant heating water heater at power OFF 790A 1 for 3 kW 2 for 6 kW 3 for 9 kW DHW if applicable Enable electric heaters for DHW heating 6015 1 Checking the system...

Page 88: ...The system installer must hand the oper ating instructions to the system user and instruct him her in the operation of the system Commissioning inspection maintenance Further details regarding the ind...

Page 89: ...89 Opening programming unit 2 2x 1 3 Troubleshooting Repairs 5600 950 GB Service...

Page 90: ...90 Removing cover from programming unit if necessary 5 4 4x Troubleshooting Repairs cont 5600 950 GB...

Page 91: ...91 Overview of internal components Internal unit Troubleshooting Repairs cont 5600 950 GB Service...

Page 92: ...nal unit service valve Schrader valve can be used in place of the external unit service valve for check ing pressure and evacuating the refrigerant circuit see page 69 M Liquid gas temperature sensor...

Page 93: ...External unit Danger Contact with live components can result in severe injuries Capacitors remain live after the power supply has been switched OFF Wait at least 4 min until the capacitors have disch...

Page 94: ...tor air intake temperature sensor OAT D Evaporator temperature sensor OMT E 4 way diverter valve F Electronic expansion valve EEV G Compressor head temperature sen sor CTT H Liquid separator K Evapora...

Page 95: ...air intake temperature sensor OAT D Evaporator temperature sensor OMT E 4 way diverter valve F Electronic expansion valve EEV G Compressor head temperature sen sor CTT H Liquid separator K Evaporator...

Page 96: ...intake temperature sensor OAT D Evaporator temperature sensor OMT E 4 way diverter valve F Electronic expansion valve EEV G Compressor head temperature sen sor CTT H Liquid separator K Evaporator refr...

Page 97: ...e 55 Buffer temperature sensor F4 Cylinder temperature sensor F6 System flow temperature sensor F13 Pt 500 Compressor head temperature sensor hot gas CTT NTC 50 k External unit see page 93 Refrigerant...

Page 98: ...60 600 20 40 60 640 Temperature sensors type Pt 500 460 20 540 100 Resistance in Temperature in C 60 140 180 620 700 780 860 20 Temperature sensors NTC 10 k 0 1 1 10 100 1000 Resistance in k 30 20 10...

Page 99: ...it Fuse F3 is located on the main PCB Fuse F101 is located on the AVI PCB Fuse F1 and F3 T 6 3AH 250 V Max power loss 2 5 W Fuse F101 T 1 0AL Max power loss 2 5 W Danger Touching live components can r...

Page 100: ...equired Serial no see type plate A Assembly from this parts list Position number of the individual part within the assembly from this parts list Standard parts are available from your local dealer Int...

Page 101: ...101 A B C E F A Type plate B Casing assembly C Electrical equipment assembly Internal unit parts lists Overview of internal unit assemblies 5600 950 GB Service...

Page 102: ...nstructions Vitotronic 200 type WO1B 0008 Service instructions Vitotronic 200 type WO1B Internal unit casing 0001 Front panel top 0002 Front panel bottom 0003 Side panel left 0004 Side panel right 000...

Page 103: ...103 0006 0003 0005 0001 0007 0008 0002 0004 0010 0009 Internal unit parts lists Internal unit casing cont 5600 950 GB Service...

Page 104: ...use terminal 0032 Control unit support 0033 Back panel programming unit 0034 Retaining spring 0035 Outside temperature sensor 0037 Separator Parts not shown 0003 PCB with connection adaptor SA136 A10...

Page 105: ...5 0006 0018 0020 0019 0001 0032 0007 0005 0010 0002 0009 0037 0011 0013 0034 0008 0023 0024 0035 0025 0033 0030 0017 Internal unit parts lists Internal unit electrical equipment cont 5600 950 GB Servi...

Page 106: ...iece 0022 3 way diverter valve 0023 Lower hinge section for casing door 0024 Upper hinge section for casing door 0025 Air vent valve G 0026 Clip for threaded pipe D 21 23 M8 EPDM insert 0027 Clip for...

Page 107: ...4 0023 0003 0013 0044 0028 0035 0041 0045 0045 0036 0045 0016 0045 0045 0036 0025 0011 0045 0036 0041 0035 0020 0044 0044 0044 0019 0037 0026 0037 0010 0045 0037 0021 0044 0044 0037 0045 0018 0036 003...

Page 108: ...lve G 0012 Flange insulation 0013 Flange for magnesium anode 0014 Magnesium anode 0015 Flange gasket 0016 Sleeve 0017 Sensor mount 0018 Air vent valve G 0019 Spring clip ring 7 32 x 1 5 mm 0020 Clip f...

Page 109: ...13 0015 0014 0014 0015 0005 0023 0024 0025 0003 0024 0025 0025 0023 0006 0024 0025 0025 0024 0009 0026 0025 0024 0024 0025 0026 0022 0011 0029 0020 0017 0018 0026 0010 0025 0026 0021 0029 0029 0016 00...

Page 110: ...Connection plate 0015 Valve cover 0016 4 way diverter valve complete 0017 4 way diverter valve 0018 Coil EEV 0019 Side panel right 0020 Protective grille 0021 Heat exchanger evaporator 0022 Connectin...

Page 111: ...0025 0005 0004 0019 0015 0006 0023 0027 0009 0014 0028 0026 0024 0021 0010 0022 0016 0002 0001 0003 0017 0032 0013 0018 0029 0007 0011 0012 External unit parts lists External unit type AWT AC 221 A04...

Page 112: ...Filter dryer 0021 Cover power supply 0022 PCB mains filter 0023 Connection plate 0024 Electronic expansion valve 0025 Coil EEV 0026 Heat exchanger evaporator 0027 Protective grille 0028 Retainer tempe...

Page 113: ...2 0028 0033 0035 0034 0004 0007 0021 0022 0023 0012 0038 0020 0013 0019 0018 0010 0009 0002 0001 0008 0003 0037 0011 0006 0005 0025 0024 0014 0015 0017 0016 External unit parts lists External unit typ...

Page 114: ...114 B C D A Type plate B Casing assembly C Electrical equipment assembly D Hydraulic assembly External unit parts lists Overview of external unit assemblies type AWT AC 221 A10 A13 5600 950 GB...

Page 115: ...anger evaporator top 0010 Axial fan 0011 DC motor 0012 Protective grille left 0013 Transport handle left 0014 Motor support 0015 Air inlet ring 0016 Transport handle right 0017 ODU control unit 0018 T...

Page 116: ...12 0014 0001 0018 0011 0009 0008 0006 0006 0004 0016 0005 0007 0015 0017 0021 0010 0015 0021 0010 0002 0016 0003 0020 0019 External unit parts lists External unit casing type AWT AC 221 A10 A13 cont 5...

Page 117: ...re sensor 0016 Wiring harness compressor 0017 Wiring harness complete com pressor 0018 Temperature sensor NTC 10 k OCT 0019 Temperature sensor NTC 50 k CTT 0020 Communication cable drivers 0021 Commun...

Page 118: ...118 0013 0010 0009 0008 0007 0001 0012 0006 0011 0005 0003 0002 0004 External unit parts lists External unit electrical equipment type AWT AC cont 5600 950 GB...

Page 119: ...gas line 0007 Oil separator 0008 Electronic expansion valve 0009 Compressor thermal insulation 0010 Temperature sensor NTC 50 k CTT 0011 Shut off valve liquid line 0012 Compressor power supply cover P...

Page 120: ...120 0012 0009 0001 0011 0008 0002 0004 0010 0006 0007 0005 0003 External unit parts lists External unit hydraulics type AWT AC 221 A10 cont 5600 950 GB...

Page 121: ...it flow temperature 35 C at air inlet temperature 15 C K 4 to 13 Testing the mixer heat pump and cylinder heating Checked under the following conditions Room temperature C Outside temperature C Temper...

Page 122: ...7011 0 Operating status for external change over 7012 2 Duration of external changeover 7013 8 h Effect of external demand on heat pump heating circuits 7014 4 Effect of ext blocking on heat pump heat...

Page 123: ...mbi cylin der 6016 0 Start attempts for DHW after high pres sure shutdown 6017 1 Operating mode cylinder primary pump 6020 Never adjust Electric heater Enable instantaneous heating water heater 7900 0...

Page 124: ...om temperature hook up 200B 3 Max flow temperature heating circuit 200E 400 40 C Room temperature in party mode 2022 200 20 C Heating circuit 2 Standard room temperature 3000 200 20 C Reduced room tem...

Page 125: ...mmertime wintertime 7C00 1 Start summertime month 7C01 3 Start summertime week 7C02 5 Start summertime day 7C03 7 Start wintertime month 7C04 10 Start wintertime week 7C05 5 Start wintertime day 7C06...

Page 126: ...ed rpm 870 650 650 650 Power consumption kW 0 97 1 88 2 36 3 40 Coefficient of perform ance COP in heating mode 4 64 4 26 4 62 4 29 Cooling capacity data at 100 to EN 14511 A35 W7 C spread 5 K Rated c...

Page 127: ...rnal pressure drop RFH at min flow rate mbar 590 540 440 380 Max flow temperature C 55 55 55 55 Electrical values External unit Rated voltage com pressor 1 N PE 230 V 50 Hz Max rated current compresso...

Page 128: ...l unit max W 3 0 3 6 5 8 5 8 Secondary pump at stage 3 2 1 W 132 92 62 132 92 62 132 92 62 132 92 62 Control unit PCB external unit max W 150 150 150 150 Control unit PCB internal unit max W 5 5 5 5 M...

Page 129: ...5 C l min 14 3 14 8 15 9 16 5 Max permissible DHW temperature C 95 95 95 95 Dimensions External unit Total length mm 869 1040 900 900 Total width mm 290 340 340 340 Total height mm 610 865 1255 1255 I...

Page 130: ...x 1 16 x 1 16 x 1 Liquid line Pipe 7 mm 6 x 1 10 x 1 10 x 1 10 x 1 Internal unit UNF External unit UNF Hot gas line Pipe 7 mm 12 x 1 16 x 1 16 x 1 16 x 1 Internal unit UNF External unit UNF Max line...

Page 131: ...m example 2 Sketch for alternative hydraulic scheme Heating circuits fully installed and filled Electrical installation completed Hydraulic lines fully thermally insulated Installation completed in fu...

Page 132: ...335 2 40 2010 03 EN 349 EN 60 335 1 with A14 2010 11 EN 378 EN 61 000 3 2 2010 02 BGR 500 chapter 2 35 EN 61 000 3 3 2009 06 In accordance with the following Directives this product is designated with...

Page 133: ...cking Fuses 99 Sensors 97 Checking free running of fan 79 Checking solder joints 73 Checking swaged connections 73 Checking system pressure 75 Checking the sensors 97 Checking threaded fittings 73 Che...

Page 134: ...98 99 Temperature sensor type Ni 500 98 Temperature sensor type Pt 500 98 Curves of the sensors 97 Cylinder Drain fill valve 92 Specification 129 Cylinder cleaning 77 Cylinder assembly Internal unit...

Page 135: ...3 Expansion vessel 43 76 For heating circuit 13 Extended menu 84 External blocking Parameter settings 86 External changeover in operating status Parameter settings 86 External demand Parameter setting...

Page 136: ...1 14 Heating output data 126 Heating output subject to type 84 Heating water buffer cylinder 13 Heating water flow 8 41 42 130 Heating water return 8 41 42 130 Heat pump closing 65 Heat pump starting...

Page 137: ...Lightning protection 19 Line length for refrigerant lines 72 For refrigerant lines 72 Refrigerant lines 33 130 Liquid gas temperature sensor Curve 97 Liquid line 8 13 33 35 37 70 130 Torque 36 40 Liqu...

Page 138: ...pe bends flaring 38 Pipe bends as anti vibration mounts 20 Pipe ends flaring 35 Pipe openings For refrigerant lines 35 37 Pipe outlet 31 Pipes securing 35 Pipe separator 44 Power cable 9 60 External u...

Page 139: ...emoving programmining unit cover 90 Repairs 89 Repair work 68 Replacing magnesium anode 79 Replacing union nuts 35 Report Control parameters 121 Reports 121 Required parameter settings For system sche...

Page 140: ...pressure checking 76 System scheme setting 11 System schemes Overview 9 T Temperature limiter 13 52 Temperature sensor 97 Compressor head CTT 94 95 96 Evaporator OMT 94 95 96 Evaporator air intake OAT...

Page 141: ...23 External unit 23 Wall mounting bracket set 19 Warranty 82 Water quality 74 Weather proofing 19 Weight 20 External unit 129 Internal unit 129 Wind direction 19 Wind loads 19 Working on the refrigera...

Page 142: ...142 5600 950 GB...

Page 143: ...143 5600 950 GB...

Page 144: ...0 Telford Shropshire TF1 7YP GB Telephone 44 1952 675000 Fax 44 1952 675040 E mail info uk viessmann com Viessmann Werke GmbH Co KG D 35107 Allendorf Telephone 49 6452 70 0 Fax 49 6452 70 2780 www vie...

Reviews: