02_20
6DIHGULYLQJB
Some simple tips are provided below that
will enable you to use your vehicle on a
daily basis in greater safety and peace of
mind. Your skill and your mechanical
knowledge are the basis of a safe ride.
We recommend trying out the vehicle in
traffic - free zones, in order to acquire a
good knowledge of the vehicle it self.
Before riding off, remember to put the
helmet on and fasten it correctly.
Reduce speed on rough roads and ride
with care.
After riding on a long stretch of wet
road without using the brakes, braking
can be poor at the beginning. In these
conditions, it is a good idea to apply the
brakes from time to time.
Do not brake hard on wet, unsurfaced
or slippery roads.
Avoid riding off by mounting the scoot-
er when it is resting on its support. In any
case, in order to avoid abrupt departures,
the rear wheel should not be turning
when in comes into contact with the
ground.
If the vehicle is used on roads covered
with sand, mud, snow mixed with salt,
etc., clean the brake disc frequently with
a mild detergent in order to prevent abra-
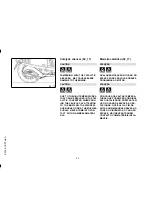
sive particles from building up inside the
holes, which can result in early brake pad
wear.
&RQGXomRVHJXUDB
Apresentamos a seguir alguns conselhos
simples que permitirão utilizar o seu veí-
culo todos os dias com uma condução
mais tranquila e segura. A sua habilidade
e os seus conhecimentos de mecânica
formam a base de uma condução segu-
ra. Assim, recomenda-se testar o veículo
em áreas sem muito trânsito, para adqui-
rir um bom conhecimento do próprio veí-
culo.
Antes de iniciar a condução do veículo,
lembre-se de colocar o capacete e de
prendê-lo correctamente.
Em estradas escorregadias, reduza a
velocidade e conduza com prudência.
Lembre que, após ter percorrido um
longo trecho de estrada molhada sem ter
accionado os travões, o efeito de trava-
gem é inicialmente menor. Nessas con-
dições de condução é aconselhável ac-
cionar periodicamente os travões.
Não trave a fundo em piso molhado,
em estrada de terra ou sobre qualquer
piso escorregadio.
Evite que o arranque seja efectuado
enquanto estiver a subir no veículo, po-
sicionado no cavalete. É importante que
a roda traseira não esteja a girar quando
entrar em contacto com o terreno, a fim
de evitar arranques bruscos.
Em caso de utilização do veículo em
estradas sujas de areia, lama, neve mis-
turada com sal, etc., recomendamos lim-
55
2 Use / 2 O uso
Summary of Contents for 946
Page 1: ...1Q000038 w w w v e s p a c o m is a registered trademark of DK ...
Page 5: ...4 ...
Page 9: ...8 ...
Page 10: ... KDS 9HKLFOH DS 9HÇFXOR ...
Page 11: ... DVKERDUG B 3DLQHO B 01_01 10 1 Vehicle 1 Veìculo ...
Page 42: ... KDS 8VH DS 2 XVR ...
Page 60: ... KDS 0DLQWHQDQFH DS PDQXWHQÂ R ...
Page 102: ... KDS 7HFKQLFDO GDWD DS DGRV WÄFQLFRV ...
Page 103: ... DWD B DGRV B 04_01 102 4 Technical data 4 Dados técnicos ...
Page 109: ...108 4 Technical data 4 Dados técnicos ...
Page 110: ... KDS 6SDUH SDUWV DQG DFFHVVRULHV DS 3HÂDV GH UHSRVLÂ R H DFHVVÎULRV ...
Page 113: ...112 5 Spare parts and accessories 5 Peças de reposição e acessórios ...
Page 114: ... KDS 6FKHGXOHG PDLQWHQDQFH DS PDQXWHQÂ R SURJUDPDGD ...
Page 121: ...120 6 Scheduled maintenance 6 A manutenção programada ...
Page 122: ... KDS 6SHFLDO ƬWWLQJV DS TXLSDPHQWRV HVSHFLDLV ...
Page 125: ...124 7 Special fittings 7 Equipamentos especiais ...
Page 127: ...126 ...
Page 133: ...4 ...
Page 137: ...8 ...
Page 138: ... DS DKU HXJ DS 9HKÇFXOR ...
Page 139: ... DV FRFNSLW B 7DEOHUR GH LQVWUXPHQWRV B 01_01 10 1 Fahrzeug 1 Vehìculo ...
Page 171: ...42 1 Fahrzeug 1 Vehìculo ...
Page 172: ... DS HQXW XQJVKLQZHLVH DS O XVR ...
Page 190: ... DS DUWXQJ DS O PDQWHQLPLHQWR ...
Page 232: ... DS 7HFKQLVFKH GDWHQ DS DWRV WÄFQLFRV ...
Page 233: ... DWHQ B DWRV B 04_01 104 4 Technische daten 4 Datos técnicos ...
Page 239: ...110 4 Technische daten 4 Datos técnicos ...
Page 240: ... DS UVDW WHLOH XQG XEHKÑU DS 5HSXHVWRV DFFHVRULRV ...
Page 243: ...114 5 Ersatzteile und zubehör 5 Repuestos y accesorios ...
Page 244: ... DS DV ZDUWXQJVSURJUDPP DS O PDQWHQLPLHQWR SURJUDPDGR ...
Page 251: ...122 6 Das wartungsprogramm 6 El mantenimiento programado ...
Page 252: ... DS 6RQGHUDXVVWDWWXQJHQ DS 3UHSDUDFLRQHV HVSHFLDOHV ...
Page 255: ...126 7 Sonderausstattungen 7 Preparaciones especiales ...
Page 257: ...128 ...
Page 263: ...4 ...
Page 267: ...8 ...
Page 268: ... DS ÓUHWÓ Χκϋ ϔόμρζ ...
Page 269: ... QVWUXPHQWSDQHOHW B ȉĮȝʌȜȩ B 01_01 10 1 Køretø 1 ...
Page 271: ...01_02 2YHUVLJW ȊʌȩȝȞȘȝĮ A 12 1 Køretø 1 ...
Page 303: ...44 1 Køretø 1 ...
Page 304: ... DS UXJHQ Χκϋ Τ όφϚψμ ...
Page 322: ... DS 9HGOLJHKROGHOVHQ Χκϋ Τ ψϊςωϚφμψμ ...
Page 364: ... DS 7HNQLVNH VSHFLƬNDWLRQHU Χκϋ ΰκόςξοϘ όζφζοωμφξψωξοϘ ...
Page 365: ...6SHFLILNDWLRQHU B ȋĮȡĮțIJȘȡȚıIJȚțȐ B 04_01 106 4 Tekniske specifikationer 4 ...
Page 371: ...112 4 Tekniske specifikationer 4 ...
Page 372: ... DS 5HVHUYHGHOH RJ WLOEHKÓU Χκϋ ΞςωζππζοωξοϘ οζξ ζσκψτϊϘφ ...
Page 375: ...116 5 Reservedele og tilbehør 5 ...
Page 376: ... DS 5XWLQHYHGOLJHKROGHOVH Χκϋ έφτθφζρρζωξψρ ϙςμ ψϊςωϚφμψμ ...
Page 383: ...124 6 Rutinevedligeholdelse 6 ...
Page 384: ... DS 6SHFLDOXGVW U Χκϋ ξιξοτϛ κστυπξψρτϛ ...
Page 387: ...128 7 Specialudstyr 7 ...
Page 389: ...130 ...


