2. Select the
Technology Group
.
3. Select the desired
Test Mode
based on the application to be tested.
4. Tap on the
OK
button to confirm.
The test port group is assigned to the selected test application.
Required software/firmware is loaded.
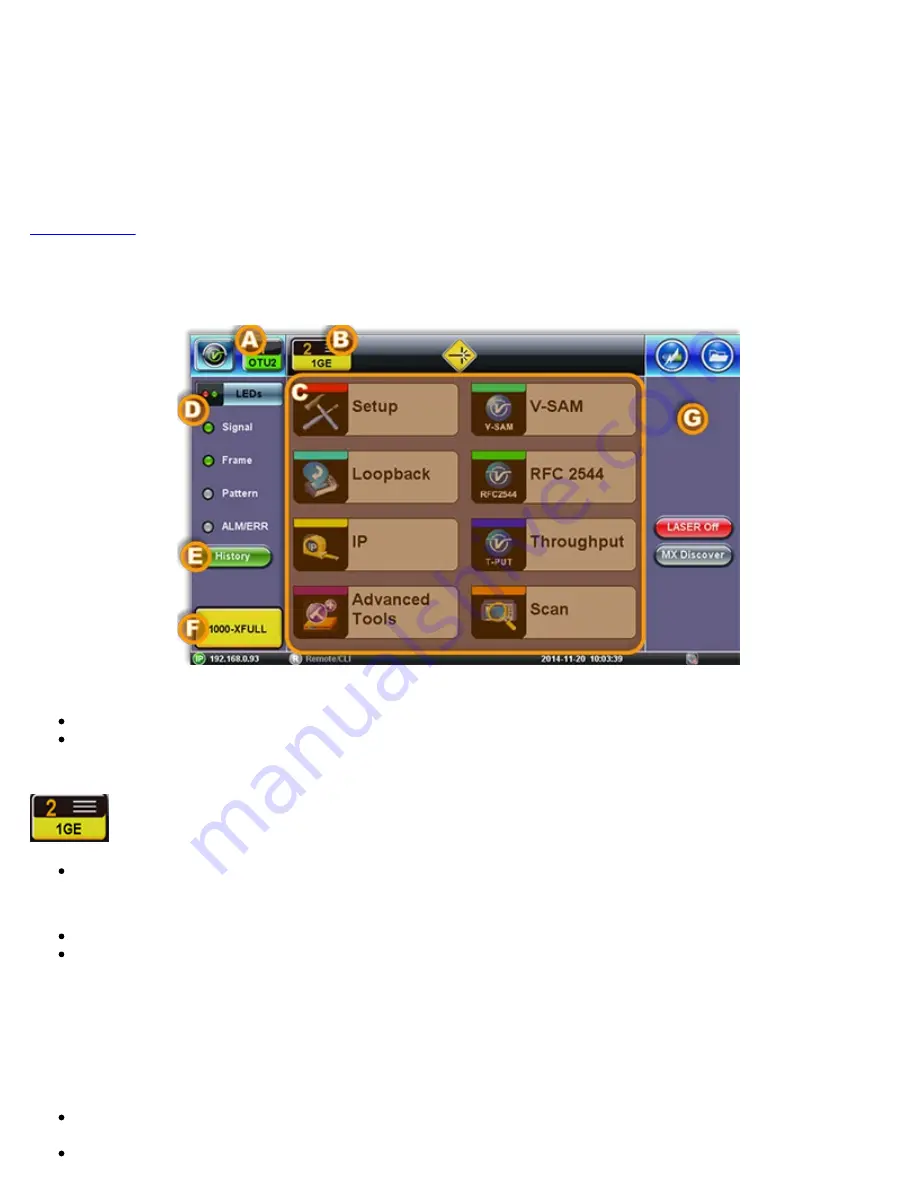
4.3 Understanding Test Application GUI
A. Background Test Application
Tap this button to bring its GUI forward.
Or press the
App
rubber button to toggle.
B. Active Test Application GUI
- Shows the Test Port Group being used and the Test App ID (Rate / Technology).
Tap this button to release the Test App or change its Test Mode.
C. Test Application Menu
Lists all test Functions, Applications and Tools available for the selected test mode.
Setup = Port and Test Signal configuration.
D. LEDs
- Test Signal Status.
E. History
- Clears past events reminder (blinking).
F.
Current test interface line rates.
G.
Action buttons section.
This vertical section displays direct access functions applicable to each specific Test Mode, such as Start/Stop test, Laser
control, Error and Alarm injection, Start protocol capture, etc.
Most of these buttons offer immediate action. A few open a configuration menu.
TX300s_Platform_Manual_RevB00
Page 19 of 104
Summary of Contents for TX300s
Page 1: ......
Page 15: ...Go back to TOC 3 5 Home Screen Go back to TOC TX300s_Platform_Manual_RevB00 Page 15 of 104...
Page 29: ...Time Zone Setup Go back to TOC TX300s_Platform_Manual_RevB00 Page 29 of 104...
Page 75: ...ARP Wiz Result Go back to TOC TX300s_Platform_Manual_RevB00 Page 75 of 104...
Page 100: ...GNSS Save Results Go back to TOC TX300s_Platform_Manual_RevB00 Page 100 of 104...


