959D Leak Detector
3-14
DRAFT
9/13/02
6. Inspect the preamplifier as part of a spectrometer tube cleaning procedure.
This procedure is contained in Section 3.4.5 “Cleaning the Preamplifier Cavity” on
page 3-17.
7. If you do not remove the preamplifier, allow all parts associated with the ion source to
air dry thoroughly.
3.4.4 Installing the Ion Source
If you did not remove the ground slit plate, begin at step 4.
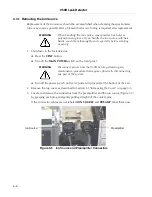
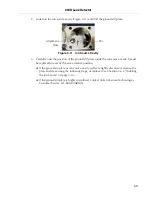
1. Place the ground slit plate onto the locking screwdriver as you did to remove it
(Figure 3-12) with the prongs facing up.
CAUTION
Be sure to seat the ground slit plate firmly and in its proper
orientation.
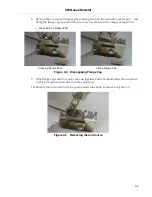
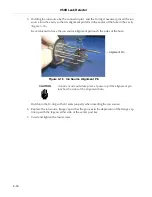
2. Carefully place the ground slit plate into the cavity, being sure to align the slit so that it
is perpendicular to the back and front of the spectrometer tube (Figure 3-14).
The hole in the ground slit plate will line up with the alignment hole on the bottom of
the ion source cavity.
Figure 3-14
Ground Slit Plate Properly Inserted
CAUTION
If it is necessary to bend the ground slit plate prongs out, be
sure to bend them only slightly so that the prongs do not scratch
the ion source cavity while the plate is being inserted. If the
plate is damaged, replace it with p/n 3088001.
Slit
Alignment Hole
Summary of Contents for 959D
Page 16: ...959D Leak Detector 1 2 D R A F T 9 1 3 0 2 Figure 1 1 Model 959D Leak Detector ...
Page 28: ...959D Leak Detector This page intentionally left blank D R A F T 9 1 3 0 2 ...
Page 48: ...959D Leak Detector This page intentionally left blank D R A F T 9 1 3 0 2 ...
Page 68: ...959D Leak Detector This page intentionally left blank D R A F T 9 1 3 0 2 ...
Page 78: ...959D Leak Detector This page intentionally left blank D R A F T 9 1 3 0 2 ...
Page 81: ......


