16
Installation Planning
Fan (Blower)
Allow for and install electrical wiring if there will be a
blower to install. Ask the homeowner if you are not sure.
Venting Confi guration
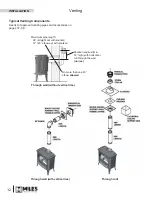
This unit is supplied with a
top outlet
and is
fi
eld
convertible to a
rear outlet
. Plan routing of vent taking
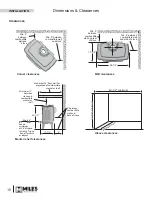
into consideration stove and vent clearances, allowable
vent terminal locations
BEFORE
cutting a hole in the
roof or wall. Avoid penetrating the wall/roof at structural
members.
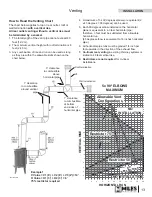
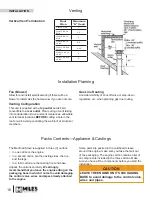
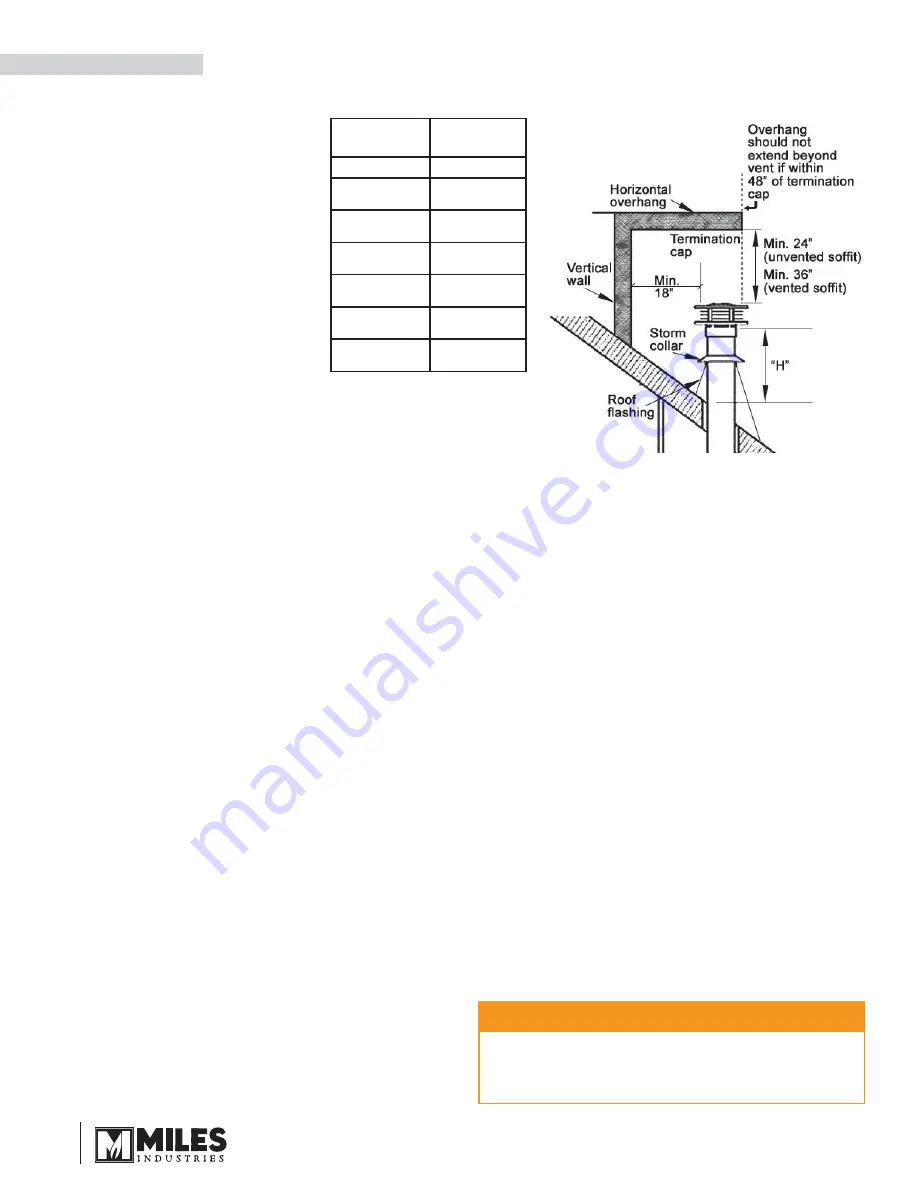
Roof
Pitch
Minimum
"H" (feet)
Flat to 7/12
1'
Over 7/12 to
8/12
1.5'
Over 8/12 to
9/12
2’
Over 9/12 to
10/12
2.5’
Over 10/12 to
11/12
3.25’
Over 11/12 to
12/12
4’
Over 12/12 to
14/12
5’
Venting
Packs Contents—Appliance & Castings
The Madrona Stove is supplied in three (3) cartons.
• In one carton is the engine.
• In a second carton are the casting sides, the top
and the legs.
• In a third carton are the casting front and base.
Unpack the cartons carefully.
We strongly
recommend that you leave the engine sitting on the
packaging base in which it came to avoid damaging
the control valve, wires and pipes already attached
to the engine.
CAUTION
LEAVE THE ENGINE ON ITS PACKAGING
BASE to avoid damage to the control valve,
wires and pipes.
Vertical Vent Termination
Gas Line Routing
Consider visibility of shut-off valve or step-down
regulators, etc. when planning gas line routing.
Some parts are packed in the cardboard sleeve
around the engine; make sure you take them all out
of the packaging. The engine carton contains a list of
all components included in the three cartons. Make
sure you have all the components before you start the
installation.
INSTALLATION

