Section 3 PREPARATIONS
3-7
6
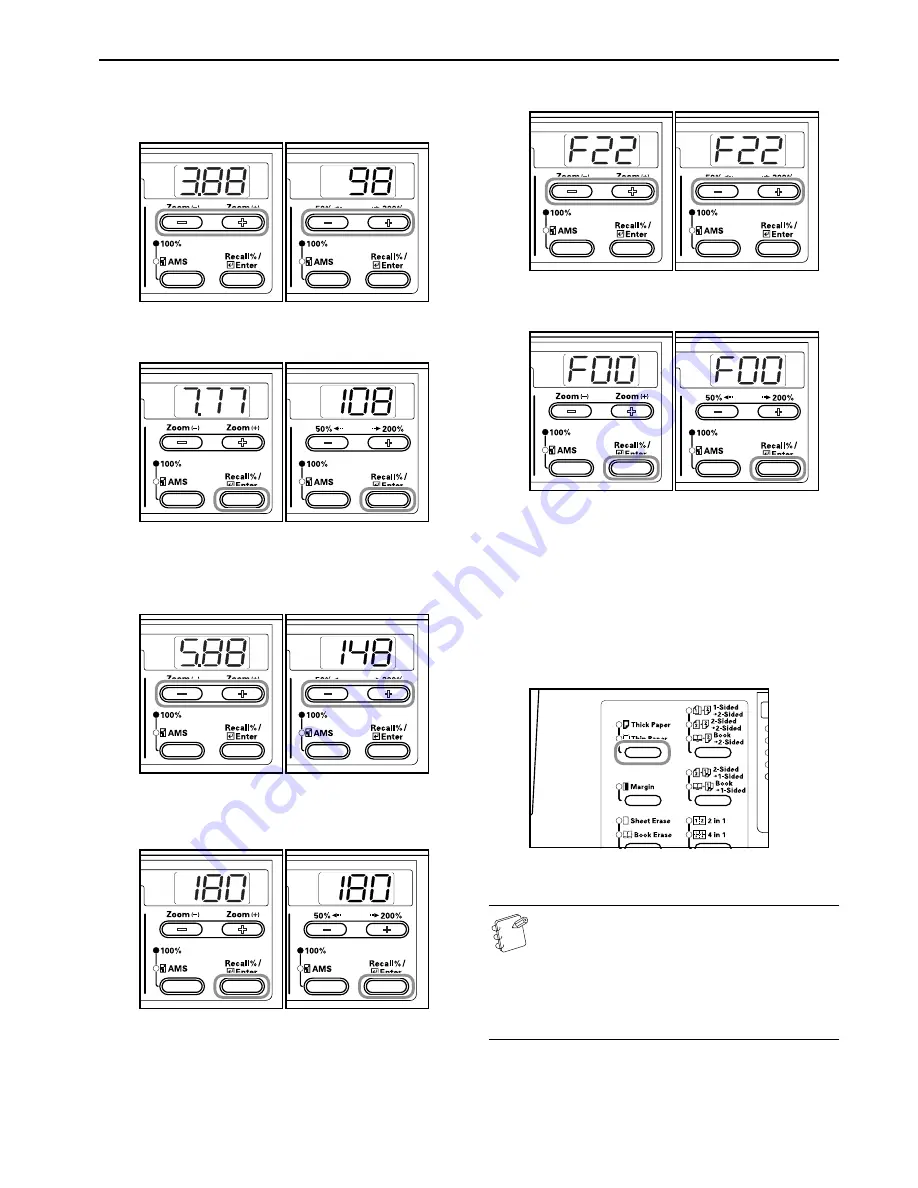
Press either the Zoom (+) or Zoom
(–)
key and input the
Length Size (Y Direction). 3.88 - 11.63(")/98 - 297 (mm): The
range in which setting is possible.
Inch specifications
Metric specifications
7
Press the [OK] key. The Width can be input after 2 blinks.
Inch specifications
Metric specifications
8
Press either the Zoom (+) or Zoom
(–)
key and input the
Width Size (X Direction). 5.88 - 17.00(")/148 - 432 (mm):
The range in which setting is possible.
Inch specifications
Metric specifications
9
Press the [OK] key. The display will blink and the copier
will return to the Default Settings Mode.
Inch specifications
Metric specifications
10
Press either the Zoom (+) or Zoom
(–)
key to display “F00”.
Inch specifications
Metric specifications
11
Press the [OK] key. Copying can be begun.
Inch specifications
Metric specifications
Selecting Special Paper Types
Select the Paper Type when copying on special types of paper such
as thick paper and thin paper. When the Paper Type has been
selected, the copier will change the fixing temperature to match the
paper.
1
Press the Paper Type Selection key and select the type of
paper. The indicator for the type of paper selected will light
up.
2
Proceed with the copying operation.
Notes
• When Paper Type has been selected, the copying speed
is reduced.
• When “Postcard” has been set for either Custom 1 or 2
during the Custom Size input, selecting Custom 1 or 2
(Postcard) using the [Paper Select] key will cause the
Thick Paper display to light up. (Refer to P.3-6
"Inputting Custom Sizes"
.)
Summary of Contents for CD 1016
Page 16: ...Section 1 IMPORTANT PLEASE READ FIRST 1 8 ...
Page 22: ...Section 2 NAMES OF PARTS 2 6 ...
Page 30: ...Section 3 PREPARATIONS 3 8 ...
Page 104: ...Section 8 TROUBLESHOOTING 8 10 ...
Page 118: ...Section 9 MAINTENANCE AND OPERATION INFORMATION 9 14 ...
Page 121: ...MEMO ...
Page 122: ...MEMO E1 ...


