Removing Glue Residue from the Feeder Unit
After printing there may be a build-up of adhesive on the guide arms, extension arms and cutter blade. As a result,
the roll will stick and create excess back tension when feeding, causing load failures, bad cuts and unfavorable
output.
If you are seeing the following:
a) The roll is not fully rotating or seems to stick to the back guide arm
b) The media is not feeding at a constant speed/rate
c) The feeder blade does not have a clean cut
To fix the three problems shown below, you will need to use 99% isopropyl alcohol and a Kimwipe to gently wipe
each of the surfaces until the adhesive and residue are removed.
For access to the cutter blade you will need to remove the cutter blade cover by unscrewing all five screws. Using
caution, wipe the cutter blade until all residue is removed. Return the cutter blade cover to its original position and
retighten the screws. Reload media and continue printing
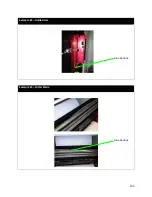
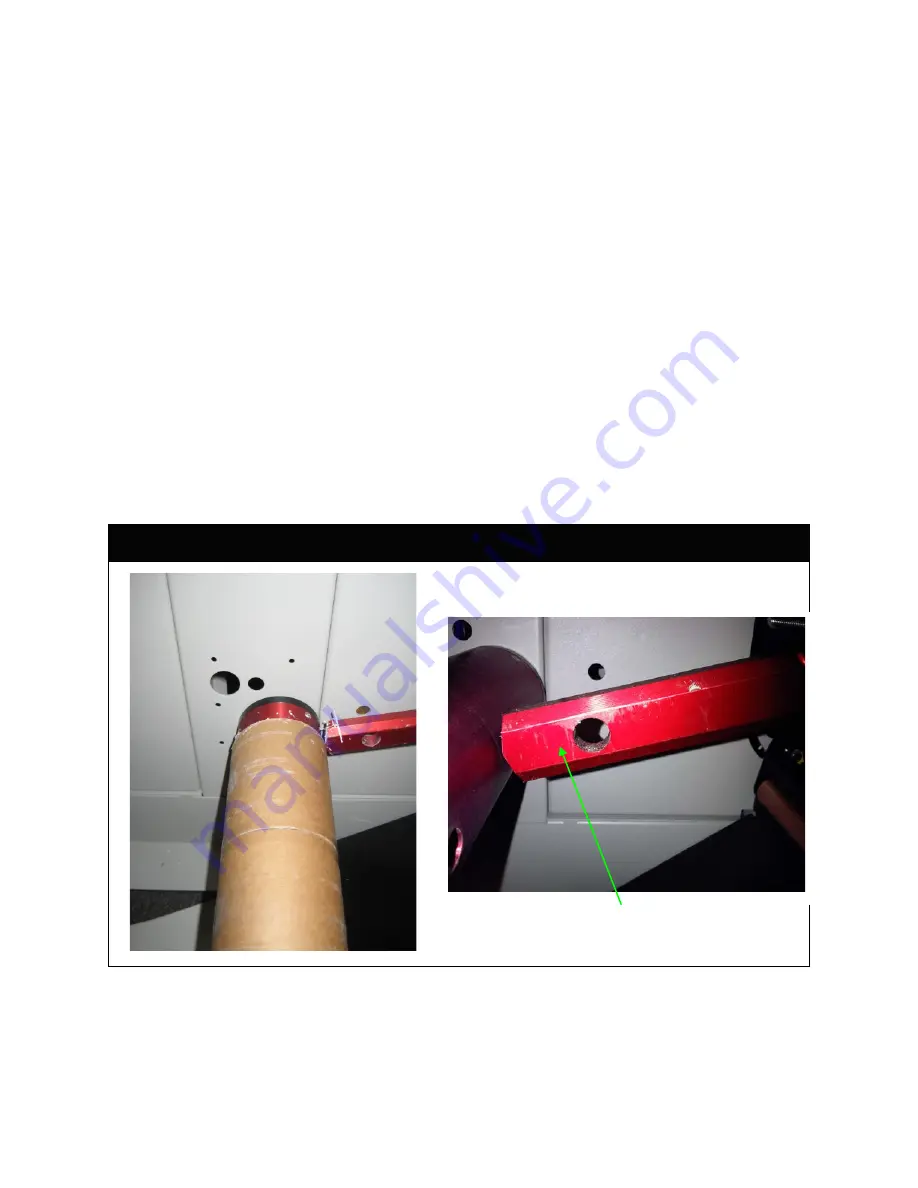
The following pictures give examples of where glue residue can build up.
Example #1 – Back Extension Arm
Glue Residue
99
Summary of Contents for iCOLOR 900
Page 1: ...iCOLOR 900 APEX2Print Installation and User Guide ...
Page 23: ...Navigate to the 2 Install RIP vR2 Folder Run the Prepare_Uninet_RIP_v2 1 exe file 23 ...
Page 24: ...STEP 3 of 8 The KEYLOK and Sentinel Drivers will install 24 ...
Page 26: ...STEP 5 of 8 Click Done STEP 6 of 8 26 ...
Page 27: ...Navigate to the 3 Install APEX2Print folder Run the APEX2Print_Install msi file Click Next 27 ...
Page 53: ...Appendix 53 ...
Page 57: ...57 ...
Page 59: ...PAGE 3 59 ...
Page 68: ...STEP 2 of 4 The Creating a New User Media Entry window will display Click Edit STEP 3 of 4 68 ...
Page 80: ...STEP 7 of 10 The job is ready for printing Click Print Nesting 80 ...
Page 87: ...STEP 3 The Preview Screen will display the scaled object 87 ...
Page 100: ...Example 2 Guide Arms Example 3 Cutter Blade Glue Residue Glue Residue 100 ...
Page 108: ...STEP 21 Close the Guide Door and the system is ready to print 108 ...

