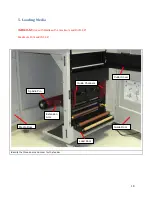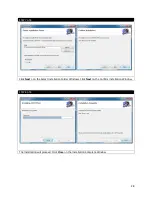
STEP 1 of 7
STEP 2 of 7
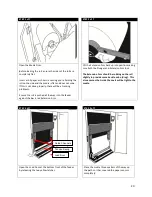
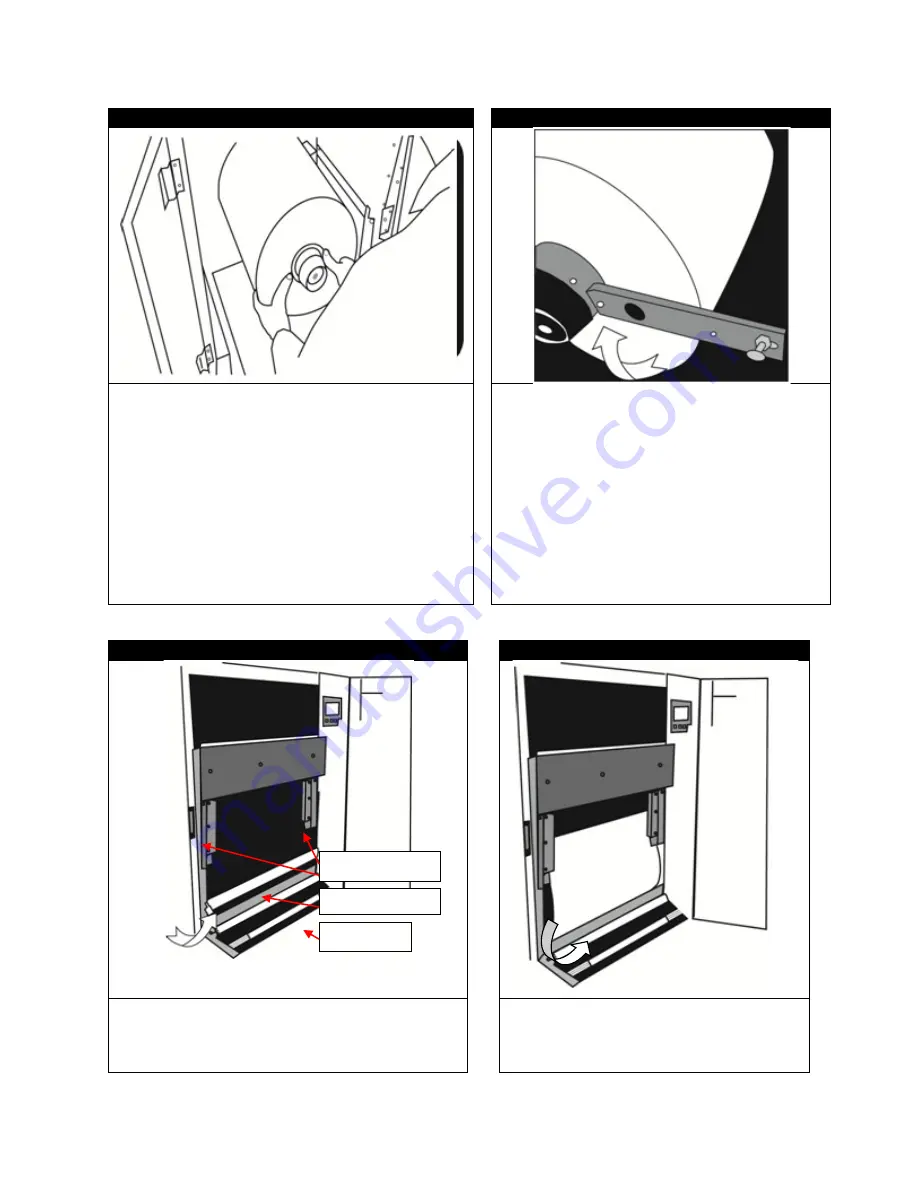
Open the Media Door.
Before loading the roll, ensure the sides of the roll are
completely flat.
Insert a roll paper as shown, ensuring you’re holding the
roll on the side and the media is flat and does not cone.
If this is not done properly, there will be a tracking
problems.
Ensure the roll is pushed all the way into the feeder
against the back, red Extension Arm.
Lift the Extension Arm back up into position making
sure both the Plunger and Extension Arm lock.
The Extension Arm should be rubbing on the roll
slightly to provide some back tension (drag). This
also ensures the Guide Channels will be tight to the
media.
STEP 3 of 7
STEP 4 of 7
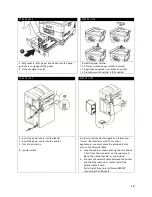
Open the Load Door at the bottom front of the feeder
by releasing the two yellow latches.
Place the media three quarters of the way up
the path so it has covered the paper sensors
completely.
Guide Channels
Tension Swing
Load Door
20
Summary of Contents for iCOLOR 900
Page 1: ...iCOLOR 900 APEX2Print Installation and User Guide ...
Page 23: ...Navigate to the 2 Install RIP vR2 Folder Run the Prepare_Uninet_RIP_v2 1 exe file 23 ...
Page 24: ...STEP 3 of 8 The KEYLOK and Sentinel Drivers will install 24 ...
Page 26: ...STEP 5 of 8 Click Done STEP 6 of 8 26 ...
Page 27: ...Navigate to the 3 Install APEX2Print folder Run the APEX2Print_Install msi file Click Next 27 ...
Page 53: ...Appendix 53 ...
Page 57: ...57 ...
Page 59: ...PAGE 3 59 ...
Page 68: ...STEP 2 of 4 The Creating a New User Media Entry window will display Click Edit STEP 3 of 4 68 ...
Page 80: ...STEP 7 of 10 The job is ready for printing Click Print Nesting 80 ...
Page 87: ...STEP 3 The Preview Screen will display the scaled object 87 ...
Page 100: ...Example 2 Guide Arms Example 3 Cutter Blade Glue Residue Glue Residue 100 ...
Page 108: ...STEP 21 Close the Guide Door and the system is ready to print 108 ...

