Troubleshooting
a. How to Change the Settings: User
It should be noted that many of these settings can be, and often are, overridden by settings
in the Windows printer drivers. However, several of the driver settings can be left at “Printer
Setting”, which will then default to the settings entered in these printer menus.
Where applicable, factory default settings are shown in bold type in the following tables.
In the normal operating condition, known as “standby,” the printer’s LCD window will show
“Ready to Print”. In this condition, to enter the menu system, press the up and down Menu
buttons on the operator panel to move up and down through the list of menus until the
menu you wish to view is displayed. Then proceed as follows:
1. Press Enter to enter the menu.
2. Use the up and down MENU buttons on the control panel to scroll through the menus.
When the item you want to change is displayed, press Enter to view the sub-menus for that
item.
3. Use the up and down MENU buttons to move up and down through the sub-menu items.
When the item you want to change is displayed press Enter to display the setting.
4. Use the up and down MENU buttons to move up and down through the available settings
for the sub-menu item. When the item you want to change is displayed press Enter to
display the setting. An asterisk (*) will appear next to the setting, indicating that this setting
is currently in effect.
5. Do one of the following:
• Press Back again to move up to the list of menus;
or…
•
Press
Online
or
Cancel
to exit from the menu system and return to standby.
112
Summary of Contents for iCOLOR 900
Page 1: ...iCOLOR 900 APEX2Print Installation and User Guide ...
Page 23: ...Navigate to the 2 Install RIP vR2 Folder Run the Prepare_Uninet_RIP_v2 1 exe file 23 ...
Page 24: ...STEP 3 of 8 The KEYLOK and Sentinel Drivers will install 24 ...
Page 26: ...STEP 5 of 8 Click Done STEP 6 of 8 26 ...
Page 27: ...Navigate to the 3 Install APEX2Print folder Run the APEX2Print_Install msi file Click Next 27 ...
Page 53: ...Appendix 53 ...
Page 57: ...57 ...
Page 59: ...PAGE 3 59 ...
Page 68: ...STEP 2 of 4 The Creating a New User Media Entry window will display Click Edit STEP 3 of 4 68 ...
Page 80: ...STEP 7 of 10 The job is ready for printing Click Print Nesting 80 ...
Page 87: ...STEP 3 The Preview Screen will display the scaled object 87 ...
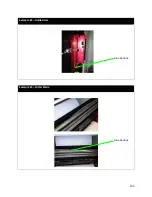
Page 100: ...Example 2 Guide Arms Example 3 Cutter Blade Glue Residue Glue Residue 100 ...
Page 108: ...STEP 21 Close the Guide Door and the system is ready to print 108 ...

