


58
DV - Digital Video
All movies on a computer are composed of ones and zeros and are therefore
digital, but Digital Video with a capital “D” and a capital “V” stands for a
very specific format of video, just like VHS or High-8. This format can be
understood (played back, recorded) by your camcorder. When you have the proper hardware
(capture card) and software (DV codec), it can also be understood by your computer.
The most exciting thing about DV is that it can be copied from your camcorder to your
computer, and then back to your camcorder (after editing, of course) without any loss of
quality. While previous versions of Ulead VideoStudio supported even the very first DV
products on the market, this latest version now offers comprehensive support for DV in all of
its manifestations. This includes, but is not limited to, Type-1, Type-2, PAL, NTSC, and even
the device control of your camcorder.
Recording a movie to your DV camcorder
1. Turn on your camcorder and set it to Play mode (or VTR
mode). See you camcorder’s manual for specific instructions.
2. Go to the Finish step.
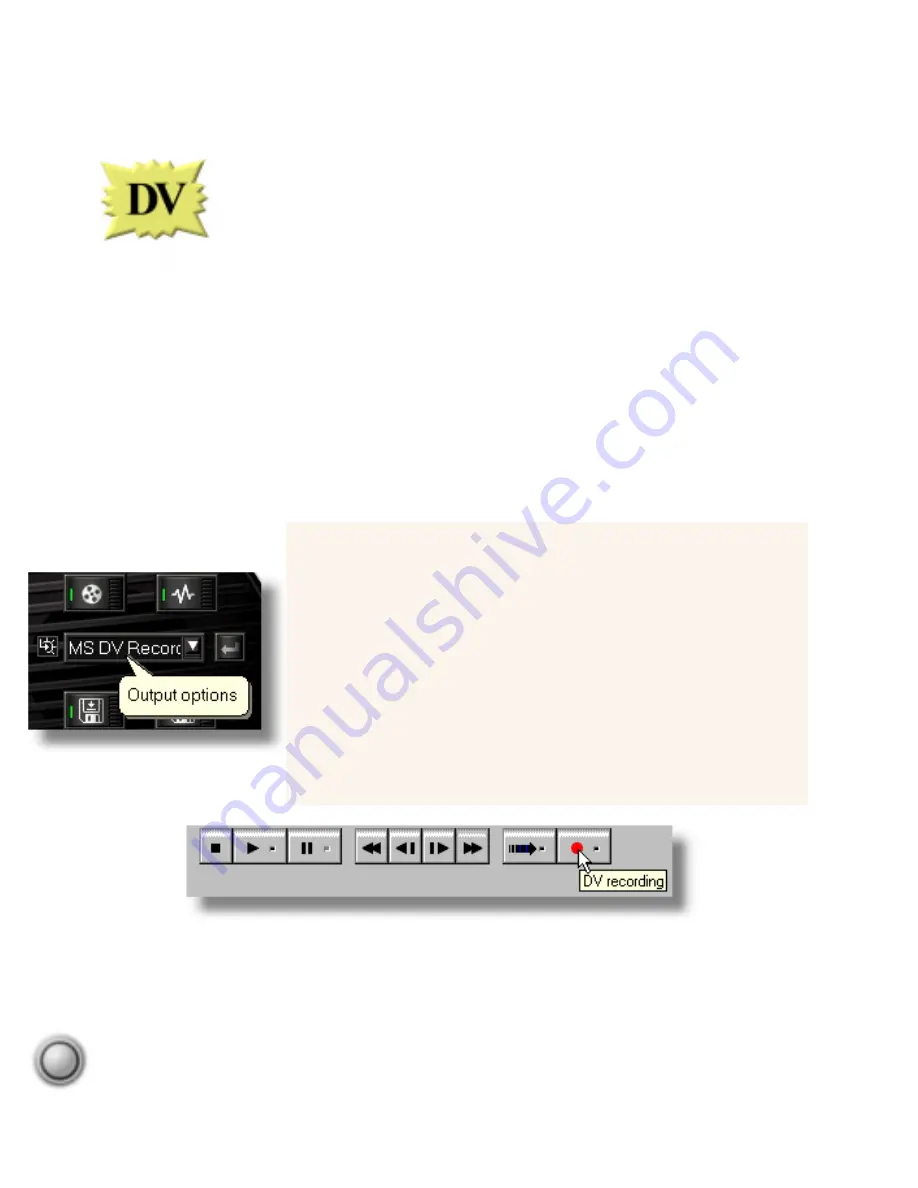
3. From the Ouput options list, select your DV Recording device
(for example: MS DV Recording).
4. Click the Export video clip button. The DV Recording -
Preview Window opens. Click Next.
5. In the DV Recording - Record Window, click the DV record-
ing button to begin the process.
The Ouput options list with the
Export video clip button to the right.
The controls in the DV Recording - Record Window dialog box.


