


Step by step
51
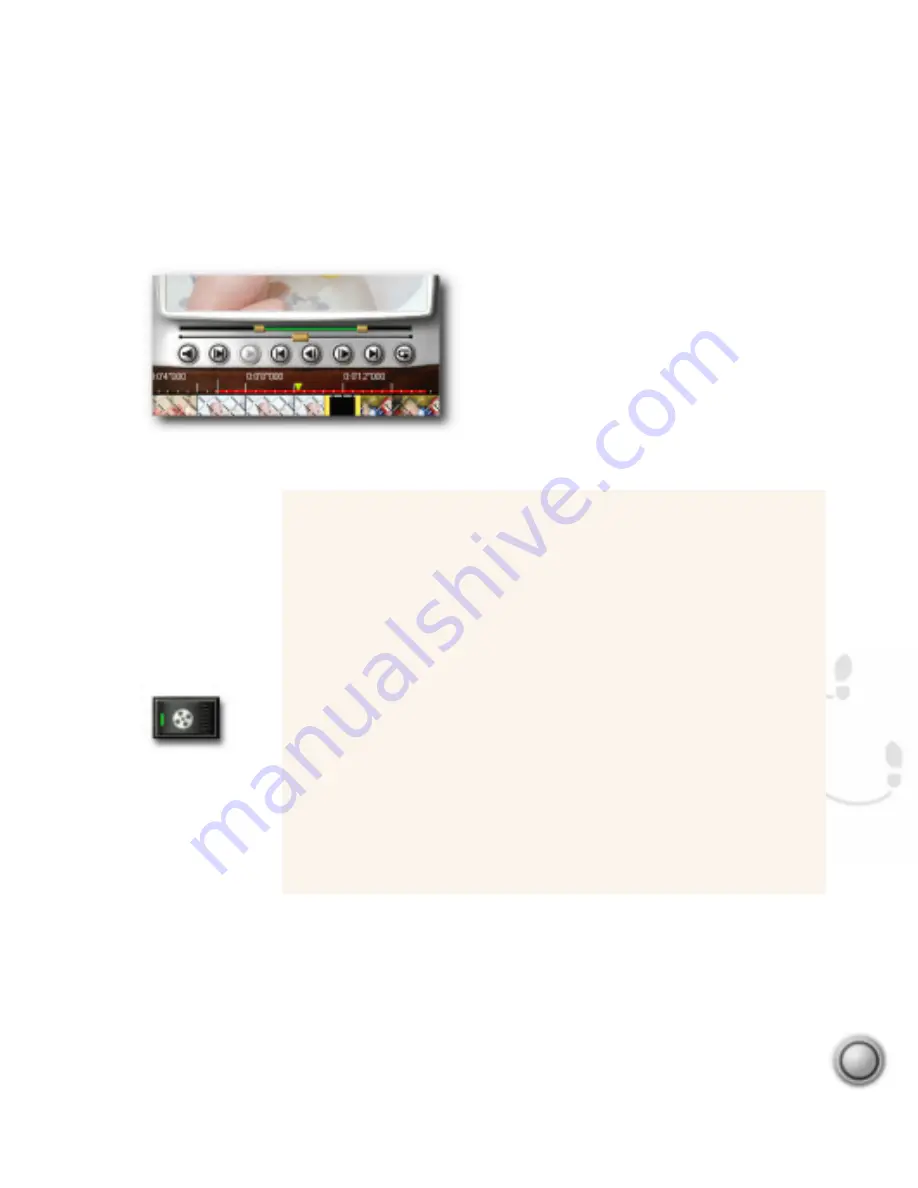
Rendering quick previews of parts of your project is invaluable in fine tuning effects, titles,
and synchronizing audio in your projects. In the image above, you can see that the Preview
range covers a bit before and after a transition effect. The resulting video file will accurately
show how the transition will look in the final movie.
If you’ve gone through the process of creating a movie already, you know that rendering may
take quite a while. Sometimes, it is hard to know how your project is going to work until it is
actually rendered. Fortunately, Ulead VideoStudio lets you select a portion or range of your
project to render as a preview video for just this reason.
Partial Rendering
1. Make sure that no clips are selected (a selected clip has a broken line
around it). You can unselect a clip by clicking on the ruler at the top
of the Timeline.
2. The green bar and Trim handles now act on the entire project. Use
the handles to select a Preview range. You can tell that the Preview
range is working on the entire project because a red line appears on
the Timelime. This represents the range selected quite clearly.
3. Click the Make movie button on the Options panel.
4. In the resulting Save As dialog box, enter a file name and then click
the Options button. On the first tab, Ulead VideoStudio, select
Preview range instead of Entire project. (For more info on Video
Save Options dialog box and recommendations, see page 54.)
5. Click OK to return to the Save As dialog box and then click the Save
button.
Make movie button.
Video clip with selected preview area in red.


