


Overview,
Continued
A-10
1. Remove plastic PCB cover.
2. Place Program Switch on the AutoPulse Z-10 in the ON position.
3. Locate the PC within 6 feet of the AutoPulse Z-10 FACP and connect a Part No. 431206
serial cable to a free serial port (typically COM1) on the PC.
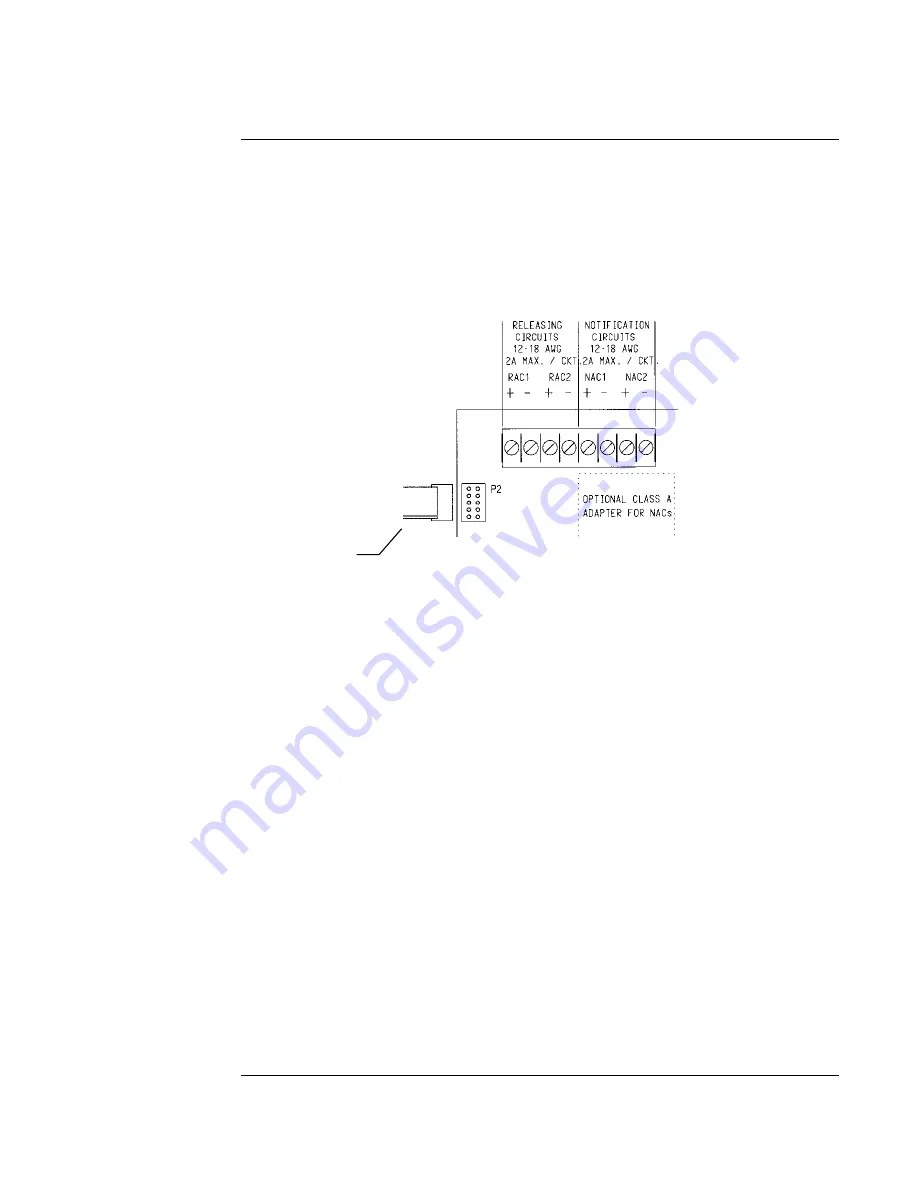
4. Connect the other end of the cable to the service port on the AutoPulse Z-10 FACP. The
Service port, labeled P2, is located on the top left of the AutoPulse Z-10 motherboard. Make
sure the stripe on the cable is positioned at the bottom, as shown in the following figure.
Figure 5-2. Connecting Cable to Service Port
5. Use a terminal emulation program, such as Windows HyperTerminal to establish a serial
communication session with the AutoPulse Z-10. Set the serial communication parameters
for the PC port to which the serial cable is connected, as follows:
9600 baud
no parity
8 data bits
1 stop bit
6. To display the historical log, enter an “L,” followed by a carriage return, at the dash prompt.
7. To view the timestamp used by the panel, enter a “T,” followed by a carriage return.
To change the timestamp, enter the following command at the dash prompt (where
HH
is the
hour,
MM
is the minutes, and
SS
is the seconds).
T
HH:MM:SS
Each field must be separated by a colon.
8. To view the current date set on the panel, enter a “D,” followed by a carriage return, at the
dash prompt.
To change the date set on the panel, enter the following command at the dash prompt (where
MM
is the month,
DD
is the date, and
YY
is the year).
D
MM
/
DD
/
YY
Viewing Historical Log/Setting Time and Date
Procedure
Stripe
Part No.
431206
Serial
Cable
Summary of Contents for AutoPulse Z-10
Page 1: ...Doc No 430545 Part No 579 357 Rev U 0579357T ...
Page 2: ...Blank Page Back of Front Cover ...
Page 6: ...vi ...
Page 32: ......


