


Page 60
E Series Ethernet Radio – User Manual
Part J – Appendices
Appendix A - Firmware Updates
Part J – Appendices
Remote and Exciter Firmware update
Overview
Firmware updates are to be performed on a unit connected locally to
the PC. It is recommended that all cabling to the unit be disconnected
prior to commencing firmware update to minimise any interruption to
the process or disturbances of signals on cables still connected. All
other TView+ Management Suite utilities should also be exited during
the firmware update process.
Please down load the Latest Firmware Pack from the Trio website At:
http://www.triodatacom.com/scada_supp.php
Firmware Update Method for Radios Se-
rial No: 600000 or above.
To perform a Firmware update on an E series Ethernet Radio under
this you must follow the following instruction to establish a connection
to it’s embedded HTML Web server.
IP Address and Factory default Reset
The Factory default IP address of the ER45e is 192.168.2.15 if you
do NOT know the IP address of your ER45e you are trying to perform
a Firmware Upgrade on, you will need to activate a factory default
reset. A factory default reset will cause all previous configuration
setting to be erased and returned to the factory default values.
A factory default on a remote can be initiated by applying DC power
to the radio (wait 45 seconds), depress the factory default switch by
using a paper clip or a similar object and keep the switch depressed
for 5 seconds until all 4 LEDs illuminate solid GREEN indicating
the radio will return to the factory defaults settings. Please wait 30
seconds for the factory default reset process to complete.
A factory default on a Base station can be initiated by applying DC
power to the radio (wait 45 seconds). Then depress the Display
ON/OFF switch until the Display LEDs begin to flash (Approx 15
seconds), then release the button for at least 1 second, then depress
it again until the front LED indicators stop flashing (Approx 15
seconds).
Connection to Embedded HTML Server
The ER45e Radio contains an embedded Web Server. To Perform a
Firmware upgrade in the
ER45e, you will need to
connect your PC to the
LAN port of your radio,
and direct your browser
to the IP address of the
locally connected unit. It
is strongly recommended
that you follow these
guidelines for successful
connection to the radio.
1) Ensure the ER45e is powered and has fully booted. This is
indicated by a solid green power LED. It takes about 45 seconds
for the radio to fully power up.
2) Disconnect you PC from any other internet/LAN networks.
Failure to do so may create a conflict in IP addresses or the ER45e
might not meet the subnet mask specified by you network.
3) Connect your PC Ethernet Port to the units LAN Port using an
RJ-45 Patch Cable. Cross over cables will also work. Successful
cable connection is indicated be a solid Green “Link LED on the
LAN port.
Note: The LAN port will also flash amber when data is being
transferred.
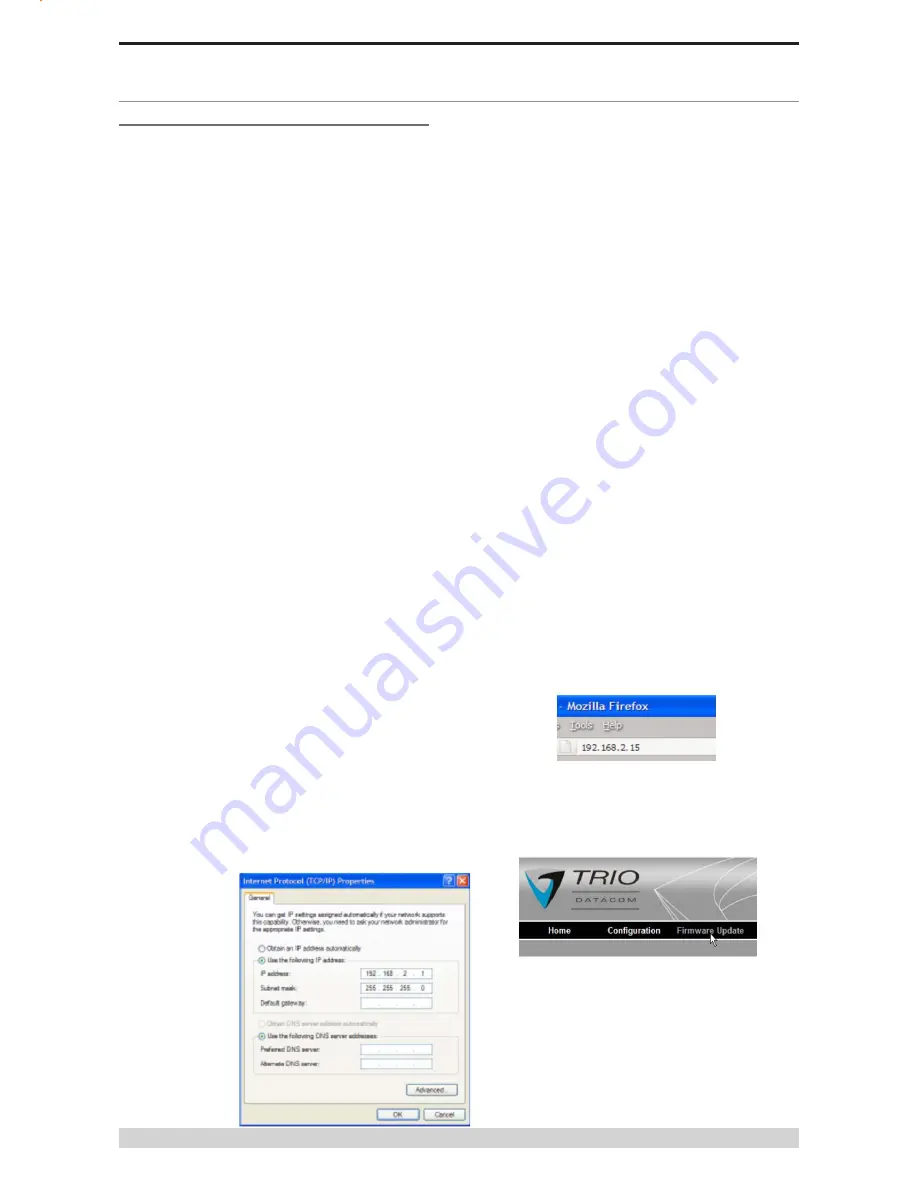
4) Ensure your PC LAN Port is configured for a suitable IP address.
You can do this by configuring the LAN settings via the control pan
-
el. Navigate to your Windows “Start” button and open Control Panel
-> Network Connections -> Local Area Connection -> Properties.
Scroll down and select “Internet Protocol (TCP/IP) and the click on
Properties. You will now see the window as shown. Ensure “Obtain
IP Address Automatically” is NOT selected. It is recommended that
you manually specify a compatible IP Address. In this example, a
factory default radio is being Firmware upgraded. The IP address
of the radio is 192.168.2.15 and a compatible IP address for the
PC would be 192.168.2.1. Click OK to accept the changes.
Note: Check with your Network Administrator before allocating IP
addresses as each LAN/WAN network is different.
5) You should start your web browser and insert the IP address of
the ER45e into the URL. In this case, we type “192.168.2.15” and
the configuration page is now displayed in the browser.
Note: You may need to disable a web proxy (if in use) or disable or
modify your local firewall to ensure security rules allow access to
the ER45e’s IP address.
Performing a Firmware Update
Once you have entered the Radios embedded HTML home page.
Up the top of the page there are some buttons, select the Firmware
Update button.
Allow a few moments for the Firmware Update page to load. Once


