


158
18.2
MULTI-POINT CALIBRATION PROCEDURE
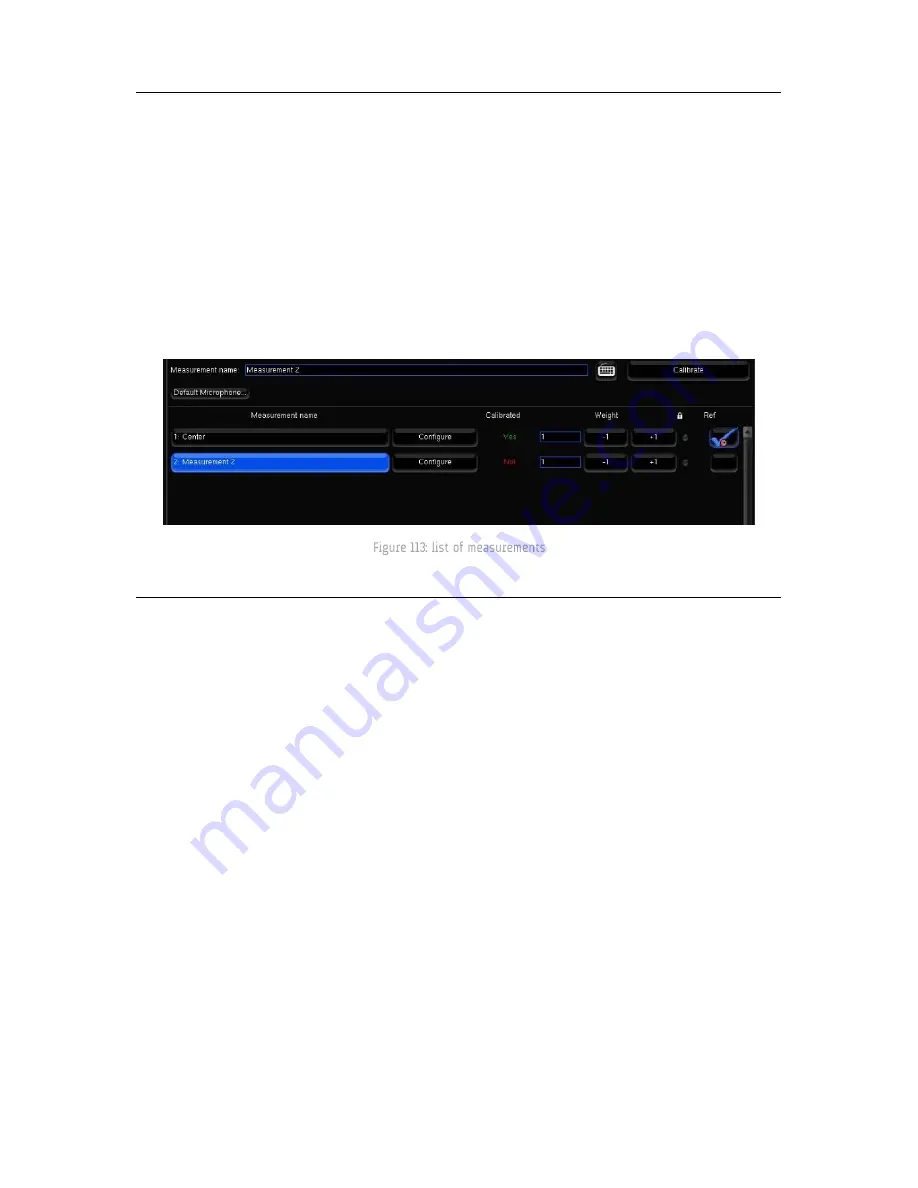
Multi-point measurements can be performed sequentially using the same microphone.
You can add a new measurement by pressing the “Add” button at the bottom of the page, or delete the selected
measurement by pressing “Delete”. You can also rename a measurement by editing the text box "Measurement name".
For each measurement, the “Calibrated” column indicates “Yes” if the measurement has been correctly performed, “No”
if it has not, and “Partial” if the calibration was interrupted before completion.
Each measurement contains the responses recorded during the calibration sound sequence.
Select the required measurement and press the “Calibrate” button to launch the calibration sequence.
Once every measurement has been calibrated, you can compute the acoustic correction filter that will best fit every point,
accordingly to their weight.
18.3
WEIGHTING MULTIPLE MEASUREMENTS
The “Weight” column allows you to set a weight to each measurement, from 0 to 100, to emphasis for example some
central points. You can bypass some points by setting their weight to 0, what can be useful in case one of the points
have failed the calibration but you don’t want to perform a calibration again.
The weight can be adjusted after a calibration; you don’t have to run a complete calibration to take weight changes into
account, just to press once the “Compute” button.
You can adjust the weight of the measurements with your mouse clicking on +1 or -1, or with your keyboard, with the up
(+1) and down (-1) arrows, or the page up (+10) and page down (-10) keys.
All the measurements with non-null weight should be fully calibrated before computing the acoustic correction
filters by pressing the “Compute” button. If some are partially or not calibrated at all, you will have to remove
the bad points or their entire measurements, for example by setting their weight to 0, before being able to
compute the acoustic filters.
The lock disables measurement settings edition.
The “ref” column indicates which measurement is the reference point. The reference point is unique, it can be
modified after the calibration. Taking a new measurement into account as reference point requires to
recompute the compensation filters.
Before saving your preset in the “Presets” page, you have to save the multipoint parameters by pressing the
“Save changes” button. These parameters are automatically saved (and the button disabled) when you leave
the point list, and when you run a calibration or a computation.
Summary of Contents for Altitude 32
Page 1: ...1...
Page 2: ...2...
Page 3: ...3 ALTITUDE32 USER GUIDE Software version v4 1 Last update February 1 2017...
Page 4: ...4...
Page 14: ...14...
Page 20: ...20 1 5 UNPACKING THE ALTITUDE32 You will find in the Altitude32 packaging...
Page 85: ...85...
Page 122: ...122 Point the front red LED to the center of the speakers set...
Page 165: ...165 CONNECTION ORDER...
Page 166: ...166...
Page 167: ...167...


