© Copyright 2020 TRENDnet. All Rights Reserved.
TRENDnet User’s Guide
TEW-831DR
45
Access Control (IP Protocol Filter)
Advanced > Security > Access Control
You may want to block computers or devices on your network access to specific ports
(used or required by a specific application) to the Internet.
Block a specific service or multiple services
1. Log into your router management page (see “
Access your router management page
on page 10).
2. Click on Advanced and click on Security, then click on Access Control.
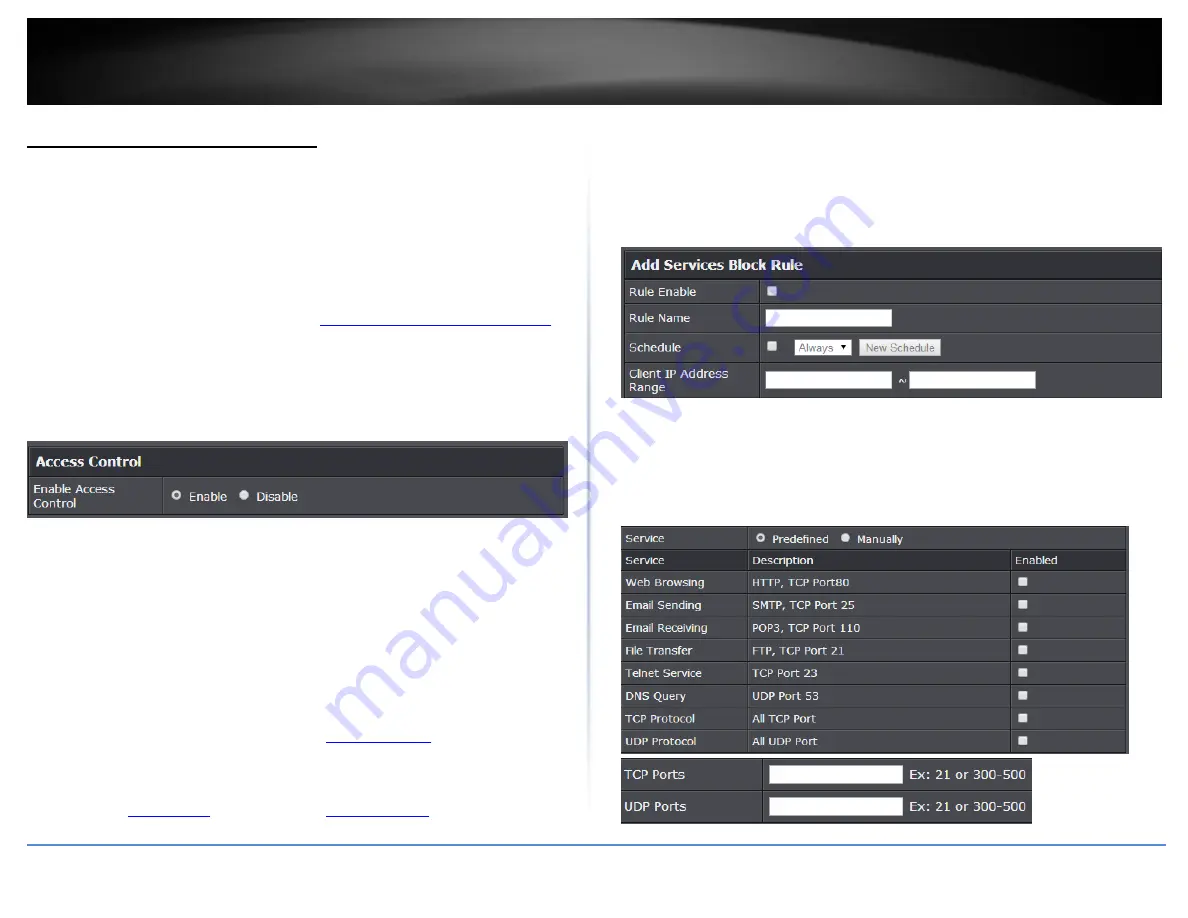
3. Next to Enable Access Control, click the Enable option.
4. Review the Add Services Block Rule. Click Add to save the rule. Commit your changes
to the router by clicking on Apply/Discard Changes in the left-hand menu, and click
Apply & Reboot.
Rule Enable – Checking this option turns on the Protocol/IP Filter and
unchecking turns it off.
Rule Name – Enter a name for the Protocol/IP Filter.
Schedule (Optional) – The schedule function allows you to define a schedule
when the access control filter should be turned on. T To define a new schedule,
click New Schedule and refer to page 42 “
”. After you have
created a new schedule, click the drop-down list and the new schedule will be
available for selection. Note: Before applying scheduling, please ensure your Time
settings are configured correct and you have defined a schedule. See page 41 to
configure
” to create a schedule.
Client IP Address Range – Enter the IP address or IP address range to apply the
protocol/IP filter. (e.g. 192.168.10.20-192.168.10.20 or 192.168.10.20-
192.168.10.30).
Note: The filter will not be applied to IP addresses outside of the range
specified.
To simplify configuration, there is a list of commonly used pre-defined Protocol/IP Filters
to modify otherwise, you can choose to manually add a new Protocol/IP Filter.
Service – Select Predefined to select from the predefined services listed or
select Manually to specifically enter the TCP or UDP port number or port range
numbers to block. (e.g. 80-80 or 20-21).


