


75
Chapter 12
Customize Your Network Settings
¾
To change the security option:
1. Go to
Advanced
>
Wireless
>
Wireless Settings
.
2. Select the wireless network
2.4GHz
,
5GHz
or
60GHz
.
3. Select an option from the
Security
drop-down list. We recommend you don’t change
the default settings unless necessary. If you select other options, configure the
related parameters according to the help page.
In addition
•
Mode
- Select a transmission mode according to your wireless client devices. It is
recommended to just leave it as default.
•
Channel Width
- Select a channel width (bandwidth) for the wireless network.
•
Channel
- Select an operating channel for the wireless network. It is recommended
to leave the channel to
Auto
, if you are not experiencing the intermittent wireless
connection issue.
•
Transmit Power
- Select either
High
,
Middle
or
Low
to specify the data transmit power.
The default and recommended setting is
High
.
12. 7. Use WPS for Wireless Connection
Wi-Fi Protected Setup (WPS) provides an easier approach to set up a security-protected
Wi-Fi connection.
1. Visit
http://tplinkwifi.net
, and log in with your TP-Link ID or the password you set for
the router.
2. Go to
Advanced
>
Wireless
>
WPS
.
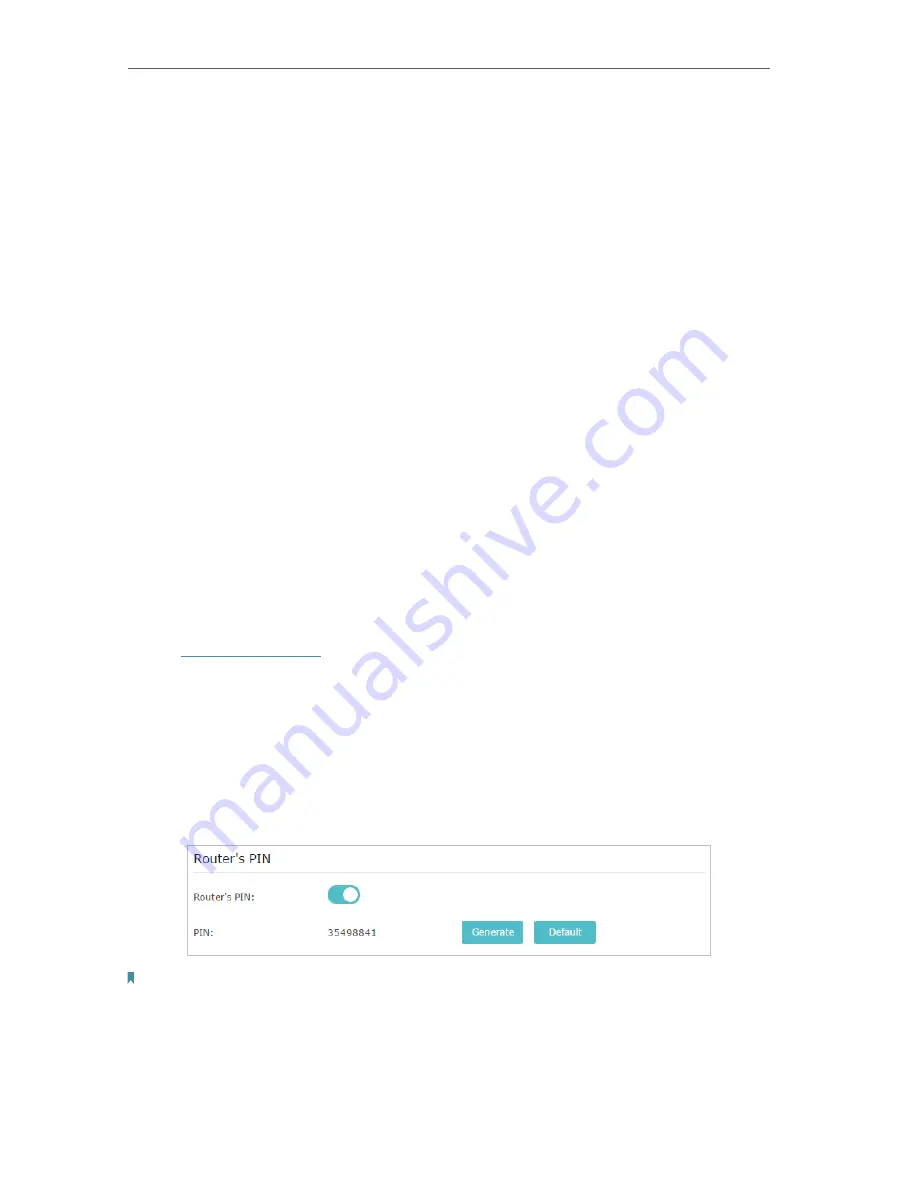
12. 7. 1. Set the Router’s PIN
Router’s PIN is enabled by default to allow wireless devices to connect to the router
using the PIN. You can use the default one or generate a new one.
Note:
• If you want to enable/disable the WPS feature, go to
System Tools
>
System Parameters
>
WPS
, tick or untick the
Enable WPS
checkbox.
• PIN (Personal Identification Number) is an eight-character identification number preset to each router. WPS supported
devices can connect to your router with the PIN. The default PIN is printed on the label of the router.
Summary of Contents for AD7200
Page 1: ...REV2 0 0 1910012084 User Guide AD7200 Multi Band Wi Fi Router AD7200...
Page 15: ...Chapter 3 Log In to Your Router...
Page 33: ...29 Chapter 5 TP Link Cloud Service...
Page 47: ...43 Chapter 7 USB Settings Windows Mac 4 Select the printer you share then click Apply Windows...
Page 88: ...84 Chapter 13 VPN Server 7 The PPTP VPN connection is created and ready to use...