


9
Chapter 2
Connect the Hardware
3. Connect the modem to your router’s Internet port with an Ethernet cable.
4. Turn on the modem, and then wait about
2 minutes
for it to restart.
5. Connect the power adapter to the router and turn on the router.
6. Verify that the following LEDs are on and solid to confirm the harware is connected
correctly.
Power
On
On
Internet
5GHz
On
2.4GHz
On
60GHz
On
Note:
• If all the LEDs are off, press the LED On/Off button
for 1 second, and then check the LEDs again.
• If the 2.4GHz, 5GHz and 60GHz LEDs are off, press and hold the Wi-Fi On/Off button
for about 2 seconds. Within
a few seconds, all the three LEDs should turn solid on.
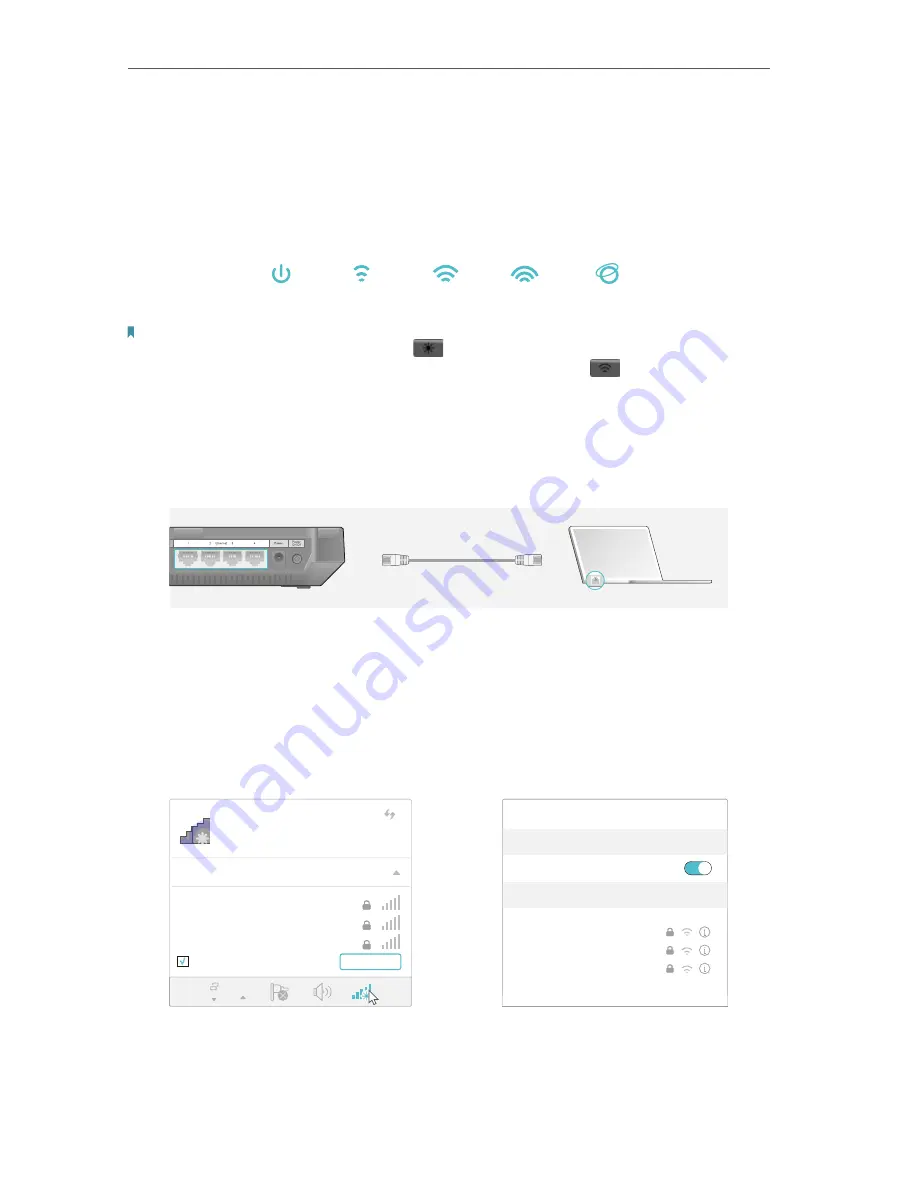
7. Connect your computer to the router.
•
Method 1: Wired
Turn off the Wi-Fi on your computer and connect the devices as shown below.
Ethernet Cable
•
Method 2: Wirelessly
1 ) Find the SSID (Network Name) and Wireless Password printed on the label at
the bottom of the router.
2 ) Click the network icon of your computer or go to Wi-Fi Settings of your smart
device, and then select the SSID to join the network.
Computer
Smart Device
or
Connections are available
Wireless Network Connection
Connect automatically
Connect
√
TP-LINK_XXXX
TP-LINK_XXXX_5G
TP-LINK_XXXX_60G
Wi-Fi
Wi-Fi
TP-LINK_XXXX
CHOOSE A NETWORK...
Other...
<
Settings
TP-LINK_XXXX_5G
TP-LINK_XXXX_60G
Summary of Contents for AD7200
Page 1: ...REV2 0 0 1910012084 User Guide AD7200 Multi Band Wi Fi Router AD7200...
Page 15: ...Chapter 3 Log In to Your Router...
Page 33: ...29 Chapter 5 TP Link Cloud Service...
Page 47: ...43 Chapter 7 USB Settings Windows Mac 4 Select the printer you share then click Apply Windows...
Page 88: ...84 Chapter 13 VPN Server 7 The PPTP VPN connection is created and ready to use...