e-STUDIO181/211
© 2009 TOSHIBA TEC CORPORATION All rights reserved
FIRMWARE UPDATING
6 - 4
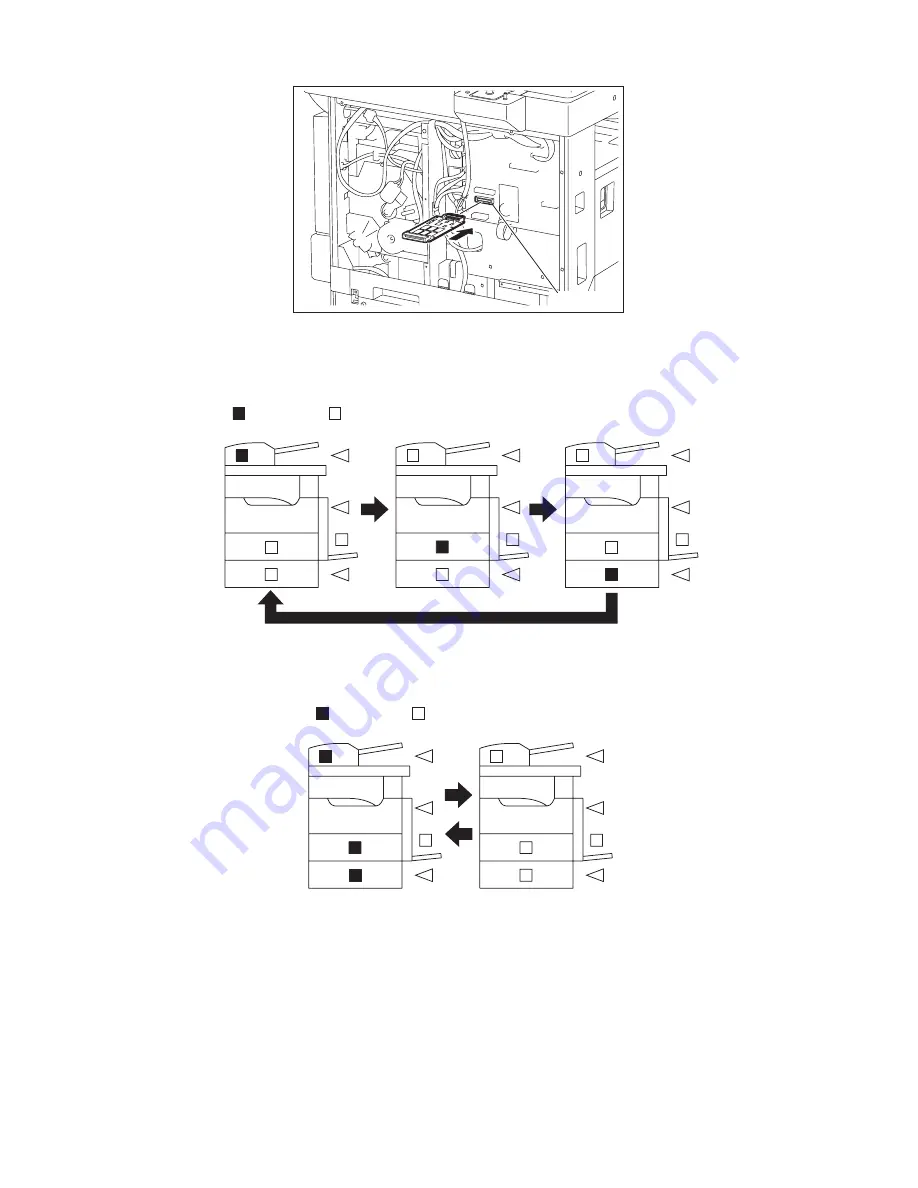
(4) Connect the download jig with the connector (CN1) on the MAIN board.
Fig. 6-5
(5) Turn ON the power.
Downloading starts automatically and the processing status is displayed on Control panel.
Fig. 6-6
(6) After the update is completed properly, the LED (DRAWER and Original setting) on the control
panel blinks.
Fig. 6-7
When the update is not completed properly, the LED (Paper jam position) on the control panel
blinks. Turn OFF the power, and then check the following items. After confirming and clearing the
problems, restart updating from the beginning.
• Is the download jig connected properly?
• Is the updating data written to the download jig properly?
• Do the download jig and the equipment operate properly?
Connector
: ON
: OFF
: ON
: OFF
Summary of Contents for e-STUDIO181
Page 14: ...e STUDIO181 211 2009 TOSHIBA TEC CORPORATION All rights reserved CONTENTS 4 ...
Page 138: ...e STUDIO181 211 2009 TOSHIBA TEC CORPORATION All rights reserved ADJUSTMENT 3 56 ...
Page 202: ...e STUDIO181 211 2009 TOSHIBA TEC CORPORATION All rights reserved TROUBLESHOOTING 5 48 ...
Page 220: ...e STUDIO181 211 2009 TOSHIBA TEC CORPORATION All rights reserved POWER SUPPLY UNIT 7 4 ...
Page 222: ...e STUDIO181 211 2009 TOSHIBA TEC CORPORATION All rights reserved WIRE HARNESS CONNECTION 8 2 ...
Page 225: ......
Page 226: ......


