


G
etting Started
English
-
15
G
etting Started
14
-
English
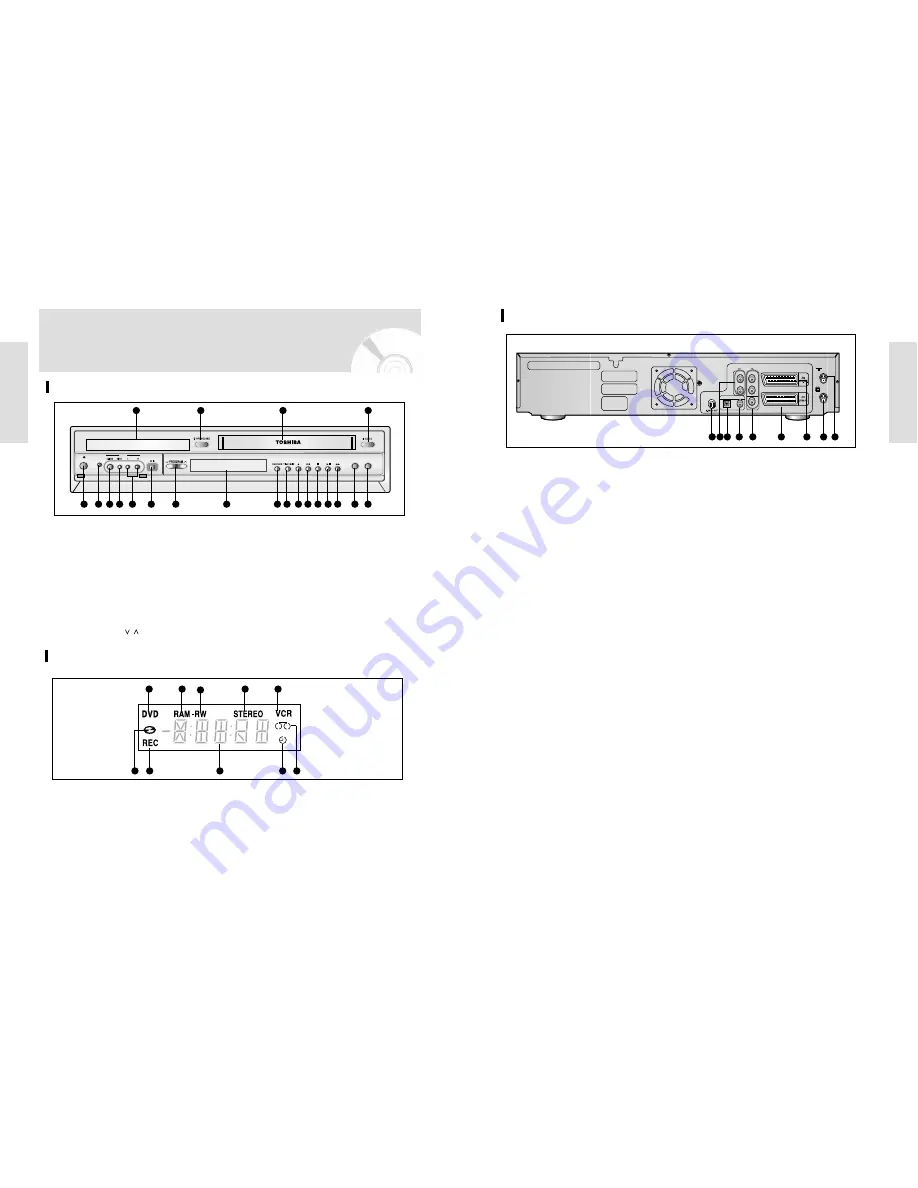
Rear Panel
DIGITAL AUDIO OUT
AUDIO OUT
OPTICAL
COAXIAL
R
R
L
VIDEO
L
1
3
4
5
6
8
2
1.
S-VIDEO OUT JACK
2.
AUDIO OUT L,R JACK
3.
DIGITAL AUDIO OUT JACK (OPTICAL)
4.
DIGITAL AUDIO OUT JACK (COAXIAL)
5.
AUDIO/VIDEO JACK
6.
AV1 (EURO AV) IN/OUT SCART
(EURO-21) SOCKET
7.
AV2 (DEC./EXT.) SCART
(EURO-21) SOCKET
8.
OUT TO TV CONNECTOR
9.
AERIAL IN CONNECTOR
9
7
Front Panel
Description
Front Panel Display
1
2
3
4
5
7
6
8
9
10
1. When the indicator is on, DVD is activated.
2. DVD-RAM is activated.
3. DVD-RW or DVD-R is activated.
4. When you watch STEREO channel or playback
Hi-Fi VCR tapes, STEREO indicator lights.
5. VCR is activated.
6. DVD or CD media is loaded.
7. Record function is working.
8. The time, counter position or current deck
status is indicated.
9. When you set a Timer recording, it or cur-
rentdeck status is indicated. this indicator is
light.
10. VHS Videotape is loaded.
DUBBING
TO DVD TO VCR
ON/STANDBY INPUT SELECT
I /
AUX
1
2
5
6
7
8
9
10
11
12
13 14
15 16 17 18 19
20
21
3
4
1. DVD DECK
2. DVD OPEN/CLOSE BUTTON
3. VCR DECK
4. VCR EJECT BUTTON
5. ON/STANDBY BUTTON
6. INPUT SELECT BUTTON
7. S-VIDEO INPUT JACK
8. VIDEO INPUT JACK
9. AUDIO L.R INPUT JACK
10. DV IN JACK
11. PROGRAM
/ BUTTON
12. FRONT PANEL DISPLAY
13. DVD/VCR SELECT BUTTON
14. TIME SLIP BUTTON
15. RECORD BUTTON
16. REW/SKIP BUTTON (VCR/DVD)
17. STOP BUTTON
18. PLAY/STILL BUTTON
19. F.F/SKIP BUTTON (VCR/DVD)
20. TO DVD BUTTON
21. TO VCR BUTTON


