


42
Connecting your TV
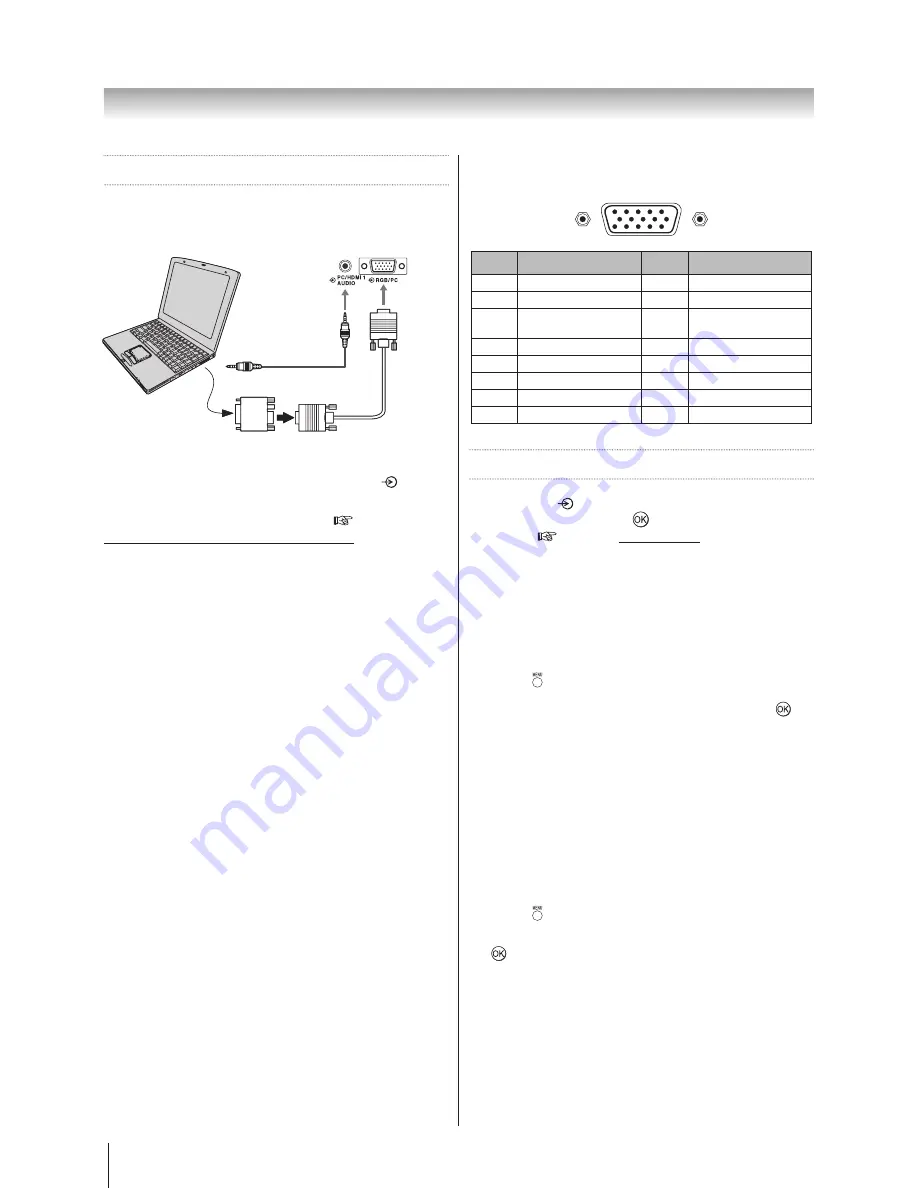
Connecting a computer
An analogue RGB (15 pin) computer cable can be
connected.
TV back view
Mini D-sub
15 pin
Conversion adapter
(if necessary)
Computer
RGB PC cable
Audio cable for
PC-to-TV
connection
Connect a PC cable from the computer to the
RGB/
PC
terminal on the back of the TV.
For acceptable PC signal formats
(
page 43
Acceptable PC signals through HDMI terminals
).
However, these signal formats are converted to match
the number of pixels of the LCD panel.
Therefore, the TV may not display small text properly.
If you connect this unit to your PC, the compressed
image is displayed in S-XGA mode, therefore the picture
quality may deteriorate and characters may not be read.
Notes:
•
Some PC models cannot be connected to this TV.
•
There is no need to use an adapter for computers
with DOS/ V compatible mini D-sub 15 pin terminal.
•
A bar may appear in the upper, lower, right or left
side of the screen, or parts of the picture may be
obscured depending on some signals. This is not the
malfunction.
•
If the edges of the picture are stretched, readjust the
picture position adjustments in the PC of PICTURE
menu.
•
Depending on the specification of the PC you are
playing the DVD-Video on, and the DVD’s title, some
scenes may be skipped, or you may not be able to
pause during multi-angle scenes.
Signal names for mini D-sub 15 pin connector
5
10
6
15
11
1
Pin assignment for RGB/PC terminal
Pin No. Signal name
Pin No. Signal name
1
R
9
VGA-5V
2
G
10
Ground
3
B
11
NC (not
connected)
4
NC (not connected)
12
VGA-SDA
5
NC (not connected)
13
H-sync
6
Ground
14
V-sync
7
Ground
15
VGA-SCL
8
Ground
Using the PC setting
•
First, press
to display the video input source list,
then press ▲ or ▼ and
to select the PC input
mode. (
page 28
Input Selection
)
•
This function may not be available for some signal or
if no signal is received.
•
The optimum points of the clock phase and sampling
clock adjustments may be incomprehensible
according to the input signals.
Adjusting the picture settings
1. Press
and use ◄ or ► to select
SETUP.
2.
Use ▲ and ▼ to select
PC Setting
and press
.
3.
Use ▲ or ▼ to select
Horizontal Position
,
Vertical
Position
,
Clock Phase
, or
Sampling Clock
and
use ◄ or ► to adjust your preference..
Auto Adjust for PC
Adjust Horizontal Position, Vertical Position, Horizontal
Clock, and Clock Phase automatically. Depending on the
type of the signal, there is a possibility that the display
may not be adjusted in its optimum condition with this
function. In that case, please adjust each item manually.
1. Press
and use ◄ or ► to select
SETUP
.
2.
Use ▲ and ▼ to highlight
Auto Adjust
and press
.
Summary of Contents for 32AV800AZ
Page 50: ...1506 0GLM000 ...


