


IT
ANNEXES
5
5.1
MAINTENANCE
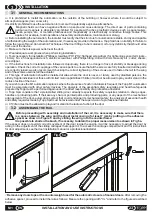
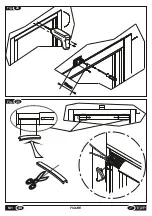
The M1 actuator does not need any particular maintenance. However, in certain sites, there may be a deposit of dust on
the glide rail that causes malfunctioning of the machine or unusual noise.
In this case we recommend dismantling the rail automation and cleaning the rail and rotor with a damp cloth, taking care to
remove any metal scraps that could be attracted by the magnetic force.
It is recommended to use electrical tape and to bond it to the rotor so that metal scraps remain on the adhesive surface and
can be easily removed
If the malfunctions persist after cleaning, contact the TOPP SpA assistance service.
Any repairs on the automation, other than those indicated above, must be authorized by TOPP SpA. Unauthorized repairs
are not permitted.
5.2
SPARE PARTS AND ACCESSORIES AVAILABLE ON REQUEST
Always use original spare parts and accessories to ensure the safety and efficient operation of the automation and avoid
invalidating the warranty. Original spare parts and accessories must be ordered exclusively from the dealer or
manufacturer, communicating the type, model, serial number and year of construction of the automation.
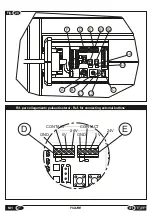
The following accessories can be requested for each automation:
- 1 microwave sensor;
- 1 infrared sensor
- 1 TS8 radio control device:
-1 Hs1 Hand sensor.
If it should be necessary to use accessories other than those mentioned, the installer can contact our technical assistance
service directly with the special requests.
Demolition of the automation must be carried out in respect of the legislation in force on the subject of environmental
safeguards. Proceed with differentiation of the parts of the automation according to the different types of material.
5.3
DEMOLITION
30
INSTALLATION AND USE INSTRUCTIONS
M1
EN
Summary of Contents for M1
Page 2: ...2 ISTRUZIONI PER L INSTALLAZIONE E L USO IT M1 ...
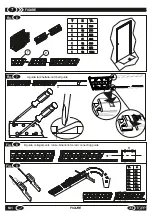
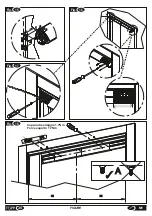
Page 34: ... 34 FIGURE M1 Fig 11 5 0 Fig 10 ...
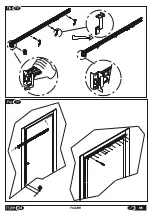
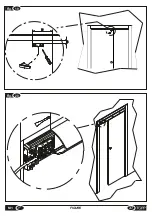
Page 37: ...Fig 19 75 10 Fig 20 37 M1 FIGURE ...
Page 38: ... M1 FIGURE 38 Fig 21 Fig 22 ...
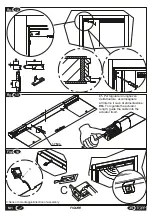
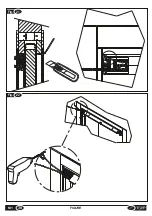
Page 40: ... M1 FIGURE 40 Fig 70mm 24 Fig 25 TOPP M1 TOPP M1 ...
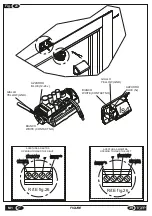
Page 42: ... M1 FIGURE 42 Fig 27 ...


