34
To change Crayon...
1. Press [B] or [C].
2. Enter the password followed by [=].
3. Press [B] or [C] to toggle the setting to ON.
4. Press the [Done] soft key to save the parameter.
Note: The default password is set to the serial number of the TigerStop.
Pusher Foot Offset
PF offset is the distance from the end of the pusher foot to the IR sensor on the TigerSaw 1000
crayon marking system.
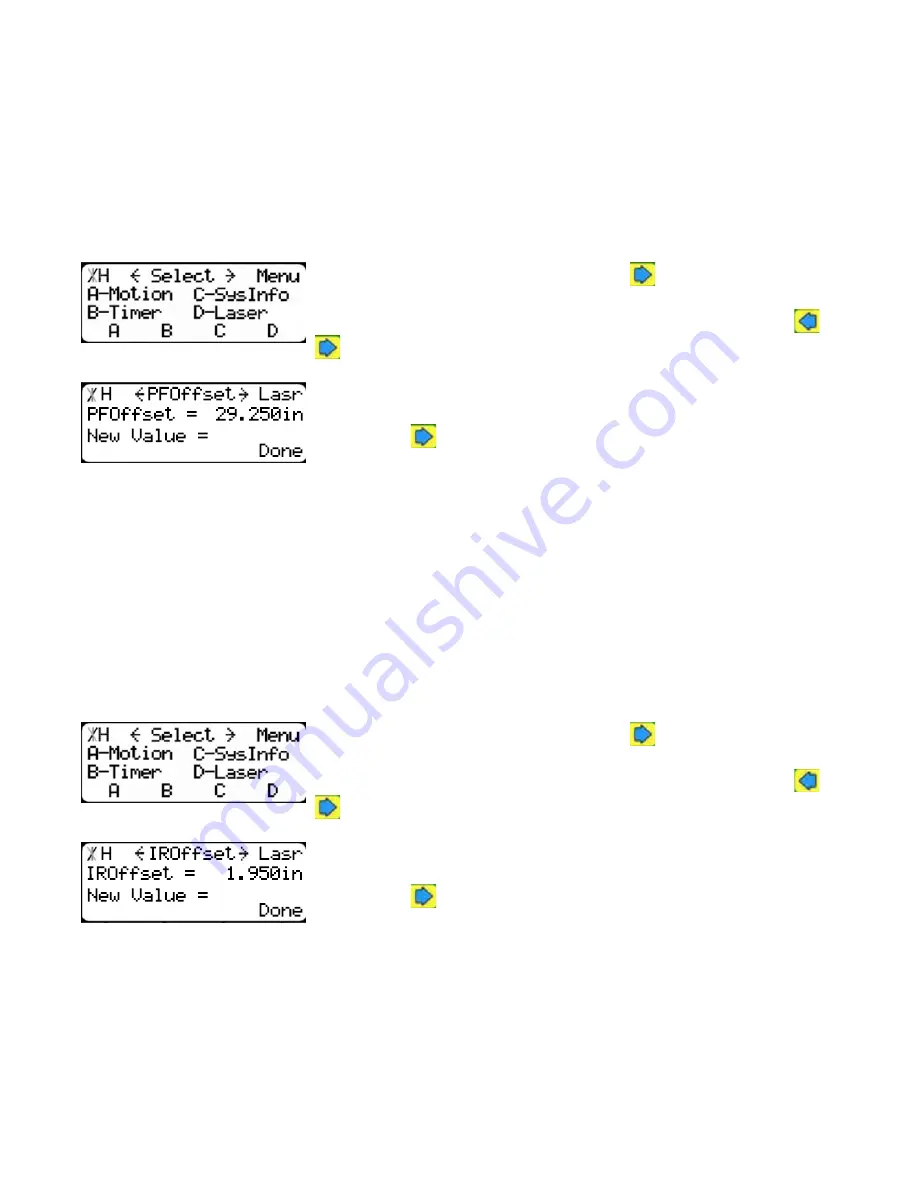
1.At the Menu Select screen, press the
button to access the sec-
ond menu screen.
Note: TigerStop has 3 menu screens. You can access them by pressing
or
.
2.Press the [Laser] soft key to access the Laser menu.
3.Press the
button 8 times.
To set PF Offset...
1. Measure from the end of the pusher foot to the red dot made by the infrared length sensor.
2. Enter the password followed by [=].
3. Enter the measurement from step 3 as the new PF Offset value.
4. Press the [Done] soft key to save the parameter.
Note: Measure as accurately as possible. This measurement is critical to the mark accuracy.
Infrared Offset
IR offset is the distance between the UV sensor and the infrared length sensor on the TigerSaw
1000 crayon marking system. The infrared length sensor will show up as a small red dot on the table a
few inches from the UV sensor range.
1.At the Menu Select screen, press the
button to access the sec-
ond menu screen.
Note: TigerStop has 3 menu screens. You can access them by pressing
or
.
2.Press the [Laser] soft key to access the Laser menu.
3.Press the
button 9 times.
To set IR Offset...
1. Measure from the middle of the UV sensor to the red dot made by the infrared length sensor.
Note: A UV crayon mark will light up under the UV sensor.
2. Enter the password followed by [=].
3. Enter the measurement from step 1 as the new IR Offset value.
Note: Measure as accurately as possible. This measurement is critical to the mark accuracy.
4. Press the [Done] soft key to save the parameter.
Note: The default password is set to the serial number of the TigerStop.
Summary of Contents for TigerSaw 1000
Page 1: ......
Page 2: ......
Page 8: ...5 TigerSaw Cap Guard TigerSaw Guard Back ...
Page 9: ...6 TigerSaw Guard Sides ...
Page 10: ...7 TigerSaw Blade Access Door In Feed and Out Feed Table ...
Page 11: ...8 Pusher Foot ...
Page 15: ...12 1 Assemble table legs ...
Page 24: ...21 7 Attach the Printer Stand M8 X 35 ...
Page 66: ......
Page 67: ......


