background image

The loudspeaker settings enable the player to direct the bass sounds (low frequencies) to the
subwoofer or to the loudspeakers that will best reproduce the acoustic effects intended by the disk
publisher. Your player cannot allow certain settings that would be inconsistent with optimum use of
your Home Cinema equipment.

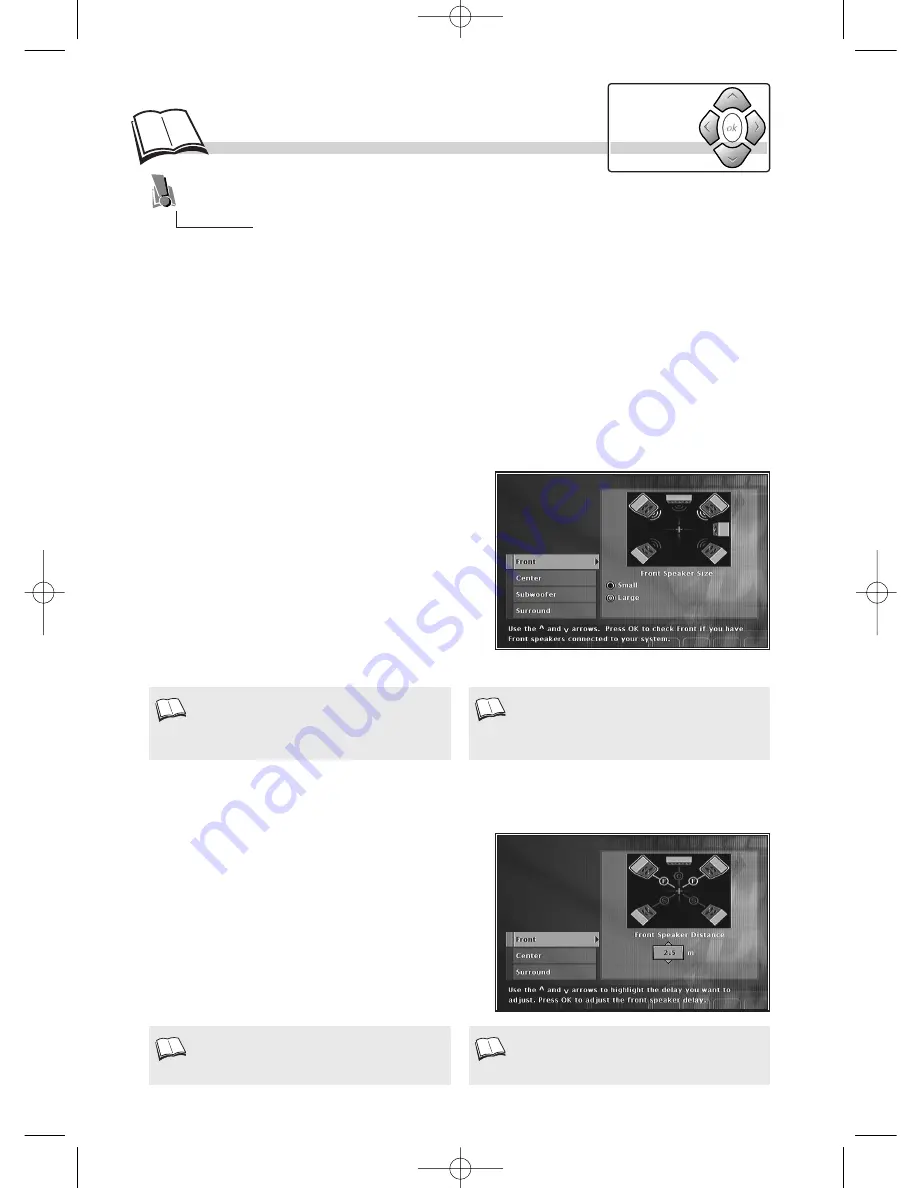
Front

: select 

Large 

(1

or 

Small

according to the size

of the speakers.

Center

: select 

None

, if you have not connected a

central speaker. Select 

Large 

(1)

or 

Small

according to

the size of the speaker.

Subwoofer

: select 

None 

if you have not connected a

bass box. If you have select 

Yes

.

Surround

: select 

None

, if you have not connected

back speakers. Select 

Large 

or 

Small

, depending on the

size of the speakers.

Speakers

Distance

14

This function enables optimisation of the “audio image” of DVDs according to the distance of the speakers
from the listening area.

Front

: adjust the distance between the spectator and the

front speakers 

(2)

(from 1.5 to 6 meters).

Center

: adjust the distance between the spectator and the

central speaker 

(3)

(from 1.5 to 6 meters).

Surround

: adjust the distance between the spectator

and the back speakers 

(3)

(from 1.5 to 3 meters).

The adjustments on this page allow you to adapt your DVD drive to 5.1 audiooutputs used to
connect an amplifier. You will thusdetermine the adjustment of the speakers connected to the
amplifier.

Large

: the bandwidth of the speakers should

cover the lowest frequencies (less than
50Hz).This is generally the case with big
speakers.

1.

The distance of the front speakers should not be
less than that chosen for the central speaker.

2.

The distance cannot be adjusted if you selected
"

None

".

3.

Installation of speakers. It is recommended that
you place your back speakers in such a way that
they are closer to the spectator than the front
and central speakers.

C

hannels 5.1 adjustments

Navigation
keys

When the player menu is displayed (in stop mode):

1.

select 

Sound 

using the 

Navigation

keys,

2.

press 

ok 

to validate,

3.

select a function (

Speakers

or 

Distance

) then validate with 

ok

,

4.

adjust the setting using the 

Navigation

keys.

DTH700_EN  13/08/02 15:26  Page 14

Summary of Contents for DTH700

Page 1: ...of its components It can be dangerous for you or for certain fragile components You could receive an electric shock or touch the laser beam Do not place your eyes close to the opening of the disc tra...

Page 2: ...ty video associated with still images audio tracks and interactive menus MP3 files The disks containing SOUND files in MP3 format JPEG files The disks containing IMAGES in JPEG format CD R CD RW Most...

Page 3: ...rsal remote control setting Keys that can be used Brand codes information Operation Advanced functions Precautions 1 Discs you can play 2 Initial setup 4 5 Before you start Initial setup of your remot...

Page 4: ...If you are not using the remote control for a long period of time remove the batteries Initial setup of your remote control Before you start Thank you for purchasing one of our videos Unpack the set...

Page 5: ...rn on your TV set 2 Turn on your DVD player by pressing the STANDBY ON button on the front panel The first time you turn on your player it will ask you to select a preferred language for the various d...

Page 6: ...nnections picture The connection setup shown on page 5 provides a rapid connection of your player This setup gives standard quality sound reproduction and an optimum quality picture RGB You may need t...

Page 7: ...o recorder Video recorder Audio Video amplifier not provided AV Cable Scart cable Scart cable Scart cable TV Your DTH 700 Your DTH 700 Video projector or or or Optical Cable Coaxial Cable Audio Cable...

Page 8: ...11 Pause playback and switch to Frame advance mode k pages 15 16 Repeats the last scene Each press steps backward 10 seconds during DVD playback Video DVD Direct access to Play mode from the function...

Page 9: ...age 15 8 Front panel display 9 AUDIO ONLY Cuts off all output to Video connections for Audio DVDs 10 PHONES Headphone connection VOLUME Adjusts the headphone volume level 11 13 15 14 12 On the display...

Page 10: ...sing ok 4 Change Settings by pressing the Navigation keys 5 To exit the menus press menu or title Disc Menu or go back to the previous menu by pressing return Player Menu Selecting menu functions and...

Page 11: ...VD kpage 20 To memorise and use markers on a Video DVD k page 19 To browse the images associated with an Audio DVD To reframe the DVD image according to the screen format of your TV To repeat the play...

Page 12: ...positioned on COMPONENT Warning If you select Progressive Scan On in the Display menu video output from the other Scart and RCA connections will be deactivated To reactivate video output from the oth...

Page 13: ...amplifier The sound effects of a 5 1 system are then simulated Select Sound then Virtual Surround and position the function on On with the ok key Dolby Digital is a sound compression technique elabor...

Page 14: ...to 6 meters Center adjust the distance between the spectator and the central speaker 3 from 1 5 to 6 meters Surround adjust the distance between the spectator and the back speakers 3 from 1 5 to 3 me...

Page 15: ...ss the info key to display the Info banner k page 11 or press pr To stop playback momentarily 2 press STOP once Press twice to stop it completely 3 Loading a disc Playing a disc Double sided discs hav...

Page 16: ...s chapters time elapsed audio and subtitles From the banner you can access certain functions directly using the Navigation keys Choose a title or a chapter DVD or a track CD Change the language of DVD...

Page 17: ...n is enabled It does not work with Video CDs Your player has several Play modes Standard play which follows the order of the tracks titles and chapters on the discs Random play which plays the sequenc...

Page 18: ...table With a DVD the title and chapter numbers will be displayed in the table To exit the programming function press the return key on the remote control To remove a section or range select it in the...

Page 19: ...at the repeat playback of the sequence is starting To stop repeating the sequence select Off with the Navigation keys or press STOP Repeat functions remain active until you turn them off open the disc...

Page 20: ...the menu During playback press yellow info key info strip is displayed on screen 1 Collie 2 Terrier 3 Bobtail 4 Shepdog 5 Husky Pedigree dogs Video DVD Camera angles On certain DVDs scenes may be reco...

Page 21: ...ad discs containing JPEG image files with a resolution of up to 2 million pixels If automatic playback mode was selected a slide show displaying each image recorded on the disc will start automaticall...

Page 22: ...ral groups that are accessed through the functions banne 1 While a disc is playing press the remote control s info key and use the navigation keys to select the group icon G 2 and then display which g...

Page 23: ...ality Conversely files with sampling rates below 128 kb sec will not be played properly Protection Do not try recording copyright protected MP3 files securized files are encrypted and code protected t...

Page 24: ...of the subtitles In the menu choose your preferred language for dialogues and subtitles If it is available on the DVD you will be playing it will be selected automatically The default language is the...

Page 25: ...th DVDs which have a DVD menu we recommend that you use the disc menus rather than the player menu You can also change the language of the dialogues and subtitles if they are available on the disc Dur...

Page 26: ...lock To enable the Lock Player function you must enter a password The Ratings Limits function enables you to control the type of discs or programs that your family can watch If certain discs contain...

Page 27: ...al player set up will not be heard or seen The disc s priority language default language is selected automatically If you want another language press key and key to select it temporarily for this disc...

Page 28: ...ur device s brand in the table of brands on the page 29 Highlight it with a pencil for example 3 Hold the menu key down and key in the 3 digit code corresponding to the make of your TV set Depending o...

Page 29: ...8 Formenti 019 Goldstar 020 Grundig 016 023 024 Hitachi 007 Imperial 016 JVC 013 Kneissel 020 025 Loewe 020 Loewe opta 019 020 Luxor 005 Metz 013 019 023 Mitsubishi 017 018 020 Mivar 016 Nokia 005 Nor...

Page 30: ...30 DTH700_EN 13 08 02 15 27 Page 30...

Reviews: