2
TS1001 Touch Screen Arming Station Installation Manual
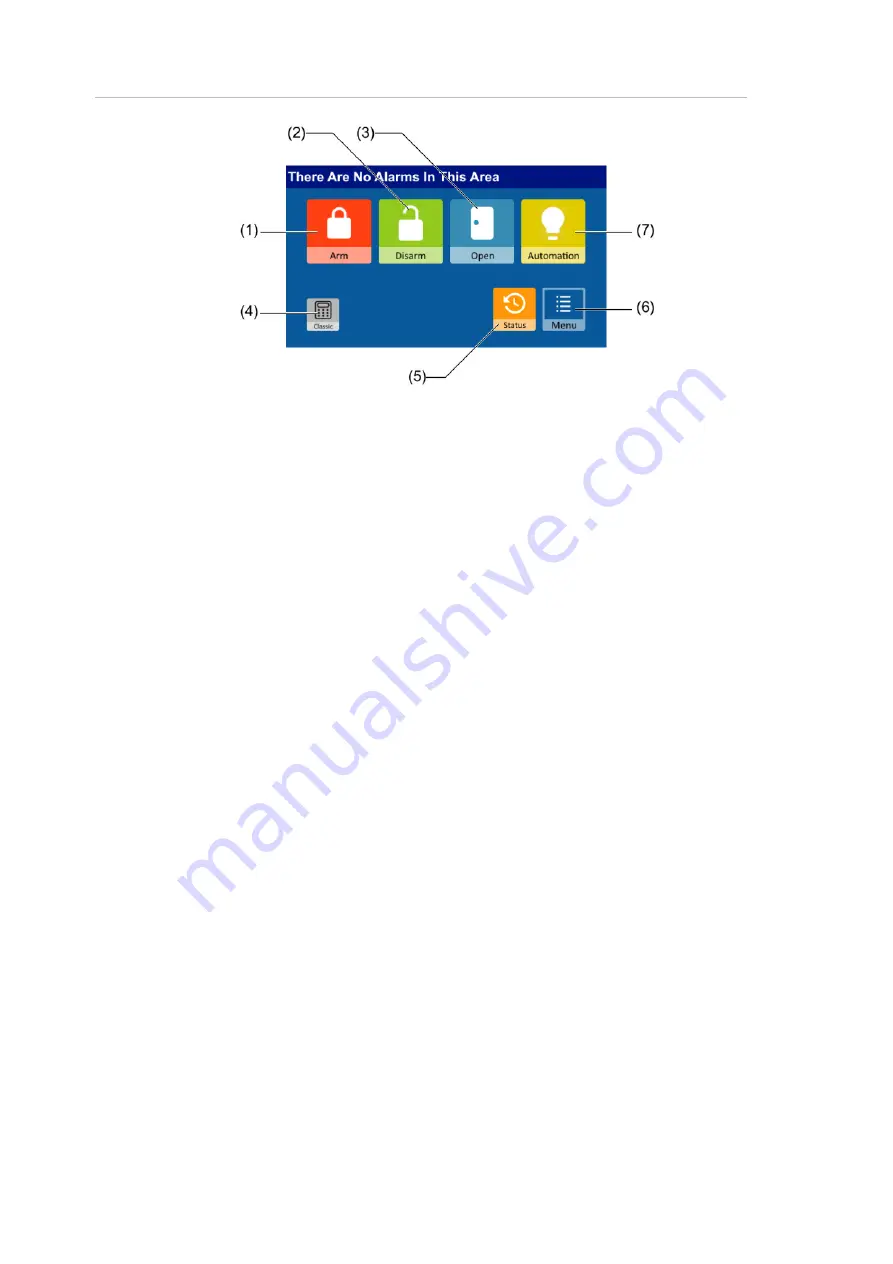
Figure 2: Home screen details
(1)
Arm button
(2)
Disarm button
(3)
Open button (optional)
(4)
Classic button (optional)
(5)
Status button
(6)
Menu button
(7)
Automation quick control button (optional)
In idle state, the touch screen displays the graphical mode Home screen
(Figure 2 above) with graphical buttons and physical keys to perform the
following functions:
• The Arm button (item 1) followed by an alarm code is used to arm assigned
areas, or to select and arm areas (depending on alarm group programming).
• The Disarm button (item 2) followed by an alarm code is used to disarm
assigned areas, or to select and disarm areas (depending on alarm group
programming).
• The optional Open button (item 3) followed by a door code is used to open
the RAS’s door. If door codes are used, and you enter an alarm code, then
the button works the same as the Arm button. Alternatively, an alarm code
can used to open the RAS’s door if “Door event flag on alarm codes” is set to
Yes in Install menu option 3. RAS Database.
• The optional Classic button (item 4) is used to access the login (code) prompt
for mimicking a conventional LCD keypad. When using classic mode, enter a
menu number to access a Challenger menu option.
• The Status button (item 5) displays the alarm Quick History when the system
is normal (no alarms). When alarms are present, the display shows the inputs
in alarm.
• The Menu button (item 6) is used to access the login (code) prompt for
graphical access to Challenger menu options.
• The optional Automation quick control button (item 7) is a shortcut to User
menu option 24-Automation Control. Automation quick control does not
require user authentication via PIN.


