background image

- 11 -

Insert card

a) 

The customer inserts their credit card.

b) 

The customer enters their 

PIN

 and presses 

OK

.

c) 

 The screen shows that authorization number, the transaction total and 

the receipts print. Go to step 5.

Swipe card

a) 

Swipe the credit card.

b) 

 The customer indicates if the card is 

<Other Card>

 or 

UnionPay

 press 

OK

. Select Visa for MasterCard and American Express cards as well. 

If 

<Other Card>

 is selected go to step C.

 If 

UnionPay

 is selected, enter the 

PIN

 and press 

OK

. The customer may 

bypass the PIN but if it is requested again, they 

must

 enter it.

c) 

Perform a fraud check on the card and signature.

d) 

 Verify the card info with what is on the terminal screen and press 

OK

Go to step 5.

Tap

a) 

 The  customer 

taps

 their contactless-enabled credit card on the 

contactless card reader. The customer may be required to insert or 

swipe their card in some cases. Go to step 5.

Manually enter card

 There is an inherent fraud risk for manually entered transactions. Please see 

page 7 for more information.

a) 

Enter the 

account number

 and press 

OK

.

b) 

Enter the 

expiry date

 and press 

OK

.

c) 

 Enter  the 

CVD number

 and press 

OK

. This number is generally located on 

the back of the credit card. This can be an optional step depending on 

your settings.

d) 

 If prompted, indicate if the card was present for the transaction (

Yes

 or 

No

). Go to step 5.

5. 

 The screen shows that authorization number, the transaction total and the 

receipts print.

 If the card was swiped or manually entered, the customer 

must

 sign the signature 

field on the merchant copy.  

 If it is a UnionPay transaction, the customer may be required to sign the receipt. 

Review the receipt to see if a signature is requested. 

If you don’t accept UnionPay cards, you will not see step b. Go to step c.

ENTER

AMOUNT

RECEIPTS

SWIPE CARD

MANUALLY 

ENTER CARD

ENTER # and  

EXP. DATE

ENTER CVD?

(optional)

IMPRINT CARD 

MESSAGE

FINISHED

ENTER PIN

INSERT CARD

TAP CARD

CONFIRM

AMOUNT

PAYMENT

METHOD

Sale (debit card)

Use these instructions to process a debit card purchase on the terminal.

1. 

Tap the 

Sale

 icon.

2. 

Enter the 

total dollar amount 

for the sale and press 

Enter

.

3. 

The customer confirms the dollar amount (

Yes

 or 

No

).

Tips (optional)

4. 

The customer selects a 

tip option

 and presses 

OK

.

5. 

The customer confirms the total amount (

Accept

 or 

Change

).

Payment method

6. 

 Perform one of the following payment methods: 

Insert

,

 Swipe 

or

 Tap

. The 

swipe option will be displayed, but it is not allowed for a debit sale.

Insert card

a) 

The customer inserts their debit card. Go to step 7.

Tap

b) 

 The  customer 

taps

 their contactless-enabled debit card on the contactless 

card reader. The customer may be required to insert or swipe their card 

in some cases. Go to step 10.

Summary of Contents for Desk 5000

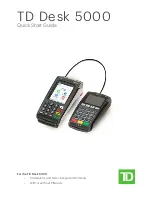
Page 1: ...TD Desk 5000 Quick Start Guide For the TD Desk 5000 Standalone and Semi Integrated terminals With or without PINpads...

Page 2: ...NOTICE The Toronto Dominion Bank reserves the right to make changes to specifications at any time and without notice The Toronto Dominion Bank assumes no responsibility for the use by the Merchant cu...

Page 3: ...ardholder Privacy and Security 7 Terminal security 7 Fraud prevention 7 Manually entered credit card transactions 7 Force post transactions are disabled by default 7 Call for authorization 8 Applicati...

Page 4: ...19 Changing terminal mode semi integrated terminals only 19 More features and functionality 19 Reporting 20 Business day reports 20 Troubleshooting 21 What problems can I easily resolve 21 Admin Menu...

Page 5: ...rect Payment UnionPay etc The TD Desk 5000 The terminal is solely for you the Merchant You will use the terminal to initiate transactions for customer s using credit or debit cards Depending on your s...

Page 6: ...19 Standalone Mode Home Screen Semi Integrated Mode Home Screen Hardware Standalone Terminal 1 Command keys Application key Cancel Correction OK or Enter 2 Touchscreen All terminal navigation is perfo...

Page 7: ...you have the clock function enabled You can request to have the following icons enabled for the Home screen Sale Settlement Report Reprint Logon and Logoff Return Void Force Post Pre Auth and P A Com...

Page 8: ...isplays important information icons and different ways to access your terminal s functionality They are 1 Communication icon This icon indicates whether the terminal is connected to the network It wil...

Page 9: ...amber panel along the top of terminal and remove the old paper roll 2 Unwrap a new paper roll and place it in the paper chamber so that the loose end of the paper feeds up from under the paper roll to...

Page 10: ...er to enter information and select options regarding the transaction If you don t have a PINpad the customer will use the terminal to enter information 1 Function keys The F1 and F4 keys can be used t...

Page 11: ...nt Fraud pamphlet in your Merchant Welcome Kit The following information will help you protect yourself from fraudulent transactions Manually entered credit card transactions There is an inherent risk...

Page 12: ...ing the card They will also tell you how to proceed you have any doubts about the validity of a card or a transaction 1 Call for a voice authorization 2 Request a CODE 10 authorization The financial i...

Page 13: ...o adjust your accepted card list please contact the TD Merchant Solutions Help Desk to discuss Sale credit card Use these instructions to process a credit card purchase on the terminal for card presen...

Page 14: ...tless card reader The customer may be required to insert or swipe their card in some cases Go to step 5 Manually enter card There is an inherent fraud risk for manually entered transactions Please see...

Page 15: ...omer confirms the dollar amount Yes or No Tips optional 4 The customer selects a tip option and presses OK 5 The customer confirms the total amount Accept or Change Payment method 6 Perform one of the...

Page 16: ...this is a UnionPay transaction the customer may be required to sign the receipt Review the receipt to see if a signature is requested If you don t use cashback you will not see step 6 7 or 8 If you do...

Page 17: ...unt number and press OK b Enter the expiry date and press OK This is four digits in length 4 The transaction is approved and the receipts are printed Return debit You use this option to fully or parti...

Page 18: ...ction Void Transaction Recall You use this option to pull up any transaction that is in an open batch on a terminal and review it with the option of voiding it If the transaction is in a closed batch...

Page 19: ...this information on the receipt or this can be provided by the customer f RRN displays a transaction by its RRN number You can find this information on the receipt g Approval Code displays a transacti...

Page 20: ...displays every transaction performed by a specific clerk number in the open batch on this terminal d Invoice displays a transaction by its invoice number You can find this information on the receipt...

Page 21: ...r REF The reference number Signature The card issuer determines when a signatures is required for a transaction Host Response Always ensure that the transaction was APPROVED as it could be DECLINED or...

Page 22: ...ends you ll receive same or next business day deposit for credit and debit card totals Otherwise they will be forwarded to the next business day Forced settlement occurs if a manual settlement is not...

Page 23: ...d that you do so 1 Go to the Home screen and tap the mode icon in the top right of the screen 2 Confirm that you wish to continue Yes or No 3 Enter a valid Admin ID and password and tap Enter More fea...

Page 24: ...s of that card type Clerk 2 Select whether the report is a Summary Report or a Tip Report 3 Select whether Is it for All Clerks or Single Clerk If it is a single clerk enter the ID 4 PRINT or DISPLAY...

Page 25: ...ecurely plugged into the modem router Display screen is blank 1 Ensure that the power cable is firmly connected to the power port and the electrical outlet Magnetic stripe card reader won t read cards...

Page 26: ...Host Batch Inquiry Print Display Setup Menu Communications ComsPriority Dial Ethernet Display Params Disabled Accesscode Baud DialRetry Dial Tone DialType Predial Current Setup Ethernet Setup Timer Se...

Page 27: ...g Setting On Off Setting Tip Guide Tip Guide Values Setting Setting Setting Setting Setting Setting Setting Setting Setting Term Settings Idle Timer Printer Term HW IdleMsg PINPadIdle Clock Display Fo...

Page 28: ...letion PWSettle PWReprint PWReports PWManual PWStandalone Setting Setting Setting Setting Setting Setting Setting Setting Setting Setting Setting Admin Menu PWs PWClerkMenu PWBatch PWSetup PWMaintenan...

Page 29: ...s Download Only Other TD Parameters Display All Info Info Info Info Info Info Info Info Info Disabled Info Info Host Management Host 1 Param DL Download Host 2 Param DL Download EMV Public Key DL Down...

Page 30: ...ction Routinely clean it with a damp cloth so that spills don t get into the inner workings Use TD approved cleaning cards for the chip and magnetic card readers Storing your terminal It must be store...

Page 31: ...ries 24 hours a day seven days a week General Merchant Inquiries Monday Friday 8 a m 8 p m ET Printer Stationery Supplies Monday Friday 8 a m 5 p m ET Documentation Portal This guide covers the most c...

Page 32: ...535592 0518...

Reviews: