Tascam MD-350 Owner'S Manual Download Page 11

– 102 –

Consejos útiles para la reproducción

ª

Para repetir una sóla pista 
(repetición de una sóla pista)

1. Con la reproducción en "CONTINUE

MODE", presione dos veces el botón
[REPEAT] en el control remoto.

"REPEAT 1" es indicado ("

" y

"

" encendidos).

2. Presione el botón de reproducción

[

¥

PLAY]. Se repetirá la pista actual.

3. La pista a ser repetida puede ser

cambiada girando el disco
[

µ

TRACK

] o presionando los

botones [

µ

TRACK

] o los botones

numéricos (1 a 9, 0, +10) del control
remoto.

La repetición de una sóla pista no está
disposible en "SHUFFLE MODE" (modo
aleatorio) o "PGM MODE" (modo
programado).

ª

Repetición de una sección dentro de
una pista (repetición A-B)

La porción especificada (entre A y B) de
una pista puede ser reproducida
repetidamente.
1. Con la reproducción activada, presione

el botón [A-B] del control remoto
("REPEAT A_" es indicado y "

"

se enciende, "

" parpadean), en el

punto de principio (A) de la porción que
usted desea repetir.

2. Presione otra vez el botón [A-B]

("REPEAT A-B" es indicado y "

"

"

" se enciende continuadamente)

en el punto final (B). La porción (A-B)
será reproducida repetidamente.

La reproducción repetida de las
porciones A-B extendidas más allá de
una pista no es posible durante la
reproducción programada o
reproducción aleatoria.

Para cancelar la reproducción repetida
y retornar a la reproducción normal,
presione el botón [A-B] o el botón
[REPEAT] nuevamente ("REPEAT OFF"
aparece indicado).

Presione el botón [

ª

STOP] para borrar

la porción especificada (entre A-B).

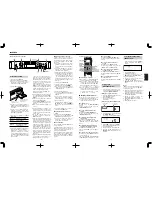
Conectando esta platina con un
temporizador (comercialmente disponible),
es posible iniciar la reproducción a la hora
especificada.
1. Inserte un MD grabado y coloque el

conmutador [TIMER] en [PLAY].

2. Seleccione la entrada del amplificador

que permite la reproducción en la
platina.

La reproducción por temporizador está
disponible cuando la reproducción
"SHUFFLE MODE", "PGM MODE", "ALL
REPEAT" o "REPEAT SINGLE" es
seleccionada.

3. Ajuste el temporizador a la hora de

inicio deseada y desconecte la
alimentación. 
Cuando llegue la hora preajustada, se
conectará la alimentación de cada
componente y se iniciará la reproduc-
ción.

Ajuste el conmutador [TIMER] en [OFF]
después de la reproducción por
temporizador.

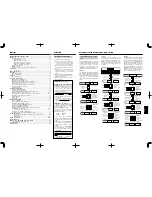
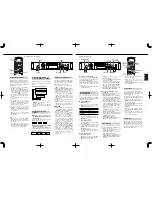
Reproducción por temporizador

Puede usar la función de control de tono
para reproducir material grabado con un
–12.0% de diferencia en relación al tono
normal de reproducción. Esta función no
está disponible en el modo LP2.
Para ajustar el cambio de tono que será
operativo cuando el interruptor PITCH
ON/OFF esté activado:
1. En el modo de parada, reproducción o

pausa, pulse el botón [EDIT/NO] hasta
que en la pantalla aparezca Pitch?.

2. Pulse el botón [YES].
3. Gire el dial [TRACK ] para ajustar el tono

en pasos de 0.1%.

4. Pulse el botón [YES] una vez que haya

realizado el ajuste.

El valor ajustado de esta forma no
tendrá efecto hasta que el interruptor
PITCH ON/OFF no sea colocado en ON.

Tenga en cuenta que cuando cambie la
posición del interruptor PITCH ON/OFF,
el sonido será anulado temporalmente.

Control de tono

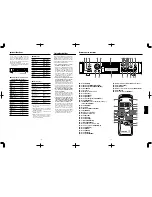
Puede combinar en un mismo disco pistas
grabadas en distintos modos (SP, MONO,
LP2 y LP4). Cuando reproduzca un disco, el
modo adecuado será seleccionado
conforme vaya siendo reproducida cada
una de las pistas, siendo visualizado en la
pantalla.

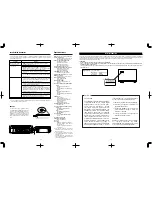
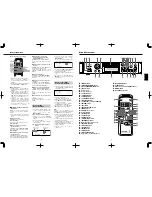
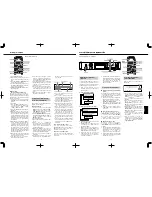
Modos de reproducción

Butones empleados en esta página

Botones
numéricos

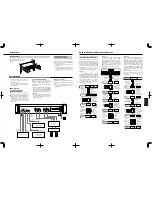
Useful Tips for Recording

– 11 –

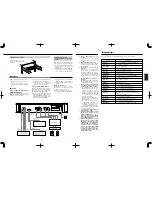
You can monitor the input signal of the
component connected to each input
terminal before recording.

1. Press the [

ø

EJECT] button to eject the

disc.

2. Select the input source with the [INPUT

SELECTOR].

3. Press the [

º

RECORD] button. 

("Monitor Mode" appears.)

Even when the [REC MODE] is set to
[MONO], the output is sent to both
channels.

Insert an MD or press the [

ª

STOP]

button to cancel the Monitor mode.

ª

Recording an analog signal

1. Insert a recordable MD and press the

[

º

RECORD] button to enter the Record-

Ready mode ("

" lights up).

2. Play the highest-level section of the

program source and turn the [INPUT]
control so that the "OVER" segments of
the peak level meters do not light.

3. Play the program source again. 

Press the [

¥

PLAY] or [

π

READY] button

to start recording.

ª

Recording a digital signal

1. In Record-Ready mode, press the

[EDIT/NO] button until “D-LEV 0.0dB”
appears.

2. Turn the [

µ

TRACK

] dial to adjust

the recording level. The recording level
can be set in 0.5 dB steps within a range
between -6.0 dB and +6.0 dB.

3. Press the [YES] button after making the

adjustment.

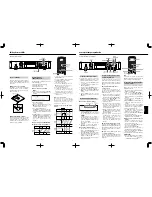
Adjusting the Recording Level

Monitoring the Input Signal

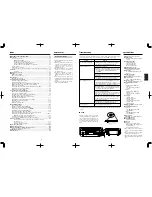
Assigning  track numbers at specific points
will make it easy to quickly locate those
points later using the playback or editing
functions. 

ª

To assign track numbers automatically
(Auto Track function)

Track numbers can be assigned automati-
cally during recording by setting the Auto
Track function to ON.

1. In the Record or Record-Ready mode,

press the [EDIT/NO] button until
"A_TRACK > XXX" appears.

2. Turn the [

µ

TRACK

] dial to select 

"A_TRACK > ON".

3. Press the [YES] button to end the setting

function.

While the Auto Track function is "ON",
the signal level must remain low for 4 or
more seconds before a new track
number is advanced.

During digital recording from a CD or
MD, the track numbers are advanced
automatically according to the CD or
MD data.

Once the Auto Track function is "ON",
this mode will not be released even after
the power is turned off. 
Press the [YES] button after selecting
"A_TRACK > OFF" to release it.

ª

To assign track numbers manually

Press the [

º

RECORD] button at every point

where you want to assign a track number
during recording.  Each press of the button
advances the track number.

ª

To assign track numbers after recording

A track number is added when a track is
divided in editing. (See "Dividing a track" on
page 16.)

Note:

Changing the input with the [INPUT
SELECTOR] switch during recording
activates the Record-Ready mode.

Assigning Track Numbers During

Recording

The Over Write function allows you to
record music by erasing a previously
recorded track. 

1. Perform steps 1 to 4 of "Recording an

MD" on page 8.

2. Turn the [

µ

TRACK

] dial (or press

the [

µ

TRACK

] buttons on the

remote control unit) until the track
number to be recorded over appears.

3. Press the  [

º

RECORD] button ("

"

lights up). 

After "Over Write" appears, the remain-
ing recording time is displayed.

The track numbers which come after the
track being recorded over blink on the
music calendar.

4. Adjust the recording  level.

If [ANALOG] was selected above, adjust
the recording level with the [INPUT]
control.

5. Press the [

¥

PLAY] button or [

π

READY]

button to start recording. 

The deck records over the existing
track.  The track number is updated.

ª

Recording over an existing track from
the middle

1. Select the track number to be erased

then press the [

¥

PLAY] button to start

playback.

2. Press the [

π

READY] button where you

want to start recording.

3. Press the [

º

RECORD] button.

The track number is updated and blinks
on the music calender.

4. Press the [

¥

PLAY] or [

π

READY] button

to start recording. 

The deck records over the existing
track. 

[CAUTION]

It is not possible to record from the
middle of an existing track when
"

" or "

" is lit.

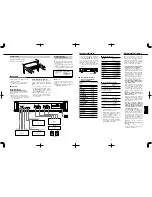
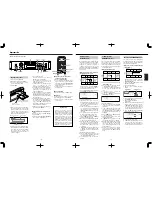
Recording Over Existing Tracks

(Over Write)

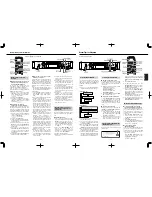
Buttons used on this page

ENGLISH

Summary of Contents for MD-350

Page 1: ...uwegein Netherlands Phone 030 6030229 TEAC AUSTRALIA PTY LTD 106 Bay Street Port Melbourne Victoria 3207 Australia Phone 03 9644 2442 A C N 005 408 462 TEAC ITALIANA S p A Via C Cant 11 20092 Cinisell...

Page 2: ...unit size of grounding conductors location of antenna discharge unit connection to grounding electrodes and re quirements for the grounding electrode Note to CATV system installer This reminder is pro...

Page 3: ...indicado Protected el MD est protegido contra borrado accidental Deslice la leng eta de protecci n contra borrado para cerrar el orificio Un MD que s lo reproduce est insertado Reemplace el MD con uno...

Page 4: ...is marked with the letter L or coloured RED When replacing the fuse only a correctly rated approved type should be used and be sure to re fit the fuse cover IF IN DOUBT CONSULT A COMPETENT ELECTRICIAN...

Page 5: ...dust on it or is damaged To protect the disc always take the following precautions Be sure that the MD is taken out of the deck and put back in its MD case after using it Do not touch the disc inside...

Page 6: ...UNDO Teclas Shift F9 Cancelaci n de modo Tecla Esc Teclas de entrada de t tulo Operaci n Operaci n de teclas Movimiento del cursor Tecla Tecla Modificaci n de n mero Tecla Tecla de pista a ser editad...

Page 7: ...ta n mero que desee copiar con el disco TRACK ejem Para copiar el t tulo de la pista 4 2 Presione el bot n EDIT NO repetidamente hasta que aparezca TITLE COPY 3 Presione el bot n YES Copiar hasta 001...

Page 8: ...one cada caracter con los botones TRACK y presione el bot n ENTER para ingresarlo 7 Repita los pasos 5 6 8 Presione el bot n YES despu s de asignar el t tulo del disco El modo de entrada de t tulo par...

Page 9: ...producci n contin a desde la nueva ubicaci n de la pista trasladada Traslado de una pista funci n MOVE Las pistas obtenidas despu s de la divisi n no tienen t tulos de pista independientemente que la...

Page 10: ...uttons used on this page 10 103 Edici n de MD grabados 1 Especifique la pista que desea borrar con el disco TRACK 2 Presione el bot n EDIT NO hasta que aparezca ERASE TRK 3 Presione el bot n YES Apare...

Page 11: ...utton to eject the disc 2 Select the input source with the INPUT SELECTOR 3 Press the RECORD button Monitor Mode appears Even when the REC MODE is set to MONO the output is sent to both channels Inser...

Page 12: ...ermanecer n en la platina Si usted intenta la reproducci n programada cuando no hubiera ning n dato programado ingresado la reproducci n normal se iniciar despu s que PGM Empty aparezca indicado Verif...

Page 13: ...espaciado autom tico no est disponible Si la funci n de auto espaciado est activa cuando active la auto escucha esa funci n de espaciado autom tico y la de auto preparaci n si es que est activa se des...

Page 14: ...0m 00s 00p lights up 2 Turn the TRACK dial so that the desired track number indicator lights on the music calendar and press PUSH ENTER on the dial The track number blinks Repeat this operation to pr...

Page 15: ...of the tracks or a specified portion A B of an MD can be played repeatedly Program playback and Shuffle playback can also be repeated To repeat all MD tracks All track repeat 1 In the Stop mode press...

Page 16: ...e una pista grabada 1 Seleccione el n mero de pista a ser borrado y presione el bot n PLAY para iniciar la reproducci n 2 Presione el bot n READY d nde desea iniciar la grabaci n 3 Presione el bot n R...

Page 17: ...is displayed 3 Press the YES button Rehearsal and Point OK are displayed alternately while the first 4 seconds of the portion which becomes the second track after division are played repeatedly 4 If...

Page 18: ...ACK dial and pressing PUSH ENTER on the dial Assigning Titles TITLE Function 7 Repeat steps 5 6 Press the STOP button to abort the operation Press the EDIT NO button for more than 3 seconds or press t...

Page 19: ...n READY se encender Inicie la reproducci n del programa fuente 8 Para parar la grabaci n presione el bot n de parada STOP Parada temporaria de la grabaci n listo Presione el bot n de pausa READY Pres...

Page 20: ...ecording time still available With the MD system it is not possible to record more than 254 tracks If you want to record more tracks erase unnecessary tracks record them on another MD or use the editi...

Page 21: ...splay will not disappear TOC Reading is displayed for a longer time than usual when a brand new recordable MD is inserted Note the following when you attempt to perform recording while erasing overwri...

Page 22: ...eg rese que el MD sea retirado de la platina y mantenido en su estuche MD despu s de usarlo No toque el disco dentro del cartucho No abra el cerrojo exponiendo el MD No coloque los MD a la luz solar d...

Page 23: ...60 minutes max Sampling frequency 44 1 kHz Compression system ATRAC Adaptive TRansform Acoustic Coding Dynamic range More than 94 dB playback 1 kHz A filter Total harmonic distortion Less than 0 013 N...

Page 24: ...ion TITLE COPY 40 Annulation de la derni re op ration Fonction UNDO 40 Fonctions optionnelles 41 Correspondance entre les touches de la platine et celles du clavier 41 Touches de montage 41 Touches d...

Page 25: ...in funzione Se non si riesce a riportare l apparecchio al suo normale funzionamento spegnerlo provare a staccare il cavo di alimentazione dalla presa di corrente alternata di rete e ricollegarvelo do...

Page 26: ...onforme alla regolamentazione SCMS Serial Copy Management System sistema di gestione della copia in serie Questa regolamenta zione stata elaborata per limitare la copia da digitale a digitale solament...

Page 27: ...P2 qualora la qualit della registrazione sia un aspetto pi importante della durata massima del disco Visualizzazione di messaggi A seconda delle condizioni operative sul quadrante possono comparire i...

Page 28: ...MD est laiss trop longtemps dans la platine ITALIANO 85 Funzioni opzionali Limiti al sistema dei minidischi Collegando al terminale KEYBOARD di questo deck una tastiera da computer a 101 o a 106 tast...

Page 29: ...zione 001 lampeggia Es Copia del titolo del brano 4 sul brano 6 Numero del brano Numero del brano sorgente di destinazione Copia di un titolo funzione TITLE COPY 4 Agendo opportunamente sulla manopola...

Page 30: ...punti 5 e 6 10 Premere di nuovo il tasto YES Nn appena attivata la modalit di assegnazione del titolo per il brano 2 l indicazione 002 _ viene visualizzata ripetere le operazioni dei punti da 5 a 8 Ri...

Page 31: ...contr le Enregistrement d un signal analogique Indicateur Ne s allument de niveau pas 1 Introduire un MD enregistrable et appuyer sur la touche RECORD pour passer en mode pr t d enregistrement s allum...

Page 32: ...contenus enregistr s seront crits sur le MD Si la platine est laiss e coup e longtemps apr s avoir fini l enregistrement par minuterie les contenus peuvent avoir disparu Pendant l enregistrement par m...

Page 33: ...ltima operazione effettuata non viene attivata Cancellazione di brani funzione di cancellazione Tasti usati in questa pagina 33 FRAN AIS Conseils utiles pour la lecture Chaque plage sur le disque est...

Page 34: ...PACE et A READY ne peuvent pas tre utilis es ensemble Pour enregistrer sur une bande analogique Touches utilis es dans cette page Touches num riques Conseils utiles pour la lecture Cette fonction ne m...

Page 35: ...CK per selezionare il numero del brano che si vuole aggiungere al programma e premere poi PUSH ENTER sulla manopola stessa per memorizzarlo Il brano pu anche venire designato semplicemente digitando s...

Page 36: ...idera riversare sul nastro non sono in ordine successivo uno dopo l altro 1 Agire due volte sul tasto AUTO SPACE del telecomando sino a visualizzare la voce A_READY ON l indicazione si illumina 2 Prem...

Page 37: ...izzati solamente nel caso in cui siano stati registrati sul minidisco Per visualizzare il titolo di un brano selezionare il brano con l apparecchio in modalit di arresto con l indicazione TRACK illumi...

Page 38: ...but de la plage s lectionn e est lu de fa on r p t e Si le point de combinaison entre les deux plages n est pas lu correctement appuyer sur la touche EDIT NO pour arr ter la lecture et reprendre l op...

Page 39: ...vec les touches TRACK et appuyer sur la touche ENTER pour le faire entrer 7 R p ter les tapes 5 6 8 Appuyer sur la touche YES apr s affectation du titre du disque Le mode d entr e de titre pour la pla...

Page 40: ...uelque chose de d fait ou quand aucune op ration annuler n a t effectu e Quand on est sorti du mode de montage en appuyant sur la touche YES Pendant l enregistrement ou quand le mode pr t d enregistre...

Page 41: ...du clavier pour votre utilisation personnelle Correspondance entre les touches de la platine et celles du clavier Touches de la platine Touches du clavier Touche F1 Touche F2 Touche STOP Touche F4 Tou...

Page 42: ...Le mode de lecture s lectionn ne convient pas Protected Le MD est prot g contre un effacement accidentel Un MD non enregistrable est charg Rec Error Une erreur d enregistrement s est produite Track F...

Page 43: ...luminino 7 Avviare la registrazione Agire sul tasto di riproduzione PLAY o di pausa READY l indicazion di registrazione si illumina Avviare anche la riproduzione del programma sorgente 8 Per arrestare...

Page 44: ...cidentel pour fermer le trou Un MD uniquement pour la lecture est charg Remplacer le MD par un disque enregistrable Si D IN UNLOCK est affich et que la source audio n est pas entr e raccorder la sourc...

Page 45: ...rauchnahme durchlesen 45 MD Handhabung 46 Speichergangreserve 46 Bei Meldung Protected 46 Bei blinkender Anzeige UTOC Writing 46 Bei blinkender Meldung D IN UNLOCK 46 Fernbedieneinheit 46 Gestelleinba...

Page 46: ...gegen frische auswechseln Batterien niemals erhitzen zerlegen oder zur Entsorgung verbrennen Fernbedieneinheit Vor der Ingebrauchnahme ITALIANO 67 Funzione di appoggio della memoria L apparecchio dis...

Page 47: ...e e umidit Non aprire la cassa dell apparecchio per evitare possibili danni alla circuita zione elettrica o folgorazioni Non pulire l apparecchio con solventi chimici che potrebbero danneggiarne le ri...

Page 48: ...hm Digital Eing nge Ausg nge Eingang 1 2 TOS EIAJ RC 5720 IEC60958 Typ II S PDIF Ausgang TOS EIAJ RC 5720 IEC60958 Typ II S PDIF Fernsteuerbuchse KEYBOARD Buchse 6 pol Mini DIN Leistungsaufnahme 13 W...

Page 49: ...INPUT SELECTOR den Eingang anw hlen Anzeige Gew hlter Eingang ANALOG ANALOG INPUT DIGITAL 1 DIGITAL INPUT 1 OPTICAL DIGITAL 2 DIGITAL IN 2 OPTICAL Vorderseite 4 Den Aufnahmemodus w hlen wie unten besc...

Page 50: ...en Die Meldung TOC Reading erlischt nicht Ist eine neue vollkommen unbespielte MD eingelegt wird die Meldung TOC Reading l nger angezeigt Die folgenden Angaben gelten f r Overwrite Aufnahmen Die vorli...

Page 51: ...gt keine Spuren die k rzer als 12 Sekun den sind Werden mehrere derart kurze Spuren gel scht unterbleibt dement sprechend die Verl ngerung der Aufnah merestzeit Die Summe aus verstrichener Aufnah meze...

Page 52: ...ung durch eine Neuaufnahme Overwrite Auf dieser Seite verwendete Tasten N tzliche Aufnahmehinweise einzustellen Der Aufnahmepegel l sst sich in 0 5 dB Schritten auf einen Wert zwischen 6 0 dB und 6 0...

Page 53: ...knopf TRACK TITLE AINC anw hlen AINC blinkt 4 Die Taste YES dr cken Der MD Titeleingabemodus ist aktiviert Anzeige DSC _ Das Cursorsymbol blinkt Das Cursorsymbol blinkt an der ersten Stelle selbst wen...

Page 54: ...an der vorgesehenen Trennstelle die Taste READY dr k ken 2 Die Taste EDIT NO dr cken bis die Meldung DIVIDE erscheint 3 Die Taste YES dr cken Die Meldungen Rehearsal und Point OK erscheinen abwechsel...

Page 55: ...iterhin im Anzeigefeld TRACK NO berpr ft werden Eine Spur kann mehrfach zur Wieder gabe programmiert werden Bei einer Spurnummer Fehleingabe die Taste CLEAR dr cken Mit jedem Dr cken dieser Taste wird...

Page 56: ...AY MODE im Stopp status bet tigt wird der programmierte Wiedergabemodus deaktiviert Der Programmtitelspeicher wird gel scht Der Programmwiedergabemodus sowie die Programmierdaten werden auch bei Ger t...

Reviews: