66
TalkSwitch User Manual
*70,1010555,, This corresponds to
70 for disabling the Call Waiting
feature, a 2 second pause to wait for the new dialtone, then 1010555 for
the long distance prefix, and a 4 second pause to wait for the new
dialtone before dialing the actual long distance phone number.
This saves you the hassle of having to enter the same prefix every time you want
to set up a Prompted Call Back phone number.
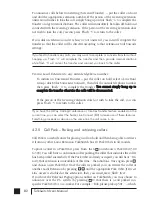
When entering a Call Back phone number using a telephone, you can enter special
characters using a special prefix. The default prefix is the
key. To enter a
in a
dialing string you will need to dial
, for a 2 second pause dial
0, and for a
, dial
. When you have completed the entire dial string, dial
.
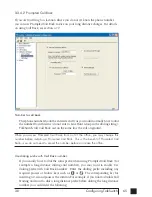
Use password on Call Back:
This option is designed to give you security and to restrict who can use Prompted
Call Back. Simply fill in a 4- to 8-digit password, and when TalkSwitch calls you
back, you will be prompted to input the password to accept Call Back.
Use Announced message:
As was described in the Auto Call Back section, this option is recommended if the
number TalkSwitch will be calling back is to a hotel or a location where
somebody else will be answering the call. The Announced message option allows
you to record a message that plays when the call is initially answered during a
Call Back. For example, you may want to say “Please transfer this call to Bob in
room 307”.
The Announced Message can be recorded locally using an extension handset or
remotely by accessing Call Back from the Auto Attendant. The Record message
button gives the instructions as follows:
Pick up a telephone handset connected to the TalkSwitch and use the
following keypad commands to record the Prompted Call Back
Announced Message:
1) Press
to enter command mode. If required, enter the password.
2) Next, enter the appropriate command as listed below. After each
command, press
to confirm the entry.
To record message: 65
To playback message: 75
Allow Call Bridge:
To allow Call Bridge after a Call Back has been accepted, check the Allow Call
Bridge box. You may also restrict the Call Bridge line access by choosing the Hunt
Group Access button.
TS manual 11th ED_CVA_v11_CD_Release.qxd 7/13/2004 3:36 PM Page 66
Summary of Contents for TALKSWITCH 48-CVA
Page 1: ...Installation and User Guide DESKTOP PHONE SYSTEM TalkSwitch 48 CVA v3 10...
Page 109: ...101 4 0 Using TalkSwitch...
Page 111: ......
Page 145: ......

