3060386 | Geniox Air Handling Unit - User Manual
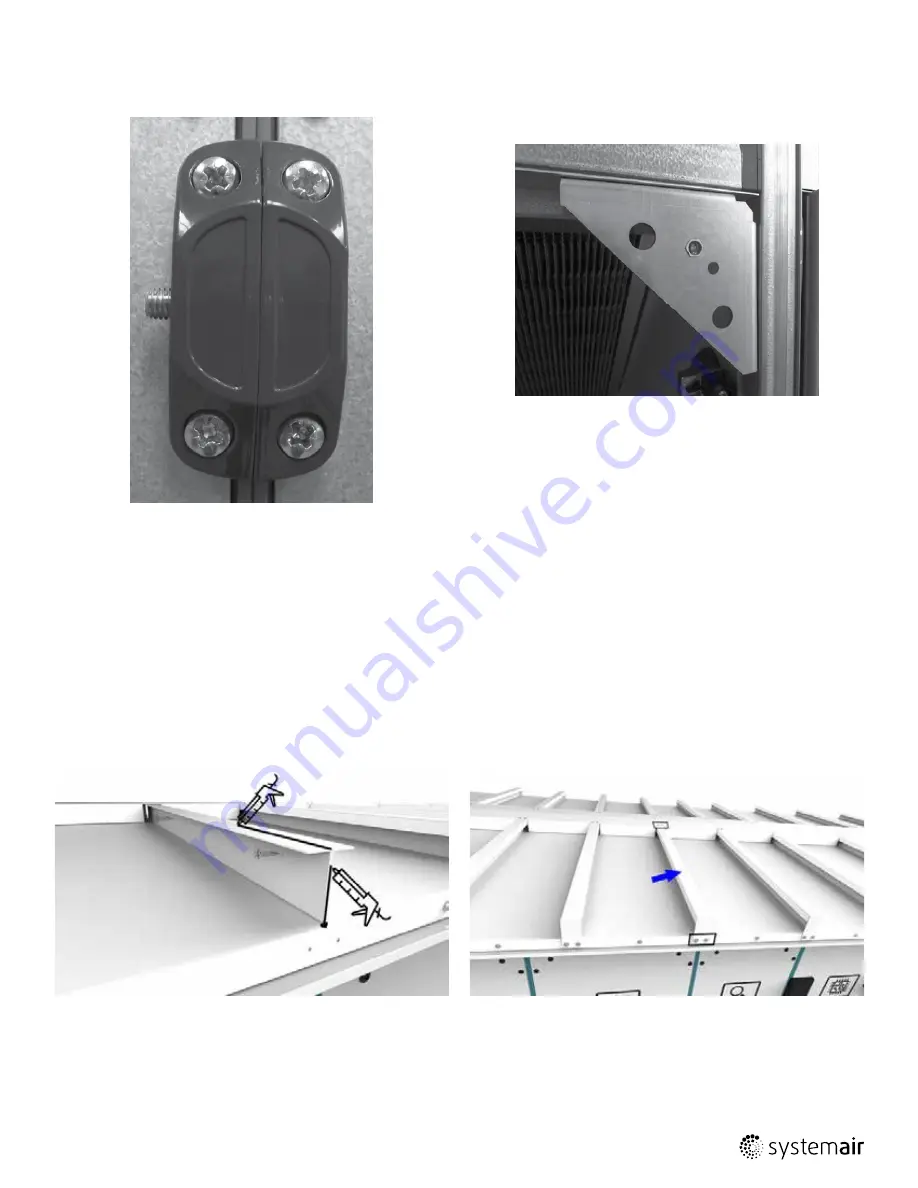
Successful assembly is as shown:
Each Geniox Section will have inner reinforcement brackets
installed as shown:
Instruction for unloading on the site as well as installation and connection | 17
G.2.5.1
Outdoor Sectional Roof Sealing
Outdoor sectional units require sealing where the roof panels meet and therefore the following steps must be taken to ensure a water-
tight seal:
1. Run a bead of caulking (Sika Flex 221 Polyurethane Sealant preferred or similar spec) along all seems where the sectional unit roof
panels meet as shown in graphic above.
2. Use ¼” self-tapping screws with bonded washer to fasten each roof panel to the next sectional roof panel as shown above.
3. Install roof panel covers over the roof panels and tuck under the middle cover using ¼” self-tapping screws with bonded washers to
fasten as shown in the graphic below.
*Steps are for all sectional splits both front and rear of unit.
Summary of Contents for Geniox 10
Page 2: ...Geniox Air Handling Unit User Manual 3060386...
Page 6: ...Geniox Air Handling Unit User Manual 3060386...
Page 35: ...3060386 Geniox Air Handling Unit User Manual Star up adjustments use and commissioning 29...
Page 61: ...3060386 Geniox Air Handling Unit User Manual ERW maintenance 4 8...
Page 62: ...Geniox Air Handling Unit User Manual 3060386 5 1 Roof curb master tables...
Page 63: ...3060386 Geniox Air Handling Unit User Manual Roof curb master tables 5 2...
Page 64: ...Geniox Air Handling Unit User Manual 3060386 5 3 Roof curb master tables...
Page 65: ...3060386 Geniox Air Handling Unit User Manual Roof curb master tables 5 4...
Page 66: ...Systemair NA 8 Rouse Street Tillsonburg ON N4G 5W8 Toll free 800 688 6363...


