background image

Chapter 4: UEFI BIOS

81

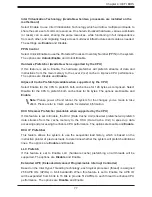
Degrade Precedence

Use this feature to select the degrading precedence option for Ultra Path Interconnect (UPI) 
connections. Select Topology Precedent to degrade UPI features if system options are in 

conflict. Select Feature Precedent to degrade UPI topology if system options are in conflict. 

The options are 

Topology Precedence

 and Feature Precedence.

Link L0p Enable

Select Enable to enable Link L0p. The options are Disable, Enable, and 

Auto

.

Link L1 Enable

Select Enable to enable Link L1 (Level 1 link). The options are Disable, Enable, and 

Auto

.

IO Directory Cache (IODC)

Select Enable for the
 IODC (I/O Directory Cache) to generate snoops instead of generating  memory lockups for 
remote IIO (InvIToM) and/or WCiLF (Cores). Select Auto for the IODC to generate snoops 
(instead of memory lockups) for WCiLF (Cores). The options are Disable, 

Auto

, Enable 

for Remote InvItoM Hybrid Push, InvItoM AllocFlow, Enable for Remote InvItoM Hybrid 
AllocNonAlloc, and Enable for Remote InvItoM and Remote WCiLF.

SNC

Select Enable to use "Sub NUMA Clustering" (SNC), which supports full SNC (2-cluster) 
interleave and 1-way IMC interleave. Select Auto for 1-cluster or 2-cluster support depending 
on the status of IMC (Integrated Memory Controller) Interleaving. The options are 

Disable

Enable, and Auto.

XPT Prefetch

Select Enable to support XPT Prefetching to enhance system performance. The options 
are Enable, 

Disable

, and Auto.

KTI Prefetch

Select Enable to support KTI Prefetching to enhance system performance. The options 
are 

Enable

 and Disable.

Local/Remote Threshold

This feature allows the user to set the threshold for the Interrupt Request (IRQ) signal, which 
handles hardware interruptions. The options are Disable, 

Auto

, Low, Medium,


and High.

Stale AtoS (A to S)

The in-memory directory has three states: I, A, and S states. The I (-invalid) state indicates 
that the data is clean and does not exist in the cache of any other sockets. The A (-snoop 

All) state indicates that the data may exist in another socket in an exclusive or modified 

state. The S state (-Shared) indicates that the data is clean and may be shared in the 
caches across one or more sockets. When the system is performing "read" on the memory 

Summary of Contents for X11DAC

Page 1: ...USER S MANUAL Revision 1 1b X11DAC ...

Page 2: ...esigned to provide reasonable protection against harmful interference when the equipment is operated in an industrial environment This equipment generates uses and can radiate radio frequency energy and if not installed and used in accordance with the manufacturer s instruction manual may cause harmful interference with radio communications Operation of this equipment in a residential area is like...

Page 3: ...e note that this motherboard is intended to be installed and serviced by professional technicians only For processor memory updates please refer to our website at http www supermicro com products Notes 1 UPI memory speeds are dependent on the processors installed in your sys tem The X11DAC supports Intel C621 2 Support for 2933MHz memory is dependent on the CPU SKU 3 Populating DDR4 memory modules...

Page 4: ... instructions Appendix E provides information on how to configure VROC RAID settings Appendix F provides information on how to configure secure boot settings Appendix G provides information on how to configure iSCSI settings Appendix H provides information on how to configure Network Interface Card NIC settings ...

Page 5: ...e Address Super Micro Computer B V Het Sterrenbeeld 28 5215 ML s Hertogenbosch The Netherlands Tel 31 0 73 6400390 Fax 31 0 73 6416525 Email sales supermicro nl General Information support supermicro nl Technical Support rma supermicro nl Customer Support Website www supermicro nl Asia Pacific Address Super Micro Computer Inc 3F No 150 Jian 1st Rd Zhonghe Dist New Taipei City 235 Taiwan R O C Tel ...

Page 6: ... 1 Static Sensitive Devices 20 2 2 Motherboard Installation 21 2 3 Processor and Heatsink Installation 23 2 4 Memory Support and Installation 31 2 5 Rear I O Ports 38 2 6 Front Control Panel 42 2 7 Connectors 47 2 8 SATA SAS Connections 55 2 9 Jumper Settings 57 2 10 LED Indicators 61 Chapter 3 Troubleshooting 3 1 Troubleshooting Procedures 63 3 2 Technical Support Procedures 66 3 3 Frequently Ask...

Page 7: ...Appendix D UEFI BIOS Recovery D 1 Overview 139 D 2 Recovering the UEFI BIOS Image 139 D 3 Recovering the Main BIOS Block with a USB Device 140 E 1 All Intel VMD Controllers Menu 144 E 2 Configuring RAID Settings 148 E 3 Use of Journaling Drive 164 Appendix F Secure Boot Settings F 1 Boot mode select Feature 168 F 2 Secure Boot Secure Boot Mode CSM Support Features 169 F 3 Secure Boot Settings 170 ...

Page 8: ...r 1 1 Checklist Important Links For your system to work properly please follow the links below to download all necessary drivers utilities and the user s manual for your motherboard Supermicro product manuals http www supermicro com support manuals Product drivers and utilities http www supermicro com wftp Product safety info http www supermicro com about policies safety_information cfm If you hav...

Page 9: ...ard Image Note All graphics shown in this manual were based upon the latest PCB revision available at the time of publication of the manual The motherboard you received may or may not look exactly the same as the graphics shown in this manual ...

Page 10: ...3 SATA4 SATA5 SATA8 SATA6 SATA7 FAN4 FAN3 JF1 LE2 DS1 T SGPIO1 T SGPIO2 VROC SAS4 7 USB3 4 CPU2 SLOT6 PCI E 3 0 X8 CPU2 SLOT5 PCI E 3 0 X16 CPU2 SLOT4 PCI E 3 0 X8 CPU2 SLOT3 PCI E 3 0 X16 CPU1 SLOT2 PCI E 3 0 X8 COM2 JBT1 CPU1 SLOT1 PCI E 3 0 X16 USB 5 6 SAS0 3 VGA LAN1 2 USB1 2 PS2 CPU2 CPU1 P2 DIMM D2 P2 DIMM D1 P2 DIMM E1 P2 DIMM F1 P1 DIMM A2 P1 DIMM A1 P1 DIMM B1 P1 DIMM C1 P2 DIMM C1 P2 DIM...

Page 11: ... 8 pin Power Supply connectors JPWR3 24 pin ATX main power supply connector VROC JRK1 Intel VROC RAID Key header for NVMe Solid State Device SSD JSPDIF_IN1 JSPDIF_ OUT1 SPDIF Sony Philips Digital Interconnect Format Audio In Out headers JTPM1 Port 80 connector for Trusted Platform Module TPM LAN1 LAN2 Dual 1GbE Ethernet ports on the IO back panel SAS0 3 SAS Connections 0 3 supported by LSI SAS 300...

Page 12: ...rt depends on the processors used in the system Note 2 For the latest CPU memory updates please refer to our website at http www supermicro com products motherboard Chipset Intel C621 Expansion Slots One PCIe 3 0 x16 slot supported by CPU1 Slot1 One PCIe 3 0 x8 slot supported by CPU1 Slot2 Two PCIe 3 0 x8 slots supported by CPU2 Slot4 Slot6 Two PCIe 3 0 x16 slot supported by CPU2 Slot3 Slot5 Baseb...

Page 13: ... State System Health Monitoring Onboard voltage monitoring for 3 3V standby 5V 5V standby 12V CPU core memory chipset BMC and PCH voltages CPU System LED and control CPU Thermal Trip support Status monitor for on off control CPU Thermal Design Power TDP support of up to 205W See Note 1 on next page Fan Control Multi speed fan control via onboard BMC System Management Trusted Platform Module TPM su...

Page 14: ...or proper CPU TDP sizing Note 2 For IPMI configuration instructions please refer to the Embedded IPMI Con figuration User s Guide available at http www supermicro com support manuals Note 3 It is strongly recommended that you change BMC login information upon initial system power on The manufacturer default username is ADMIN and the password is ADMIN For proper BMC configuration please refer to ht...

Page 15: ...G3 PCI E X4 G3 BMC Debug Card TPM Header USB Super IO AST2500 PS 2 Keyboard Mouse DDR4 VGA CONN Temp Sensor BIOS COM2 Header W83773 at SMBUS BMC Boot Flash PCI E X8 PCI E X8 PCI E X16 PCI E X16 SLOT 4 SLOT 6 SLOT 5 SLOT 3 1 2 3 4 8 7 6 5 6 0 Gb S UPI UPI UPI 10 4 11 2G P1 P0 P1 P0 ALC888 2 1 2 2 2 3 2 4 2 5 2 6 2 7 2 8 1 1 1 2 1 3 1 4 1 5 1 6 1 7 1 8 PCI E X16 PCI E X8 LAN Control 2x1G 88E1512 SAS...

Page 16: ...o 6 channels Hot plug and enclosure management with Intel Volume Management Device Intel VMD Rich set of available IOs with increased PCIe lanes 48 lanes Integrated Intel Ethernet Connection X722 with iWARP RDMA New features supported by 2nd Gen Intel Xeon Scalable SP Processors 2nd Gen Intel Xeon Scalable SP processors support the following features Higher performance for a wider range of workloa...

Page 17: ...pports system health monitoring Onboard Voltage Monitors The onboard voltage monitor will continuously scan crucial voltage levels Once a voltage becomes unstable it will give a warning or send an error message to the IPMI WebGUI and IPMIView The user can adjust the voltage thresholds to define the sensitivity of the voltage monitor Real time readings of these voltage levels are all displayed in t...

Page 18: ...ent interface for configuration control ACPI leverages the Plug and Play BIOS data structures while providing a processor architecture independent implementation that is compatible with the appropriate Windows operating systems For detailed information on OS support please refer to our website at www supermicro com 1 6 Power Supply As with all computer products a stable power source is necessary f...

Page 19: ...rovided by the ME on client platforms 1 8 Intel Optane DC Persistent Memory Overview 2nd Gen Intel Xeon Scalable SP processors support new DCPMM Optane DC Persistent Memory Modules technology that offers data persistence with higher capacity than existing memory modules and lower latency than NVMe SSDs DCPMM memory provides hyper speed storage capability for high performance computing platforms wi...

Page 20: ... not touch its components peripheral chips memory modules or gold contacts When handling chips or modules avoid touching their pins Put the motherboard and peripherals back into their antistatic bags when not in use For grounding purposes make sure that your chassis provides excellent conductivity be tween the power supply the case the mounting fasteners and the motherboard Use only the correct ty...

Page 21: ...P1 DIMM D2 P1 DIMM D1 P1 DIMM E1 SAS Controller Chip PCH 2 2 Motherboard Installation All motherboards have standard mounting holes to fit different types of chassis Make sure that the locations of all the mounting holes for both the motherboard and the chassis match Although a chassis may have both plastic and metal mounting fasteners metal ones are highly recommended because they ground the moth...

Page 22: ...curely placed in the chassis Note Images displayed in this manual are for illustration only Your system or com ponents might look different from those shown in this manual SAS CODE BIOS LICENSE DESIGNED IN USA MAC CODE MAC CODE X11DAC REV 1 00 BMC FAN6 FAN5 JTPM1 JRK1 JA1 JPCIE6 JPCIE4 JPCIE2 JPCIE3 JPCIE1 JPCIE5 JD1 JSPDIF_OUT1 JSPDIF_IN1 JL1 Battery JWD1 JPME2 JPME1 JPS1 LEDM1 FAN1 FAN2 FANA JPW...

Page 23: ...r Heatsink Module PHM and then install the entire PHM into the CPU socket When you receive a motherboard without a processor pre installed make sure that the plastic CPU socket cap is in place and that none of the socket pins are bent otherwise contact your retailer immediately Refer to the Supermicro website for updates on CPU support Please follow the instructions given in the ESD Warning sectio...

Page 24: ...e SP or 2nd Generation Intel Xeon Scalable SP processor 2 the narrow processor clip 3 the dust cover and 4 the CPU socket 3 Dust Cover 4 CPU Socket 1 Intel Processor Note Be sure to cover the CPU socket with the dust cover when the CPU is not in stalled 2 Narrow processor clip the plastic processor package carrier used for the CPU ...

Page 25: ...atsink Module PHM The Processor Heatsink Module PHM contains 1 a heatsink 2 a narrow processor clip and 3 Intel Xeon Scalable SP or 2nd Gen Intel Xeon Scalable SP processor 1 Heatsink 2 Narrow processor clip 3 Intel Processor Processor Heatsink Module PHM ...

Page 26: ... clip by sliding notch B of the CPU into notch B of the processor clip and sliding notch C of the CPU into notch C of the processor clip 4 Examine all corners of the CPU to ensure that it is properly seated on the processor clip Once the CPU is securely attached to the processor clip the processor package assembly is created Note Please exercise extreme caution when handling the CPU Do not touch t...

Page 27: ...e a larger hole and plastic mounting clips located next to the hollow triangle Also locate another set of mounting clips and a larger hole at the diagonal corner of the same reverse side of the processor carrier assembly b in the graphic 3 With the back of the heatsink and the reverse side of the processor package assembly facing up align the triangular corner on the heatsink A in the graphic agai...

Page 28: ...e components are pre installed on the motherboard before shipping CPU Socket w Dust Cover On Dusk Cover CPU Socket Removing the Dust Cover from the CPU Socket Remove the dust cover from the CPU socket exposing the CPU socket and socket pins as shown on the illustration below Note Do not touch the socket pins to avoid damaging them causing the CPU to malfunction Socket Pins Remove the dust cover fr...

Page 29: ... and you will see a triangle marked on the processor clip at the same corner of hollow triangle 3 Carefully align pin 1 the triangle on the the PHM against pin 1 the triangle on the CPU socket 4 Once they are properly aligned insert the two diagonal oval holes on the heatsink into the guiding posts 5 Using a T30 Torx bit screwdriver install four screws into the mounting holes on the socket to secu...

Page 30: ...e processor heatsink module PHM unplug the power cord from the power outlet 1 Using a T30 Torx bit screwdriver turn the screws on the PHM counterclockwise to loosen them from the socket starting with screw marked 4 in the sequence of 4 3 2 1 2 After all four screws are removed wiggle the PHM gently and pull it up to remove it from the socket Note To properly remove the processor heatsink module be...

Page 31: ...modules Exercise extreme care when installing or removing DIMM modules to prevent any damage Memory Installation Sequence Memory modules for this motherboards are populated using the Fill First method The blue memory slot of each channel is considered the first DIMM module of the channel and the black slot the second module of the channel When installing memory modules be sure to populate the blue...

Page 32: ...66 2666 RDIMM DRx8 8GB 16GB 2666 2666 2666 RDIMM DRx4 16GB 32GB 2666 2666 2666 RDIMM 3Ds QRX4 N A 2H 64GB 2666 2666 2666 RDIMM 3Ds 8RX4 N A 4H 128GB 2666 2666 2666 LRDIMM QRx4 32GB 64GB 2666 2666 2666 LRDIMM 3Ds QRX4 N A 2H 64GB 2666 2666 2666 LRDIMM 3Ds 8Rx4 N A 4H 128GB 2666 2666 2666 DDR4 Memory Support Type Ranks Per DIMM Data Width DIMM Capacity GB Speed MT s Voltage V Slots Per Channel SPC a...

Page 33: ...lowed in the same channel across different channels and across different sockets Key Parameters for DIMM Configuration Key Parameters for DIMM Configurations Parameters Possible Values Number of Channels 1 2 3 4 5 or 6 Number of DIMMs per Channel 1DPC 1 DIMM Per Channel or 2DPC 2 DIMMs Per Channel DIMM Type RDIMM w ECC 3DS RDIMM LRDIMM 3DS LRDIMM DIMM Construction non 3DS RDIMM Raw Cards A B 2Rx4 ...

Page 34: ...MA1 P1 DIMMA2 P1 DIMMD1 P1 DIMME1 P1 DIMMF1 1 CPU 8 DIMMs Unbalanced not recommended CPU1 P1 DIMMC1 P1 DIMMB1 P1 DIMMA1 P1 DIMMA2 P1 DIMMD2 P1 DIMMD1 P1 DIMME1 P1 DIMMF1 When 2 CPUs are used Memory Population Sequence 2 CPUs 2 DIMMs CPU1 P1 DIMMA1 CPU2 P2 DIMMA1 2 CPUs 4 DIMMs CPU1 P1 DIMMA1 P1 DIMMD1 CPU2 P2 DIMMA1 P2 DIMMD1 2 CPUs 6 DIMMs CPU1 P1 DIMMC1 P1 DIMMB1 P1 DIMMA1 CPU2 P2 DIMMC1 P2 DIMM...

Page 35: ...1 B1 96GB 64GB A1 B1 C1 144GB 96GB A1 B1 C1 D1 192GB 128GB A1 B1 C1 D1 E1 240GB 160GB A1 B1 C1 D1 E1 F1 288GB 192GB A1 A2 B1 C1 D1 D2 E1 F1 416GB 320GB Dual Rank Memory Rank Sparing 16GB DIMM Memory Population Total RAM Detected One Rank Configuration Two Rank Configuration A1 8GB 8GB A1 B1 16GB 16GB A1 B1 C1 24GB 24GB A1 B1 C1 D1 32GB 32GB A1 B1 C1 D1 E1 40GB 40GB A1 B1 C1 D1 E1 F1 49GB 49GB A1 A...

Page 36: ...Capacity DRAM1 RDIMM 3DS RDIMM LRDIMM 3DS LRDIMM Refer to Validation Matrix DDR4 DIMMs validated with DCPMM below DRAM2 RDIMM DRAM3 RDIMM 3DS RDIMM LRDIMM Note DDR4 single rank x8 is not available for DCPMM Memory Mode or App Direct Mode Legend for the first two tables above Capacity DCPMM Any Capacity Uniformly for all channels for a given configuration 2nd socket has no DCPMM DIMM Mode definitio...

Page 37: ...mory modules of the same type and speed on the motherboard for the system to work properly 2 Push the release tabs outwards on both ends of the DIMM slot to unlock it 3 Align the key of the DIMM module with the receptive point on the memory slot 4 Align the notches on both ends of the module against the receptive points on the ends of the slot 5 Use two thumbs together to press on both ends of the...

Page 38: ... CPU2 SLOT4 PCI E 3 0 X8 CPU2 SLOT3 PCI E 3 0 X16 CPU1 SLOT2 PCI E 3 0 X8 COM2 JBT1 CPU1 SLOT1 PCI E 3 0 X16 USB 5 6 SAS0 3 VGA LAN1 2 USB1 2 PS2 CPU2 CPU1 P2 DIMM D2 P2 DIMM D1 P2 DIMM E1 P2 DIMM F1 P1 DIMM A2 P1 DIMM A1 P1 DIMM B1 P1 DIMM C1 P2 DIMM C1 P2 DIMM B1 P2 DIMM A1 P2 DIMM A2 P1DIMM F1 P1 DIMM D2 P1 DIMM D1 P1 DIMM E1 SAS Controller Chip PCH 6 2 5 Rear I O Ports See the layout below for...

Page 39: ...LOT4 PCI E 3 0 X8 CPU2 SLOT3 PCI E 3 0 X16 CPU1 SLOT2 PCI E 3 0 X8 COM2 JBT1 CPU1 SLOT1 PCI E 3 0 X16 USB 5 6 SAS0 3 VGA LAN1 2 USB1 2 PS2 CPU2 CPU1 P2 DIMM D2 P2 DIMM D1 P2 DIMM E1 P2 DIMM F1 P1 DIMM A2 P1 DIMM A1 P1 DIMM B1 P1 DIMM C1 P2 DIMM C1 P2 DIMM B1 P2 DIMM A1 P2 DIMM A2 P1DIMM F1 P1 DIMM D2 P1 DIMM D1 P1 DIMM E1 SAS Controller Chip PCH VGA Port The onboard VGA port is located next to IPM...

Page 40: ...X8 CPU2 SLOT3 PCI E 3 0 X16 CPU1 SLOT2 PCI E 3 0 X8 COM2 JBT1 CPU1 SLOT1 PCI E 3 0 X16 USB 5 6 SAS0 3 VGA LAN1 2 USB1 2 PS2 CPU2 CPU1 P2 DIMM D2 P2 DIMM D1 P2 DIMM E1 P2 DIMM F1 P1 DIMM A2 P1 DIMM A1 P1 DIMM B1 P1 DIMM C1 P2 DIMM C1 P2 DIMM B1 P2 DIMM A1 P2 DIMM A2 P1DIMM F1 P1 DIMM D2 P1 DIMM D1 P1 DIMM E1 SAS Controller Chip PCH 2 1 3 Front Panel USB 5 6 3 0 Pin Definitions Pin Definition Pin De...

Page 41: ...CI E 3 0 X16 CPU2 SLOT4 PCI E 3 0 X8 CPU2 SLOT3 PCI E 3 0 X16 CPU1 SLOT2 PCI E 3 0 X8 COM2 JBT1 CPU1 SLOT1 PCI E 3 0 X16 USB 5 6 SAS0 3 VGA LAN1 2 USB1 2 PS2 CPU2 CPU1 P2 DIMM D2 P2 DIMM D1 P2 DIMM E1 P2 DIMM F1 P1 DIMM A2 P1 DIMM A1 P1 DIMM B1 P1 DIMM C1 P2 DIMM C1 P2 DIMM B1 P2 DIMM A1 P2 DIMM A2 P1DIMM F1 P1 DIMM D2 P1 DIMM D1 P1 DIMM E1 SAS Controller Chip PCH 1 LAN 1 2 Ethernet Ports Two Ethe...

Page 42: ... 2 USB1 2 PS2 CPU2 CPU1 P2 DIMM D2 P2 DIMM D1 P2 DIMM E1 P2 DIMM F1 P1 DIMM A2 P1 DIMM A1 P1 DIMM B1 P1 DIMM C1 P2 DIMM C1 P2 DIMM B1 P2 DIMM A1 P2 DIMM A2 P1DIMM F1 P1 DIMM D2 P1 DIMM D1 P1 DIMM E1 SAS Controller Chip PCH Power Button UID LED NIC1 Active LED Reset Button HDD LED PWR LED Reset PWR 3 3V Stby 3 3V Stby Ground 19 X Ground X 3 3V Stby 20 1 2 Ground Power Fail LED NIC2 Active LED NMI 3...

Page 43: ...2 Ground Power Button The Power Button connection is located on pins 1 and 2 of JF1 Momentarily contacting both pins will power on off the system This button can also be configured to function as a suspend button with a setting in the BIOS see Chapter 4 To turn off the power when the system is in suspend mode press the button for 4 seconds or longer Refer to the table below for pin definitions Res...

Page 44: ...JF1 Status Description Solid red An overheat condition has occurred This may be caused by cable congestion Blinking red 1Hz Fan failure check for an inoperative fan Blinking red 0 25Hz Power failure check for a non operational power supply Solid blue Local UID is activated Use this function to locate a unit in a rack mount environment that might be in need of service Blinking blue 300 msec Remote ...

Page 45: ...on pins 11 and 12 of JF1 and LAN port 2 is on pins 9 and 10 Attach the NIC LED cables here to display network activity Refer to the table below for pin definitions 1 NIC2 LED 2 NIC1 LED 3 HDD LED LAN1 LAN2 LED Pin Definitions JF1 Pin Definition 9 NIC 2 Activity LED 11 NIC 1 Activity LED 1 2 3 HDD LED The HDD LED connection is located on pins 13 and 14 of JF1 Attach a cable to pin 14 to show hard d...

Page 46: ... Fail Fan Fail LED Power LED The Power LED connection is located on pins 15 and 16 of JF1 Refer to the table below for pin definitions Power LED Pin Definitions JF1 Pins Definition 15 3 3V 16 PWR LED NMI Button The non maskable interrupt NMI button header is located on pins 19 and 20 of JF1 Refer to the table below for pin definitions NMI Button Pin Definitions JF1 Pins Definition 19 Control 20 Gr...

Page 47: ...IO1 SATA1 SATA2 SATA3 SATA4 SATA5 SATA8 SATA6 SATA7 FAN4 FAN3 JF1 LE2 DS1 T SGPIO1 T SGPIO2 VROC SAS4 7 USB3 4 CPU2 SLOT6 PCI E 3 0 X8 CPU2 SLOT5 PCI E 3 0 X16 CPU2 SLOT4 PCI E 3 0 X8 CPU2 SLOT3 PCI E 3 0 X16 CPU1 SLOT2 PCI E 3 0 X8 COM2 JBT1 CPU1 SLOT1 PCI E 3 0 X16 USB 5 6 SAS0 3 VGA LAN1 2 USB1 2 PS2 CPU2 CPU1 P2 DIMM D2 P2 DIMM D1 P2 DIMM E1 P2 DIMM F1 P1 DIMM A2 P1 DIMM A1 P1 DIMM B1 P1 DIMM ...

Page 48: ...E 3 0 X8 CPU2 SLOT3 PCI E 3 0 X16 CPU1 SLOT2 PCI E 3 0 X8 COM2 JBT1 CPU1 SLOT1 PCI E 3 0 X16 USB 5 6 SAS0 3 VGA LAN1 2 USB1 2 PS2 CPU2 CPU1 P2 DIMM D2 P2 DIMM D1 P2 DIMM E1 P2 DIMM F1 P1 DIMM A2 P1 DIMM A1 P1 DIMM B1 P1 DIMM C1 P2 DIMM C1 P2 DIMM B1 P2 DIMM A1 P2 DIMM A2 P1DIMM F1 P1 DIMM D2 P1 DIMM D1 P1 DIMM E1 SAS Controller Chip PCH 2 12V 8 pin CPU Power Connectors JPWR1 and JPWR2 are the 8 pi...

Page 49: ...USB1 2 PS2 CPU2 CPU1 P2 DIMM D2 P2 DIMM D1 P2 DIMM E1 P2 DIMM F1 P1 DIMM A2 P1 DIMM A1 P1 DIMM B1 P1 DIMM C1 P2 DIMM C1 P2 DIMM B1 P2 DIMM A1 P2 DIMM A2 P1DIMM F1 P1 DIMM D2 P1 DIMM D1 P1 DIMM E1 SAS Controller Chip PCH Onboard Fan Header Seven 4 pin fan headers FAN1 6 FANA are located on the motherboard to provide CPU system cooling These fan headers support both 3 pin fans and 4 pin fans however...

Page 50: ...E 3 0 X8 COM2 JBT1 CPU1 SLOT1 PCI E 3 0 X16 USB 5 6 SAS0 3 VGA LAN1 2 USB1 2 PS2 CPU2 CPU1 P2 DIMM D2 P2 DIMM D1 P2 DIMM E1 P2 DIMM F1 P1 DIMM A2 P1 DIMM A1 P1 DIMM B1 P1 DIMM C1 P2 DIMM C1 P2 DIMM B1 P2 DIMM A1 P2 DIMM A2 P1DIMM F1 P1 DIMM D2 P1 DIMM D1 P1 DIMM E1 SAS Controller Chip PCH TPM Header The JTPM1 header is used to connect a Trusted Platform Module TPM Port 80 which is available from S...

Page 51: ...CPU1 P2 DIMM D2 P2 DIMM D1 P2 DIMM E1 P2 DIMM F1 P1 DIMM A2 P1 DIMM A1 P1 DIMM B1 P1 DIMM C1 P2 DIMM C1 P2 DIMM B1 P2 DIMM A1 P2 DIMM A2 P1DIMM F1 P1 DIMM D2 P1 DIMM D1 P1 DIMM E1 SAS Controller Chip PCH 1 SGPIO Headers The T SGPIO1 and T SGPIO2 Serial General Purpose Input Output headers are used to communicate with the enclosure management chip on the backplane SGPIO Header Pin Definitions Pin D...

Page 52: ...JPCIE3 JPCIE1 JPCIE5 JD1 JSPDIF_OUT1 JSPDIF_IN1 JL1 Battery JWD1 JPME2 JPME1 JPS1 LEDM1 FAN1 FAN2 FANA JPWR3 JPWR2 JPWR1 JPI2C1 JAUDIO1 SATA1 SATA2 SATA3 SATA4 SATA5 SATA8 SATA6 SATA7 FAN4 FAN3 JF1 LE2 DS1 T SGPIO1 T SGPIO2 VROC SAS4 7 USB3 4 CPU2 SLOT6 PCI E 3 0 X8 CPU2 SLOT5 PCI E 3 0 X16 CPU2 SLOT4 PCI E 3 0 X8 CPU2 SLOT3 PCI E 3 0 X16 CPU1 SLOT2 PCI E 3 0 X8 COM2 JBT1 CPU1 SLOT1 PCI E 3 0 X16 ...

Page 53: ...CIE6 JPCIE4 JPCIE2 JPCIE3 JPCIE1 JPCIE5 JD1 JSPDIF_OUT1 JSPDIF_IN1 JL1 Battery JWD1 JPME2 JPME1 JPS1 LEDM1 FAN1 FAN2 FANA JPWR3 JPWR2 JPWR1 JPI2C1 JAUDIO1 SATA1 SATA2 SATA3 SATA4 SATA5 SATA8 SATA6 SATA7 FAN4 FAN3 JF1 LE2 DS1 T SGPIO1 T SGPIO2 VROC SAS4 7 USB3 4 CPU2 SLOT6 PCI E 3 0 X8 CPU2 SLOT5 PCI E 3 0 X16 CPU2 SLOT4 PCI E 3 0 X8 CPU2 SLOT3 PCI E 3 0 X16 CPU1 SLOT2 PCI E 3 0 X8 COM2 JBT1 CPU1 S...

Page 54: ...OC SAS4 7 USB3 4 CPU2 SLOT6 PCI E 3 0 X8 CPU2 SLOT5 PCI E 3 0 X16 CPU2 SLOT4 PCI E 3 0 X8 CPU2 SLOT3 PCI E 3 0 X16 CPU1 SLOT2 PCI E 3 0 X8 COM2 JBT1 CPU1 SLOT1 PCI E 3 0 X16 USB 5 6 SAS0 3 VGA LAN1 2 USB1 2 PS2 CPU2 CPU1 P2 DIMM D2 P2 DIMM D1 P2 DIMM E1 P2 DIMM F1 P1 DIMM A2 P1 DIMM A1 P1 DIMM B1 P1 DIMM C1 P2 DIMM C1 P2 DIMM B1 P2 DIMM A1 P2 DIMM A2 P1DIMM F1 P1 DIMM D2 P1 DIMM D1 P1 DIMM E1 SAS ...

Page 55: ... 3 0 X8 CPU2 SLOT3 PCI E 3 0 X16 CPU1 SLOT2 PCI E 3 0 X8 COM2 JBT1 CPU1 SLOT1 PCI E 3 0 X16 USB 5 6 SAS0 3 VGA LAN1 2 USB1 2 PS2 CPU2 CPU1 P2 DIMM D2 P2 DIMM D1 P2 DIMM E1 P2 DIMM F1 P1 DIMM A2 P1 DIMM A1 P1 DIMM B1 P1 DIMM C1 P2 DIMM C1 P2 DIMM B1 P2 DIMM A1 P2 DIMM A2 P1DIMM F1 P1 DIMM D2 P1 DIMM D1 P1 DIMM E1 SAS Controller Chip PCH 2 8 SATA SAS Connections 1 SATA 3 0 Ports The X11DAC has eight...

Page 56: ...PDIF_IN1 JL1 Battery JWD1 JPME2 JPME1 JPS1 LEDM1 FAN1 FAN2 FANA JPWR3 JPWR2 JPWR1 JPI2C1 JAUDIO1 SATA1 SATA2 SATA3 SATA4 SATA5 SATA8 SATA6 SATA7 FAN4 FAN3 JF1 LE2 DS1 T SGPIO1 T SGPIO2 VROC SAS4 7 USB3 4 CPU2 SLOT6 PCI E 3 0 X8 CPU2 SLOT5 PCI E 3 0 X16 CPU2 SLOT4 PCI E 3 0 X8 CPU2 SLOT3 PCI E 3 0 X16 CPU1 SLOT2 PCI E 3 0 X8 COM2 JBT1 CPU1 SLOT1 PCI E 3 0 X16 USB 5 6 SAS0 3 VGA LAN1 2 USB1 2 PS2 CP...

Page 57: ...tween two pins to change the function of the connector Pin 1 is identified with a square solder pad on the printed circuit board See the diagram at right for an example of jumping pins 1 and 2 Refer to the motherboard layout page for jumper locations Note On two pin jumpers Closed means the jumper is on and Open means the jumper is off the pins Connector Pins Jumper Setting 3 2 1 3 2 1 ...

Page 58: ...ords Do not use the PW_ON connector to clear CMOS JBT1 contact pads 1 Clear CMOS SAS CODE BIOS LICENSE DESIGNED IN USA MAC CODE MAC CODE X11DAC REV 1 00 BMC FAN6 FAN5 JTPM1 JRK1 JA1 JPCIE6 JPCIE4 JPCIE2 JPCIE3 JPCIE1 JPCIE5 JD1 JSPDIF_OUT1 JSPDIF_IN1 JL1 Battery JWD1 JPME2 JPME1 JPS1 LEDM1 FAN1 FAN2 FANA JPWR3 JPWR2 JPWR1 JPI2C1 JAUDIO1 SATA1 SATA2 SATA3 SATA4 SATA5 SATA8 SATA6 SATA7 FAN4 FAN3 JF1...

Page 59: ... Recovery mode See the table below for jumper settings Manufacturer Mode Jumper Settings Jumper Setting Definition Pins 1 2 Normal Pins 2 3 ME Recovery 2 SAS CODE BIOS LICENSE DESIGNED IN USA MAC CODE MAC CODE X11DAC REV 1 00 BMC FAN6 FAN5 JTPM1 JRK1 JA1 JPCIE6 JPCIE4 JPCIE2 JPCIE3 JPCIE1 JPCIE5 JD1 JSPDIF_OUT1 JSPDIF_IN1 JL1 Battery JWD1 JPME2 JPME1 JPS1 LEDM1 FAN1 FAN2 FANA JPWR3 JPWR2 JPWR1 JPI...

Page 60: ...pen Disabled 1 Watch Dog SAS CODE BIOS LICENSE DESIGNED IN USA MAC CODE MAC CODE X11DAC REV 1 00 BMC FAN6 FAN5 JTPM1 JRK1 JA1 JPCIE6 JPCIE4 JPCIE2 JPCIE3 JPCIE1 JPCIE5 JD1 JSPDIF_OUT1 JSPDIF_IN1 JL1 Battery JWD1 JPME2 JPME1 JPS1 LEDM1 FAN1 FAN2 FANA JPWR3 JPWR2 JPWR1 JPI2C1 JAUDIO1 SATA1 SATA2 SATA3 SATA4 SATA5 SATA8 SATA6 SATA7 FAN4 FAN3 JF1 LE2 DS1 T SGPIO1 T SGPIO2 VROC SAS4 7 USB3 4 CPU2 SLOT6...

Page 61: ...P1 DIMM A1 P1 DIMM B1 P1 DIMM C1 P2 DIMM C1 P2 DIMM B1 P2 DIMM A1 P2 DIMM A2 P1DIMM F1 P1 DIMM D2 P1 DIMM D1 P1 DIMM E1 SAS Controller Chip PCH 2 10 LED Indicators 1 LAN1 LAN2 LEDs 2 IPMI LAN LEDs 1 LAN LEDs The LAN ports are located on the IO Backplane on the motherboard Each Ethernet LAN port has two LEDs The yellow LED indicates activity Link LED located on the left side of the LAN port may be ...

Page 62: ...DIMM D1 P2 DIMM E1 P2 DIMM F1 P1 DIMM A2 P1 DIMM A1 P1 DIMM B1 P1 DIMM C1 P2 DIMM C1 P2 DIMM B1 P2 DIMM A1 P2 DIMM A2 P1DIMM F1 P1 DIMM D2 P1 DIMM D1 P1 DIMM E1 SAS Controller Chip PCH BMC Heartbeat LED LEDM1 is the BMC heartbeat LED When the LED is blinking green BMC is functioning normally See the table below for the LED status Onboard Power LED Indicator LED Color Definition Green Blinking BMC ...

Page 63: ... motherboard and chassis 4 Disconnect all cables from the motherboard including those for the keyboard and mouse 5 Remove all add on cards 6 Install a CPU a heatsink and connect the internal speaker and the power LED to the motherboard Check all jumper settings as well Make sure that the heatsink is fully seated 7 Use the correct type of onboard CMOS battery as recommended by the manufacturer To a...

Page 64: ...he power cord and con tacting both pads on the CMOS Clear Jumper JBT1 Refer to chapter 2 2 Remove all components from the motherboard especially the DIMM modules Make sure that system power is on and that memory error beeps are activated 3 Turn on the system with only one DIMM module installed If the system boots check for bad DIMM modules or slots by following the Memory Errors Troubleshooting pr...

Page 65: ...hat all hard disk drives HDDs work properly Replace the bad HDDs with good ones 4 System cooling Check the system cooling to make sure that all heatsink fans and CPU system fans etc work properly Check the hardware monitoring settings in the IPMI to make sure that the CPU and system temperatures are within the normal range Also check the front panel Overheat LED and make sure that it is not on 5 A...

Page 66: ...lease take the following steps Also note that as a motherboard manufacturer we do not sell directly to end users so it is best to first check with your distributor or reseller for troubleshooting services They should know of any possible problem s with the specific system configuration that was sold to you 1 Please review the Troubleshooting Procedures and Frequently Asked Questions FAQs sections ...

Page 67: ...rboard Question How do I update my BIOS Answer It is recommended that you do not upgrade your BIOS if you are not experiencing any problems with your system Updated BIOS files are located on our website at http www supermicro com ResourceApps BIOS_IPMI_Intel html Please check our BIOS warning message and the information on how to update your BIOS on our website Select your motherboard model and do...

Page 68: ...nds without you pressing any key BIOS will be updated after the system reboots You can also press Y to force an immediate system reboot to shorten the process Dur ing system reboot press the F11 key to invoke the boot menu and boot into the build in UEFI Shell Your BIOS will be updated automatically b If the FDT is the same BIOS update will be immediately performed without a system reboot initiate...

Page 69: ... hazardous materials into the environment Do not discard a used battery in the garbage or a public landfill Please comply with the regulations set up by your local hazardous waste management agency to dispose of your used battery properly Battery Installation To install an onboard battery follow the steps below 1 Power off your system and unplug your power cable 2 Locate the onboard battery as sho...

Page 70: ...nently displayed on the outside of the shipping carton and mailed prepaid or hand carried Shipping and handling charges will be applied for all orders that must be mailed when service is complete For faster service RMA authorizations may be requested online http www supermicro com support rma This warranty only covers normal consumer use and does not cover damages incurred in shipping or from fail...

Page 71: ... F2 etc Each main BIOS menu option is described in this manual The Main BIOS screen has two main frames The left frame displays all the options that can be configured Grayed out options cannot be configured The right frame displays the key legend Above the key legend is an area reserved for a text message When an option is selected in the left frame it is highlighted in white Often a text message ...

Page 72: ...ard Press the Tab key or the arrow keys to move between fields The date must be entered in Day MM DD YYYY format The time is entered in HH MM SS format Note The time is in the 24 hour format For example 5 30 P M appears as 17 30 00 The date s default value is the BIOS build date after the RTC Real Time Clock reset Supermicro X11DAC BIOS Version This feature displays the version of the BIOS ROM use...

Page 73: ...EFI BIOS 73 Memory Information Total Memory This feature displays the total size of memory available in the system Memory Speed This feature displays the default speed of the memory modules installed in the system ...
Page 74: ...n between displaying POST messages or the OEM logo at bootup Select Disabled to display the POST messages Select Enabled to display the OEM logo instead of the normal POST messages The options are Enabled and Disabled Note POST message is always displayed regardless of the item setting Option ROM Messages Use this feature to set the display mode for the Option ROM Select Keep Current to use the cu...

Page 75: ...vice after an initial boot failure The options are Disabled Legacy Boot and EFI Boot Power Configuration Watch Dog Function Select Enabled to allow the Watch Dog timer to reboot the system when it is inactive for more than 5 minutes The options are Enabled and Disabled EuP Energy using Product Select Enabled for EuP Energy using Product support to conserve energy use and enhance power performance ...

Page 76: ...essor specified by the user Use the key and the key on the keyboard to set the desired number of CPU cores you want to enable in a processor Please note that the maximum of 24 CPU cores are currently available in each CPU package The default setting is 0 Monitor Mwait Select Enable to enable the Monitor Mwait instructions in the processor The options are Enable and Disable Execute Disable Bit Avai...

Page 77: ...to prefetch both cache lines for 64 bytes The options are Disable and Enable Note Please power off and reboot the system for the changes you ve made to take effect Please refer to Intel s website for detailed information DCU Streamer Prefetcher Available when supported by the CPU If this feature is set to Enable the DCU Data Cache Unit streamer prefetcher will prefetch data streams from the cache ...

Page 78: ... system performance to its highest potential however this may result in maximum power consumption as energy is needed to fuel the processor frequency The higher the performance is the higher the power consumption will be Select Max Power Efficient to maximize power saving however system performance may be substantially impacted because limited power use decreases the processor frequency The option...

Page 79: ...or cores to run faster than the frequency specified by the manufacturer The options are Disable and Enable Hardware PM Power Management State Control Available when Power Technology is set to Custom Hardware P States If this feature is set to Disable hardware will choose a P state setting for the system based on an OS request If this feature is set to Native Mode hardware will choose a P state set...

Page 80: ...o Limit and Auto CPU T State Control Available when Power Technology is set to Custom Software Controlled T States If this feature is set to Enable CPU throttling settings will be supported by the software of the system The options are Enable and Disable Chipset Configuration Warning Setting the wrong values in the following items may cause the system to malfunction North Bridge This feature allow...

Page 81: ... Remote WCiLF SNC Select Enable to use Sub NUMA Clustering SNC which supports full SNC 2 cluster interleave and 1 way IMC interleave Select Auto for 1 cluster or 2 cluster support depending on the status of IMC Integrated Memory Controller Interleaving The options are Disable Enable and Auto XPT Prefetch Select Enable to support XPT Prefetching to enhance system performance The options are Enable ...

Page 82: ...nable Disable and Auto Isoc Mode Select Enable to enable Isochronous support to meet QoS Quality of Service requirements This feature is especially important for Virtualization Technology The options are Disable Enable and Auto Memory Configuration Enforce POR Plan of Record Select POR to enforce POR restrictions for DDR4 memory frequency and voltage programming The options are POR and Disable PPR...

Page 83: ...le to use different values for the tRWSR DDR timing settings for different channels as trained The options are Auto Disable and Enable Enable ADR Select Enable forADR Async DIMM Self Refresh support to enhance memory performance The options are Disable and Enable Data Scrambling for NVDIMM Select Enable to enable data scrambling support for onboard NVDIMM memory to improve system performance and s...

Page 84: ...h Select Enable for memory 2X refresh support to enhance memory performance The options are Disable Enable and Auto Page Policy Use this feature to set the page policy for onboard memory support The options are Closed Adaptive and Auto IMC Interleaving Use this feature to configure interleaving settings for the IMC Integrated Memory Controller which will improve memory performance The options are ...

Page 85: ...ult setting is 512 Intel Run Sure Select Enable to use Intel Run Sure Technology which will enhance critical data protection and increase system uptime and resiliency The options are Enable and Disable SDDC Plus One Available when this feature is supported by the CPU the item Intel Run Sure is set to Disable SDDC Single Device Data Correction checks and corrects single bit or multiple bit 4 bit ma...

Page 86: ... On Hide Features When this feature is set to Enable the EV_DFX Lock Bits that are located in a processor will always remain clear during electric tuning The options are Disable and Enable CPU1 Configuration CPU2 Configuration IOU0 IIO PCIe Br1 Use this feature to configure the PCIe Bifurcation setting for a PCIe port specified by the user The options are x4x4x4x4 x4x4x8 x8x4x4 x8x8 x16 and Auto I...

Page 87: ...ion Disable TPH TLP Processing Hint TPH is used for data tagging with a destination ID and a few important attributes It can send critical data to a particular cache without writing through to memory Select No in this item for TLP Processing Hint support which will allow a TPL request to provide hints to help optimize the processing of each transaction occurred in the target memory space The optio...

Page 88: ...t to enhance system performance The options are Enable and Disable PassThrough DMA Available when Intel VT for Directed I O VT d is set to Enable Select Enable for the Non Isoch VT d engine to pass through DMA Direct Memory Access to enhance system performance The options are Enable and Disable ATS Available when Intel VT for Directed I O VT d is set to Enable Select Enable to enable ATS Address T...

Page 89: ...t Disable to have all USB devices available for EFI applications only The options are Enabled Disabled and Auto XHCI Hand Off This is a work around solution for operating systems that do not support XHCI Extensible Host Controller Interface hand off The XHCI ownership change should be claimed by the XHCI driver The options are Disabled and Enabled Port 60 64 Emulation Select Enabled for I O port 6...

Page 90: ...specified by the user as an AHCI drive Select RAID to configure a SATA drive specified by the user as a RAID drive The options are AHCI and RAID Note This item is hidden when the SATA Controller item is set to Disabled SATA HDD Unlock Available when SATA Controller is set to Enable Select Enable to unlock SATA HDD password in the OS The options are Enable and Disable SATA sSATA RAID Boot Select Av...

Page 91: ...The options are Hard Disk Drive and Solid State Drive sSATA Configuration When this submenu is selected the AMI BIOS automatically detects the presence of the sSATA devices that are supported by the sSATA controller and displays the following items sSATA Controller This item enables or disables the onboard sSATA controller supported by the Intel PCH The options are Enable and Disable Configure sSA...

Page 92: ...fied by the user which will allow the user to replace the device installed in the slot without shutting down the system The options are Enable and Disabled Spin Up Device This setting allows the SATA device installed on the SATA port specified by the user to start a COMRESET initialization when an edge is detected from 0 to 1 The options are Enable and Disable sSATA Device Type Use this feature to...

Page 93: ...ed to onboard PCI devices The options are 1G 1 5G 1 75G 2G 2 25G and 3G VGA Priority Use this feature to select the graphics device to be used as the primary video display for system boot The options are Auto Onboard and Offboard PCI Devices Option ROM Settings CPU1 Slot 1 PCI E x16 OPROM CPU1 Slot 2 PCI E x8 OPROM CPU2 Slot 3 PCI E x16 OPROM CPU2 Slot 4 PCI E x8 OPROM CPU2 Slot 5 PCI E x16 OPROM ...

Page 94: ...re Disabled and Enabled Ipv4 HTTP Support Select Enabled to enable Ipv4 HTTP boot support If this feature is disabled it will not create the Ipv4 HTTP boot option The options are Enabled and Disabled Ipv6 PXE Support Select Enabled to enable Ipv6 PXE boot support If this feature is disabled it will not create the Ipv6 PXE boot option The options are Disabled and Enabled Ipv6 HTTP Support Select En...

Page 95: ... IRQ address to a serial port specified The options for Serial Port 2 are Auto IO 2F8h IRQ 3 IO 3F8h IRQ 3 4 5 6 7 9 10 11 12 IO 2F8h IRQ 3 4 5 6 7 9 10 11 12 IO 3E8h IRQ 3 4 5 6 7 9 10 11 12 and IO 2E8h IRQ 3 4 5 6 7 9 10 11 12 Serial Port 2 Attribute Select SOL to use COM Port 2 as a Serial_Over_LAN SOL port for console redirection The options are COM and SOL Serial Port Console Redirection CM2 ...

Page 96: ...eature to set the data transmission size for Console Redirection The options are 7 Bits and 8 Bits Parity A parity bit can be sent along with regular data bits to detect data transmission errors Select Even if the parity bit is set to 0 and the number of 1 s in data bits is even Select Odd if the parity bit is set to 0 and the number of 1 s in data bits is odd Select None if you do not want to sen...

Page 97: ...se this feature to select the COM port to display redirection of Legacy OS and Legacy OPROM messages The default option is COM2 SOL Resolution Use this feature to select the number of rows and columns used in Console Redirection for Legacy OS support The options are 80x24 and 80x25 Redirect After POST Use this feature to enable or disable Legacy Console Redirection after BIOS POST When the option ...

Page 98: ... bits per second Flow Control Use this feature to set the flow control for Console Redirection to prevent data loss caused by buffer overflow Send a Stop signal to stop data sending when the receiving buffer is full Send a Start signal to start data sending when the receiving buffer is empty The options are None Hardware RTS CTS and Software Xon Xoff The setting for each these features is displaye...

Page 99: ... data integrity and system security Please note that the OS will not show the security device Neither TCG EFI protocol nor INT1A interaction will be made available for use If you have made changes on the setting on this item be sure to reboot the system for the change to take effect The options are Disable and Enable If this option is set to Enable the following screen and items will display Activ...

Page 100: ...o be used for non privacy sensitive operations by the platform owner such as an IT professional or the end user Storage Hierarchy has an owner policy and an authorization value both of which can be set and are held constant rarely changed through reboots This hierarchy can be cleared or changed independently of the other hierarchies The options are Enabled and Disabled Endorsement Hierarchy Select...

Page 101: ...ll be displayed Server CA Configuration This feature allows the user to configure the client certificate that is to be used by the server Enroll Certification This feature allows the user to enroll the certificate in the system Enroll Cert Certification Using File This feature allows the user to enroll the security certificate in the system by using a file Cert Certification GUID Global Unique Ide...

Page 102: ...e when you want to exit from this submenu after you ve created a raw RAM disk Discard Exit Select this feature when you want to abandon the changes you ve made and to exit from the submenu Create from File This feature allows the user to create a RAM disk from a file specified by the user Select this submenu and press Enter the following items will display Create RAM Disk List Use this feature to ...

Page 103: ...his feature indicates the manageability state of the DCPMM module Health State This feature indicates the health state of the DCPMM module Health State Reason This feature indicates the reason that effectuates the health state of the DCPMM module Capacity This feature indicates the capacity of the DCPMM module Firmware Version This feature indicates the firmware version of the DCPMM module Firmwar...

Page 104: ...oller ID Vendor ID Device ID System Vendor ID Subsystem Vendor ID Subsystem Device ID Device Locator Subsystem Revision ID Interface Format Code Manufacturing Information Valid Manufacturing Date Manufacturing Location Memory Type Memory Bank Label Data Width Label b Total Width b Speed MHz Channel ID Channel Position Revision ID Form Factor ...

Page 105: ...er Budget mW Avg Average Power Budget mW Max Average Power Budget mW Package Sparing Capable Package Sparing Enabled Package Spares Available Configuration Status SKU Violation ARS Status Overwrite DIMM Status Last Shutdown Time First Fast Refresh Viral Policy Enable Viral State Latched Last Shutdown Status Unlatched Last Shutdown Status Security Capabilities Modes Supported ...

Page 106: ...ormal threshold value for the DCPMM module to maintain normal operations Critical Lower Threshold This feature displays the lowest threshold value for the DCPMM module to maintain normal operations Critical Upper Threshold This feature displays the higher threshold value for the DCPMM module to maintain normal operations Fatal Threshold This feature indicates the highest value allowed for the DCPM...

Page 107: ...ect The following items will display Current Firmware Version This feature displays the current firmware version Selected Firmware Version This feature allows the user to select a new firmware ver sion to use File This feature allows the user to specify the file path in the root directory that contains the new firmware for firmware update Staged Firmware Version This feature indicates the staged f...

Page 108: ...enu Select this feature and press Enter to go back to the Intel Optane DC Persistent Memory Configuration menu Configure Data Policy Use this feature to configure the data policy settings for all onboard DCPMM modules First Fast Fresh State Select Enabled to display the First Fast Fresh state for onboard DCPMM modules Enable First Fast Fresh State Select Enabled to support the first fast fresh sta...

Page 109: ...Socket ID of the DCPMM module Persistent Memory Type Capacity Free Capacity Create Goal Configuration When this submenu is selected the following items will display Create Goal Configuration for Use this feature to select the target to create goal con figuration for the DCPMM modules The options are Platform and Socket Reserved Use this feature to reserve a percentage of the DCPMM capacity for a p...

Page 110: ...space to view the following information on the selected namespace Namespace ID Name Heath Status 0x00000201 Select this feature and press Enter the following items will display UUID ID Name Region Health Mode Block Size Units Use this feature to change the namespace capacity in the unit of B MB MiB GB GiB TB and TiB Capacity Label Version Save After configuring the settings for the namespace above...

Page 111: ...maximum memory capacity currently available as system memory capacity Select Manual to enter the system memory capacity manually The options are Remaining and Manual Units Use this feature to select the type of unit to use when inputting namespace capacity in the system The options are B MB MiB GB GiB TB and TiB Capacity This feature displays the namespace capacity Back to Namespace Select this fe...

Page 112: ...u Select this feature and press Enter to go back to the Intel Optane DC Persistent Memory Configuration menu Diagnostics Perform Diagnostic Tests on DIMMs When you select this submenu and press enter the following items will display Choose Diagnostics Type Quick Diagnostics Select Enabled for the quick diagnostics test to be performed on the DCPMM module installed in the system when needed The opt...

Page 113: ...to modify the default DIMM ID as displayed on the screen The options are Handle and UID Capacity Units This feature allows the user to view and to set the default capacity unit of the selected DCPMM to be displayed on the screen The options are Auto Auto_10 B MB MiB GB GiB TB and TiB App Direct Settings This feature displays the Application Direct Settings The default setting is 4KB_4KB Recommende...

Page 114: ... Logging during system boot The options are Enabled and Disabled Erasing Settings Erase Event Log Select No to keep the event log without erasing it upon next system bootup Select Yes Next Reset to erase the event log upon next system reboot The options are No Yes Next reset and Yes Every reset When Log is Full Select Erase Immediately to immediately erase all errors in the SMBIOS event log when t...

Page 115: ... The default setting is 1 METW Multiple Event Count Time Window This feature is used to determine how long in minutes should the multiple event counter wait before generating a new event log Enter a number between 0 to 99 The default setting is 60 View System Event Log This feature allows the user to view the event in the system event log Select this item and press Enter to view the status of an e...

Page 116: ...he status of the BMC Baseboard Management Controller installed in your system System Event Log Enabling Disabling Options SEL Components Select Enabled to enable all system event logging upon system boot The options are Enabled and Disabled Erasing Settings Erase SEL Select Yes On next reset to erase all system event logs upon next system boot Select Yes On every reset to erase all system event lo...

Page 117: ...etting is Disabled IPv4 Address Source This feature displays the source of IPv4 addresses The default setting is DHCP Station IP Address This feature displays the Station IP address for this computer This should be in decimal and in dotted quad form i e 192 168 10 253 Subnet Mask This feature displays the sub network that this computer belongs to The value of each three digit number separated by d...

Page 118: ...r a DHCP Dynamic Host Configuration Protocol server attached to the network and request the next available IP address for this computer The options are DHCP and Static IPv6 Support Select Enabled for IPv6 support The options are Enabled and Disabled If this option is set to Enabled the following item will display Configuration Address Source Use this feature to select the IP address source for thi...

Page 119: ... of the password should be from 3 characters to 20 characters long User Password Use this feature to set the user password which is required to enter the BIOS setup utility The length of the password should be from 3 characters to 20 characters long Password Check Select Setup for the system to check for a password at Setup Select Always for the system to check for a password at system boot and up...

Page 120: ...upported by the system The options are Enabled and Disabled Restore Factory Keys Select Yes to restore manufacturer default keys used to ensure system security The options are Yes and No Reset To Setup Mode Select Yes to reset the system to the Setup Mode The options are Yes and No Key Management Vendor Keys Factory Key Provision Select Yes to install manufacturer default keys for system security ...

Page 121: ...be used as platform firmware keys for the system The sizes keys numbers and key sources of the platform keys will be indicated as well Select Update to update the platform key Key Exchange Keys This feature allows the user to enter and configure a set of values to be used as Key Exchange Keys for the system The sizes keys numbers and key sources of the Key Exchange Keys will be indicated as well S...

Page 122: ... Append and Delete Authorized TimeStamps This feature allows the user to set and save the timestamps for the authorized signatures which will indicate the time when these signatures are entered into the system Select Update to update your Authorized TimeStamps Select Append to append your Authorized TimeStamps The settings are Update and Append OsRecovery Signatures This feature allows the user to...

Page 123: ...ixed Boot Order Priorities This feature prioritizes the order of a bootable device from which the system will boot Press Enter on each item sequentially to select devices When the item above Boot Mode Select is set to Dual default the following items will be displayed for user s configuration Boot Option 1 Boot Option 17 When the item above Boot Mode Select is set to Legacy the following items wil...

Page 124: ... Boot Option Use this feature to select a boot device to delete from the boot priority list Delete Boot Option Use this feature to remove an EFI boot option from the boot priority list Add New Driver Option Use this feature to select a new driver to add to the boot priority list Add Driver Option Use this feature to specify the name of the driver to be added to the boot priority list Path for Drov...

Page 125: ...the boot priority list Delete Drive Option Select the target boot driver to delete from the boot priority list UEFI Hard Disk Drive BBS Priorities Boot Option 1 5 UEFI USB Key Drive BBS Priorities Boot Option 1 UEFI Application Boot Priorities Boot Option 1 Network Drive BBS Priorities Boot Option 1 ...

Page 126: ...puter Save Changes and Reset When you have completed the system configuration changes select this option to leave the BIOS setup utility and reboot the computer for the new system configuration parameters to become effective Save Changes When you have completed the system configuration changes select this option to save all changes made This will not reset reboot the system Discard Changes Select ...

Page 127: ...the user to save all changes to the BIOS setup for future use Restore User Defaults To set this feature select Restore User Defaults from the Exit menu and press Enter Use this feature to retrieve user defined default settings that were saved previously Boot Override This feature allows the user to override the Boot priorities sequence in the Boot menu and immediately boot the system with a device...

Page 128: ...he system to continue to boot up If a fatal error occurs you should consult with your system manufacturer for possible repairs The fatal errors are usually communicated through repeated patterns of audible beeps Each pattern of audible beeps listed below corresponds to its respective error BIOS Beep POST Codes Beep Code Error Message Description 1 beep Refresh Circuits have been reset Ready to pow...

Page 129: ...om support manuals AMI BIOS POST Codes User s Guide When BIOS performs the Power On Self Test it writes checkpoint codes to I O port 0080h If the computer cannot complete the boot process a diagnostic card can be attached to the computer to read I O port 0080h Supermicro p n AOC LPC80 20 For information on AMI updates please refer to http www ami com products ...

Page 130: ... www supermicro com support manuals Installing the OS 1 Create a method to access the MS Windows installation ISO file That might be a DVD perhaps using an external USB SATA DVD drive or a USB flash drive or the IPMI KVM console 2 Retrieve the proper RST RSTe driver Go to the Supermicro web page for your motherboard and click on Download the Latest Drivers and Utilities select the proper driver an...

Page 131: ...s using an external USB SATA DVD drive or a USB flash drive or the IPMI KVM console 2 Retrieve the proper RST RSTe driver Go to the Supermicro web page for your motherboard and click on Download the Latest Drivers and Utilities select the proper driver and copy it to a USB flash drive 3 Boot from a bootable device with Windows OS installation You can see a bootable device list by pressing F11 duri...

Page 132: ...icated then choose the storage drive on which you want to install it For non RAID choose the SATA sSATA AHCI driver indicated then choose the storage drive on which you want to install it 5 Once all devices are specified continue with the installation 6 After the Windows OS installation has completed the system will automatically reboot multiple times ...

Page 133: ... Another option is to go to the Supermicro website at http www supermicro com products Find the product page for your motherboard and Download the Latest Drivers and Utilities Insert the flash drive or disk and the screenshot shown below should appear Figure B 3 Driver Tool Installation Screen Note Click the icons showing a hand writing on paper to view the readme files for each item Click the com...

Page 134: ...sions and can be used with Nagios to maximize your system monitoring needs With SuperDoctor 5 Management Server SSM Server you can remotely control power on off and reset chassis intrusion for multiple systems with SuperDoctor 5 or IPMI SuperDoctor 5 Management Server monitors HTTP FTP and SMTP services to optimize the efficiency of your operation Note The default User Name and Password for SuperD...

Page 135: ...products nfo IPMI cfm B 5 Logging into the BMC Baseboard Management Controller Supermicro ships standard products with a unique password for the BMC user This password can be found on a label on the motherboard When logging in to the BMC for the first time please use the unique password provided by Supermicro to log in You can change the unique password to a user name and password of your choice f...

Page 136: ...com about policies safety_information cfm Battery Handling 電池の取り扱い 電池交換が正しく行われなかった場合 破裂の危険性があります 交換する電池はメーカーが推 奨する型 または同等のものを使用下さい 使用済電池は製造元の指示に従って処分して下さい Warnung Bei Einsetzen einer falschen Batterie besteht Explosionsgefahr Ersetzen Sie die Batterie nur durch den gleichen oder vom Hersteller empfohlenen Batterietyp Entsorgen Sie die benutzten Batterien nach den Anweisungen des Herstellers Warnin...

Page 137: ...rd te worden 경고 배터리가 올바르게 교체되지 않으면 폭발의 위험이 있습니다 기존 배터리와 동일하거나 제조사에서 권장하는 동등한 종류의 배터리로만 교체해야 합니다 제조사의 안내에 따라 사용된 배터리를 처리하여 주십시오 Advertencia Existe peligro de explosión si la batería se reemplaza de manera incorrecta Reemplazar la batería exclusivamente con el mismo tipo o el equivalente recomendado por el fabricante Desechar las baterías gastadas según las instrucciones del fabricante אזהרה להחליף ...

Page 138: ...s et ou directives de respect de l environnement Renseignez vous auprès de l organisme compétent Waarschuwing De uiteindelijke verwijdering van dit product dient te geschieden in overeenstemming met alle nationale wetten en reglementen 경고 이 제품은 해당 국가의 관련 법규 및 규정에 따라 폐기되어야 합니다 Warning Ultimate disposal of this product should be handled according to all national laws and regulations המוצר סילוק אזהר...

Page 139: ... Recovering the UEFI BIOS Image A UEFI BIOS flash chip consists of a recovery BIOS block and a main BIOS block a main BIOS image The recovery block contains critical BIOS codes including memory detection and recovery codes for the user to flash a healthy BIOS image if the original main BIOS image is corrupted When the system power is turned on the recovery block codes execute first Once this proce...

Page 140: ...EFI BIOS recovery using a USB attached device follow the instructions below 1 Please use a different machine to download the BIOS package for your motherboard or your system from the product page available on our website at www supermicro com 2 Extract the BIOS package to a USB device and rename the BIOS ROM file BIOSname that is included in the BIOS package to SUPER ROM for BIOS recovery use 3 Co...

Page 141: ... want to start the BIOS recovery If you decide to proceed with BIOS recovery follow the procedures below 6 When the screen as shown above displays use the arrow keys to select the item Proceed with flash update and press the Enter key You will see the BIOS recovery progress as shown in the screen below Note Do not interrupt the BIOS flashing process until it is complete ...

Page 142: ...enu list select Boot Option 1 as shown below Then set Boot Option 1 to UEFI AP UEFI Built in EFI Shell Press F4 to save the settings and exit the BIOS Setup utility 7 After the BIOS recovery process is complete press any key to reboot the system Note It is recommended that you update your BIOS after BIOS recovery Please refer to Chapter 3 for BIOS update instructions ...

Page 143: ...ory that contains the BIOS package you extracted earlier from Step 1 Enter flash nsh BIOSname at the prompt to start the BIOS update process Note Do not interrupt this process until the BIOS flashing is complete 10 The screen above indicates that the BIOS update process has completed Reboot the system when you see the screen below ...

Page 144: ... the lat est updates please contact us or refer to our website at https www supermicro com Note 2 Depending on the version of driver utility package it may or may not have exactly the same as the BIOS settings features shown in the appendix E 1 All Intel VMD Controllers Menu The following section provide you with instructions on how to access the All Intel VMD Controllers menu which will allow you...

Page 145: ...lots that can be configured for VMD support on the screen 8 From the available PCI slots displayed on the screen select a PCI slot you want to use for a VMD device by highlighting it 9 Select the option Enable and press Enter to enable the selected slot for VMD support 10 Repeat Step 8 Step 9 to select and enable all the PCI slots of your choice for VMD support 11 After enabling all PCI slots for ...

Page 146: ... has become available Note 1 The license and header on the motherboard for Intel VROC hardware key are required Also be sure the version of Intel Rapid Storage Technology enterprise Intel RSTe VROC utility is 5 or above look for Intel R VROC with VMD Technology x x x xxxx shown on the screen Note 2 Intel VROC Premium hardware key is used in the appendix to demonstrate RAID settings 13 Navigate to ...

Page 147: ...l VMD x16 PCIe Intel VMD x16 PCIe Intel VMD x16 PCIe NVMe Device NVMe Device NVMe Device NVMe Device Processor Intel VMD x16 PCIe Intel VMD x16 PCIe Intel VMD x16 PCIe NVMe Device NVMe Device NVMe Device NVMe Device UPI NVMe Device Data RAID will be allowed to cross VMDs and processors Boot RAID will NOT be able to cross VMDs Note A single Intel VMD supported processor supplies 48 PCIe lanes and c...

Page 148: ...pear Please carefully follow the instructions listed in this section to configure RAID settings for your devices as desired To Create a RAID Volume Use the arrow keys to select Create RAID Volume from the screen above and press Enter to create a RAID Volume The Create RAID Volume submenu which allows you to configure the settings of the RAID volume you ve created will appear as shown below ...

Page 149: ...e screen above displays enter a unique name for the RAID volume To Enter a Name for the RAID Volume From the Create RAID Volume submenu as shown on the previous screen use the arrow keys to select Name and press Enter and the following screen will display ...

Page 150: ...ected to the system Note 2 For RAID0 RAID1 RAID5 RAID10 the minimum number of NVMe devices required is two two three four respectively Note 3 Use Intel VROC Standard hardware key to support RAID 0 1 10 Use Intel VROC Premium hardware key or Intel SSD Only hardware key to support RAID 0 1 5 10 Use the arrow keys to select the desired RAID level for the RAID volume that you ve created The options ar...

Page 151: ...nter RAID spanned over VMD Controllers and press Enter The following screen will display Note For a bootable RAID volume do not cross VMD domains Enter a desired setting for your RAID volume in the pop up menu The options are not selected and X selected Please set this feature to X if the RAID level you selected earlier from Step 3 will cross VMD domains ...

Page 152: ...mes From the Create RAID Volume submenu use the arrow keys to highlight Select Disk and press Enter The following screen will display The options are not selected and X selected Set the features one by one to X to select the desired RAID disks for your RAID volumes ...

Page 153: ... select Strip Size and press Enter The following screen will display Note For RAID5 the options are 4KB 8KB 16KB 32KB 64KB and 128KB For RAID10 the options are 4KB 8KB 16KB 32KB and 64KB From the pop up menu as shown above select the desired RAID strip size for your RAID volume and press Enter The options are 4KB 8KB 16KB 32KB 64KB and 128KB ...

Page 154: ...ty GB for the RAID Volume From the Create RAID Volume submenu use the arrow keys to select Capacity GB and press Enter The following screen will display Enter the desired RAID capacity in GB in the pop up menu to set the capacity for your RAID volume ...

Page 155: ...te Volumes To finalize your RAID volume configuration select Create Volume from the Create RAID Volume submenu as shown on the screen below After selecting Create Volume press Enter The following screen will appear and display RAID volumes as shown below ...

Page 156: ...nformation use the arrow keys to select the desired RAID volume as shown below To Display RAID VOLUME Information When the screen above appears press Enter The RAID VOLUME INFO menu will appear and display the detailed information about the RAID volume you ve selected as shown below ...

Page 157: ... On the RAID VOLUME INFO menu use the arrow keys to select Delete and press Enter to delete the RAID volume you have selected The following screen will appear to confirm if you want to delete the RAID Volume Select Yes to delete the RAID Volume The options are Yes and No ...

Page 158: ...t the desired NVMe device from the list of RAID Member Disks and press Enter as shown below Select Reset to Non RAID from the screen below and press Enter to remove RAID data from the selected NVMe device When the following screen appears select Yes to confirm that you want to set the selected NVMe device to non RAID The options are Yes and No ...

Page 159: ...s menu When the following screen displays select a non RAID physical disk to turn on the disk locator LED to locate a selected device You can also select a RAID member disk to locate the selected device When the following screen appears use the arrow keys to select Turn Locate LED On Press Enter to turn on the locator LED to show the location of the selected device ...

Page 160: ... to access the All Intel VMD Controllers menu When the following screen appears select a desired NVMe device from the list of Non RAID Physical Disks After a NVMe device is selected press Enter and the following screen will appear Select Mark as Spare and press Enter to mark the selected device as a spare device ...

Page 161: ...at you want the selected device to be used as a spare device The options are Yes and No Note A spare disk is used for automatic RAID volume rebuilds when status of failed missing or at risk is detected on the array disk For a RAID0 volume only status of at risk will trigger automatic RAID volume rebuilds ...

Page 162: ...E 1 section to access the All Intel VMD Controllers menu When the following screen appears select a desired NVMe device from the list of Non RAID Physical Disks for use as a journaling drive After selecting a NVMe device press Enter and the following screen will appear Select Mark as Journaling Drive and press Enter ...

Page 163: ... a RAID5 volume The use of journaling drive that contains partial parity logging PPL can reduce the potential data loss Refer to the following illustration for the use of journaling drive Disk1 Journaling Drive Data Disk2 Data Disk3 Data Disk4 Parity RAID SW for Read modify write Case PPL Partial parity logging PPL old data XOR old parity New parity new data XOR PPL read old parity XOR operation w...

Page 164: ...y based RAID Press Enter and the following screen will appear Step 2 Use the arrow keys to select RWH Policy RWH is a scenario related to a power drive failure crash Step 1 Refer to the instructions stated in the E 1 section to access All Intel VMD Controllers menu items When the following screen appears use the arrow keys to select the desired RAID5 volume ...

Page 165: ...ned as the result of XOR calculation of old data and old parity PPL is a feature available for RAID5 volumes While a power drive failure crash occurring PPL information helps rebuild the RAID volume and re duce the potential data loss Note 2 For the RWH condition the Intel RSTe 5 X or above RWH closure algorithm provides the option of use of an additional NVMe device for RAID volume rebuilds Journ...

Page 166: ... RWH Policy to Journaling Drive Press Enter and the RWH JD feature will become available as shown below RWH JD Use the arrow keys to select RWH JD Press Enter and the following screen will appear The feature displays the information of journaling drive s ...

Page 167: ...ke effect use the arrow keys to select Change RWH settings and press Enter Your computer will return to the main screen of All Intel VMD Controllers as shown below Step 4 Use the arrow keys and press Enter to select the desired journaling drive from the option list of RWH JD ...

Page 168: ...structions on how to enable the secure boot features The F 4 section states Key Management settings F 1 Boot mode select Feature Press Del during system boot to enter the BIOS Setup utility Navigate to the Boot tab Use the arrow keys to select Boot mode select and press Enter The options are LEGACY UEFI and DUAL Set Boot mode select to UEFI For the changes to take effect press F4 to save the setti...

Page 169: ...andard and Custom Select Standard to load manufacturer s default secure variables Select Custom to change the image execution policy and to manage secure boot keys CSM Support Select Enabled to support the legacy CSM which provides compatibility support for traditional legacy BIOS for system boot The options are Disabled and Enabled F 2 Secure Boot Secure Boot Mode CSM Support Features Press Del d...

Page 170: ...ave the secure boot support be sure to follow the steps below Step 1 Step 4 Step 1 Set Secure Boot Mode to Standard Press Yes to install factory default keys as needed Note The Key Management menu will become unavailable when Secure Boot Mode is set to Standard ...

Page 171: ...the settings and exit the BIOS Setup utility Step 3 Press Del during system boot to enter the BIOS Setup utility Navigate to the Security tab and enter the Secure Boot menu Set CSM Support to Disabled For the changes to take effect press F4 to save the settings and exit the BIOS Setup utility ...

Page 172: ...ver are allowed Step 4 Press Del during system boot to enter the BIOS Setup utility Navigate to the Security tab and enter the Secure Boot menu Set Secure Boot to Enabled For the changes to take effect press F4 to save the settings and exit the BIOS Setup utility Press Del during system boot to enter the BIOS Setup utility Navigate to the Security tab and enter the Secure Boot menu The following s...

Page 173: ...en Secure Boot Mode is set to Custom allows the secure boot keys to be installed via the external device and be involved in the secure boot process Provision Factory Defaults This feature is to provision the default secure boot keys set by the manufacturer when system is in the Setup mode The options are Disabled and Enabled ...

Page 174: ...t secure boot keys and key variables Also it will reset the system to the User mode The options are Yes and No Reset To Setup Mode available when the System Mode is in User mode Select and press Yes to clear all secure boot variables and reset the system to the Setup mode The options are Yes and No ...

Page 175: ...s feature to export NVRAM content of secure boot variables to files in a root folder on a file system device Enroll Efi Image This feature is to enroll SHA256 hash of the binary into the Authorized Signature Data base DB and to allow the image to run in the secure boot mode ...

Page 176: ...le when the system is not in Device Guard Ready Select and press Yes to remove Microsoft UEFI CA certificate from the DB The options are Yes and No Restore DB defaults Select and press Yes to restore the DB variables to factory defaults The options are Yes and No ...

Page 177: ...Export Update and Delete Select Details to display detailed information of PK Select Export to save the current PKs to a FAT formatted USB flash drive Select Update to load the factory defaults or load PKs from a file on the external device Select Delete to clear the current PKs and reset the system to the Setup mode See the following for more information of each option Details Use the arrow keys ...

Page 178: ... Export Use the arrow keys to select Export It is to save the current PKs to a FAT for matted USB flash drive Note Refer to the right panel of the screen for the file formats accepted Press Enter and the following screen will appear ...

Page 179: ...ndix F Secure Boot Settings 179 Press Enter and the following screen will appear Update Use the arrow keys to select Update It is to load the factory defaults or load PKs from a file on the external device ...

Page 180: ...Super X11DAC User s Manual 180 To load the factory defaults navigate to Yes and press Enter The following screen will appear To load PKs from a file on the external device navigate to No and press Enter ...

Page 181: ...Appendix F Secure Boot Settings 181 When the following screen appears select the USB flash drive that contains the desired file ...

Page 182: ...Super X11DAC User s Manual 182 Delete Use the arrow keys to select Delete and press Enter to clear the current PKs and reset the system to the Setup mode Press Enter and the following screen will appear ...

Page 183: ...ailed information of KEKs Select Export to save the current KEKs to a FAT formatted USB flash drive Select Update to load the factory defaults or load KEKs from a file on the external device Select Append to load the factory defaults or load KEKs from a file on the external device Select Delete to clear the current KEKs or to delete only one certificate from the key database Refer to page 178 for ...

Page 184: ...n will appear To load the factory defaults navigate to Yes and press Enter The following screen will appear To load KEKs from a file on the external device navigate to No and press Enter Refer to pages 181 and 182 on how to load KEKs from a file on the external device ...

Page 185: ... Boot Settings 185 Delete Use the arrow keys to select Delete and press Enter Navigate to Yes and press Enter to clear the current KEKs Navigate to No and press Enter to delete only one certificate from the key database ...

Page 186: ...xport to save the cur rent DB to a FAT formatted USB flash drive Select Update to load the factory defaults or load DB from a file on the external device Select Append to add variables to the exist ing DB Select Delete to clear the current DB or to delete only one certificate from the key database Refer to page 178 for the Export process Refer to pages 179 180 181 and 182 for the Update process Re...

Page 187: ... Select Export to save the current DBX to a FAT formatted USB flash drive Select Update to load the factory defaults or load DBX from a file on the external device Select Append to add variables to the existing DBX Select Delete to clear the current DBX or to delete only one certificate from the key database Refer to page 178 for the Export process Refer to pages 179 180 181 and 182 for the Update...

Page 188: ...t to save the cur rent DBT to a FAT formatted USB flash drive Select Update to load the factory defaults or load DBT from a file on the external device Select Append to add variables to the existing DBT Select Delete to clear the current DBT or to delete only one certificate from the key database Refer to page 178 for the Export process Refer to pages 179 180 181 and 182 for the Update process Ref...

Page 189: ...t to save the current DBR to a FAT formatted USB flash drive Select Update to load the factory defaults or load DBR from a file on the external device Select Append to add variables to the exist ing DBR Select Delete to clear the current DBR or to delete only one certificate from the key database Refer to page 178 for the Export process Refer to pages 179 180 181 and 182 for the Update process Ref...

Page 190: ...f storage devices or an intermediate device attached to storage devices The iSCSI initiator and iSCSI target must connect to an IP network To have iSCSI settings available refer to instructions stated in the G 1 section The G 2 section explains iSCSI settings G 1 PCIe PCI PnP Features Press Del during system boot to enter the BIOS Setup utility Navigate to the Advanced tab Use the arrow keys to se...

Page 191: ... Additionally these features will become unavailable except Onboard LAN1 Option ROM Onboard LAN1 Option ROM Use the arrow keys to select Onboard LAN1 Option ROM and press Enter The options are Disabled Legacy and EFI Set this feature to EFI Network Stack Configuration Use the arrow keys to select Network Stack Configuration and press Enter to access the menu items ...

Page 192: ...t iSCSI Configuration and press Enter to access the menu items Ipv4 PXE Support Ipv6 PXE Support To enable Ipv4 Ipv6 PXE boot support use the arrow keys to select and set Ipv4 PXE Support Ipv6 PXE Support to Enabled Note Enable both Ipv4 PXE Support and Ipv6 PXE Support to have iSCSI settings available In some cases enabling either one feature may also have iSCSI settings available depending on th...

Page 193: ...ing iSCSI Settings 193 G 2 Configuring iSCSI Settings iSCSI Initiator Name Use this feature to enter the unique initiator name in iSCSI qualified name IQN format Add an Attempt Use the arrow keys to select Add an Attempt ...

Page 194: ...is feature displays the iSCSI attempt name Press Enter and the following screen will appear Press Enter and the following screen will appear Use the arrow keys to select the desired media access control address MAC address network interface card NIC port ...

Page 195: ... O MPIO is a feature that allows the system to route I O through the available paths if the active path fails be sure to have more than one physical path connected to the system Internet Protocol Use this feature to set the Internet protocol The options are IPv4 IPv6 and Autoconfigure Note Enabling the feature iSCSI Mode is required for iSCSI configuration ...

Page 196: ...ter the number of logon sessions allowed for the iSCSI initiator to restart with the iSCSI target if the first logon connection fails Connection Establishing Timeout Use this feature to set the logon connection establishing timeout in milliseconds The valid range is from 100 milliseconds to 20 seconds ...

Page 197: ...efault value is derived from the last three bytes of the OUI format ISID Also only the last three bytes of the ISID are configurable OUI format ISID This feature displays the default ISID in OUI format The value in six bytes is derived from the MAC address of the NIC port that you selected earlier ...

Page 198: ...he desired iSCSI initiator IP address Enable DHCP Use this feature to disable enable dynamic host configuration protocol DHCP server service for the iSCSI initiator The options are Disabled and Enabled Note Set the feature Enable DHCP to Disabled if you would like to specify the iSCSI initiator IP address subnet mask gateway ...

Page 199: ...tiator Subnet Mask available when Enable DHCP is set to Disabled Use this feature to enter the desired iSCSI initiator subnet mask Gateway available when Enable DHCP is set to Disabled Use this feature to enter the desired iSCSI initiator gateway ...

Page 200: ... server service for the iSCSI target The options are Disabled and Enabled Note 1 Set the feature Get target info via DHCP to Disabled if you would like to specify the iSCSI target name IP address boot LUN Note 2 LUN stands for logical unit number which is used to identify a logical physical disk Target Name Use this feature to enter the desired iSCSI target name in IQN format ...

Page 201: ...iguring iSCSI Settings 201 Target Address Use this feature to enter the desired iSCSI target IP address Target Port This feature displays the iSCSI target port Boot LUN Use this feature to enter the LUN ID of boot LUN ...

Page 202: ... the CHAP type The options are One way and Mutual Note Challenge handshake authentication protocol CHAP is a protocol used to verify the identity of the peer of a connection Note 1 If one way unidirectional CHAP authentication is performed the iSCSI target authenticates the iSCSI initiator Note 2 If mutual bidirectional CHAP authentication is performed the iSCSI target and iSCSI initiator authenti...

Page 203: ...en Authentication Type is set to CHAP Use this feature to enter the CHAP name authenticated by the iSCSI target CHAP Secret available when Authentication Type is set to CHAP Use this feature to enter the CHAP secret 12 16 characters authenticated by the iSCSI target ...

Page 204: ...1DAC User s Manual 204 CHAP Status This feature displays the CHAP status Reverse CHAP Name available when CHAP Type is set to Mutual Use this feature to enter the CHAP name authenticated by the iSCSI initiator ...

Page 205: ...P Secret available when CHAP Type is set to Mutual Use this feature to enter the CHAP secret 12 16 characters authenticated by the iSCSI initiator Reverse CHAP Status available when CHAP Type is set to Mutual This feature displays the reverse CHAP status ...

Page 206: ...he arrow keys to select Save Changes and press Enter to save settings shown on the screen Note For the changes to take effect save settings and restart the system Back to Previous Page Use the arrow keys to select Back to Previous Page and press Enter ...

Page 207: ...guring iSCSI Settings 207 The user will be returned to the main screen of iSCSI Configuration as shown below Delete Attempts Use the arrow keys to select Delete Attempts Press Enter and the following screen will appear ...

Page 208: ... X11DAC User s Manual 208 Attempt 1 Use the feature to disable enable Attempt 1 The options are Disabled and Enabled Attempt 2 Use the feature to disable enable Attempt 2 The options are Disabled and Enabled ...

Page 209: ...SI Settings 209 Commit Changes and Exit Press Enter to save changes and return to the main screen of iSCSI Configuration Discard Changes and Exit Press Enter to return to the main screen of iSCSI Configuration without any change ...

Page 210: ...Super X11DAC User s Manual 210 Change Attempt Order Use the arrow keys to select Change Attempt Order Press Enter and the following screen will appear ...

Page 211: ...en keys to move up down the selected Attempt For instance move up the selected Attempt by using key Move down the selected Attempt by using key Commit Changes and Exit Press Enter to save changes and return to the main screen of iSCSI Configuration Discard Changes and Exit Press Enter to return to the main screen of iSCSI Configuration without any change ...

Page 212: ...tel LAN devices via the BIOS Setup utility supported by the Unified Extensible Firmware Interface UEFI driver H 1 Network Interface Card NIC Settings Press Del during system boot to enter the BIOS Setup utility Navigate to the Advanced tab Use the arrow keys to select PCIe PCI PnP Configuration and press Enter to access the menu items ...

Page 213: ...AN device s will become available for configuration as shown below Note If Onboard LAN1 Option ROM is set to EFI all features for onboard LAN op tion ROM will be set to EFI by the EFI driver Additionally these features will become unavailable except Onboard LAN1 Option ROM Onboard LAN1 Option ROM available when NIC s is are detected by the system Use the arrow keys to select Onboard LAN1 Option RO...

Page 214: ...User s Manual 214 Use the arrow keys to select the desired onboard LAN device as shown below Press Enter and the following screen will appear It displays the detailed information for the selected onboard LAN device ...

Page 215: ...ing Network Interface Card NIC Settings 215 Blink LEDs This feature allows the user to set the LED blink duration in seconds The valid range is 0 15 seconds NIC Configuration Use the arrow keys to select NIC Configuration ...

Page 216: ...nd the following screen will appear Wake on LAN Use the arrow keys to select Wake On LAN and press Enter The following screen will appear The options are Disabled and Enabled Set this feature to support system wake up via the selected LAN device ...

Reviews: