


-
33
-
© STULZ GmbH, Hamburg
-
33
-
1
0
ON
7.2 Starting the unit
7.2.1 Starting with a new cylinder
When starting the unit with a new cylinder (for example, starting the machine for the first time, or after replacing the cylin-
der), the automatic Cylinder Cleaning procedure should be activated (available only on models with type H control). This
procedure:
1. opens the fill electrovalve and drain electrovalve at the same time (the electrodes are not powered), for around 10 min-
utes; this initial phase cleans the pipe for any impurities that may generate foam;
2. fills and subsequently empties the cylinder three times; this phase cleans the inside walls of the cylinder for any residual
impurities that may generate foam; the cylinder is filled with the electrodes powered, as hot water improves cleaning.
The “cylinder cleaning” procedure can be activated after the start-up sequence when the humidifier is switched on
(see par. 7.2.3), by pressing the SEL and
t
buttons together for at least two seconds; the start of the procedure is
confirmed by the code “PC” flashing periodically on the display.
The procedure can be stopped by pressing the SEL and arrow buttons
t
again for at least two seconds.
At the end of the procedure, the code will no longer be displayed and the machine will be ready to start production.
7.2.2 Starting with an empty cylinder
When starting the unit with the cylinder empty, a significant period must pass (which, depending greatly on the conductiv-
ity of the supply water, may even be a number of hours) before the rated production is reached. In fact, to achieve a level
of current sufficient to produce the rated thermal power, the salinity and thus the conductivity of the water must reach a
sufficient level. This is due to the effect of the concentration of salts resulting from the repeated evaporation and filling with
water. This obviously does not occur if the machine is started with cylinder con taining water that already has a sufficient
level of conductivity.
7.2.3 Start procedure
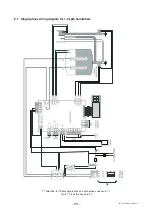
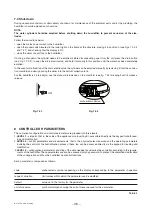
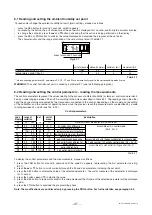
Figs. 7.2.3.1 and 7.2.3.2 show the electrical controls located on the lower right of the frame of the structure.
I – 0 switch: start. Arrow button “
t
”: drain. After having powered the humidifier, switch the appliance by placing the rocker
switch located next to the drain button in the lower right on the frame of the structure in position I.
The start-up sequence is thus initiated, which includes an initial phase followed by the actual operating phase.
The start-up sequence is highlighted by the lighting up of the LEDs on the control panel, as described in the following
chapter.
Fig. 7.2.3.1
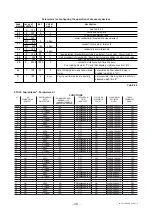
Fig. 7.2.3.2
7.2.4 Starting with an empty cylinder
The water contained in the cylinder can be drained manually by pressing the DRAIN button marked with the arrow (see
Fig. 7.2.3.2). On releasing the button, if request for humidification persists, the controller will start production, filling with
water if necessary.


