4-2.
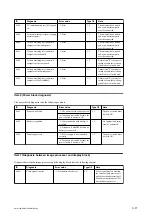
MAINTENANCE Menu
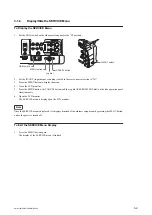
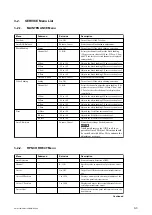
The MAINTENANCE menu enables adjustment of parameters that are unique to each unit for correction of non-
uniformity of image pickup devices and lenses.
4-2-1.
Test Saw Setting
• The Test Saw setting enables the operator to select the Test Saw signal instead of the imager output signal when
recording or outputting images in the CAMERA mode.
4-2-2.
Executing Auto Black Balance
• Executing the Auto Black Balance triggers the auto black balance adjustment (automatic black level adjustment).
• When the Auto Black Balance menu is selected, the Execute and Cancel choices appear. In addition, selecting
Execute starts Auto Black Balance.
• When the Auto Black Balance is executed, the automatic RPN detection is executed simultaneously.
Note
Auto Black Balance cannot be executed from the SERVICE menu under the following settings.
• While recording or while the color bars are displayed.
• When the electronic shutter is operating in the SLS mode.
• When EX Slow Shutter is set to ON.
• When Interval Rec is set to ON.
• When Frame Rec is set to ON.
• When P.Cache Rec is set to ON.
• When S&Q Motion is set to ON.
Change the settings to execute Auto Black Balance.
4-2-3.
Black Shading Adjustment
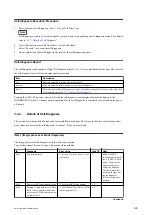
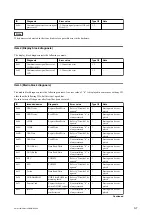
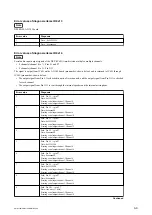
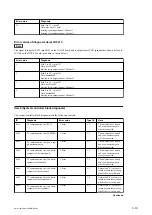
The Black Shading menu enables adjustments of the H Saw correction level, V Saw correction level, and parabola
correction level of the black shading correction function.
Note
All the Black Shading correction values have been set to ±0 since the unit was shipped from the factory.
When the Black Shading correction is executed, it results in height difference of black level at the boundary areas
between the corrected areas. Do not change the Black Shading correction values from ±0 unless it is necessary.
1.
Setting
It can be set to enable or disable the Black Shading correction function. This function is enabled automatically after
the power is turned on.
PMW-160/PMW-150/PMW-EX260
4-2
Summary of Contents for XDCAM PMW-160
Page 1: ...SOLID STATE MEMORY CAMCORDER PMW 160 PMW 150 PMW EX260 SERVICE MANUAL 1st Edition ...
Page 4: ......
Page 8: ......
Page 10: ......
Page 30: ......
Page 38: ...3 Install the removed parts by reversing steps of removal PMW 160 PMW 150 PMW EX260 2 8 ...
Page 92: ......
Page 128: ......
Page 130: ......
Page 131: ......

