9.
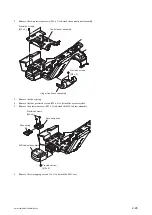
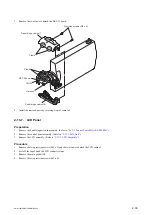
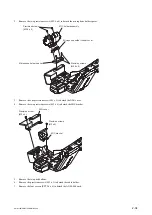
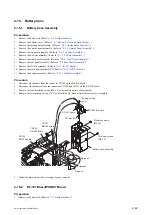
Remove the four screws (P2.6 x 5) to detach the front frame S.
Front frame S
Outside
bottom bracket
Ground plate (B)
P2.6 x 5
Precision screw (M2 x 4)
Precision screw (M2 x 4)
Heat sink (A)
Ground plate (A)
Precision screw (M2 x 4)
P2.6 x 5
Main gasket C
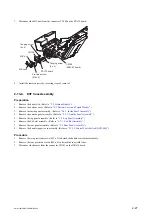
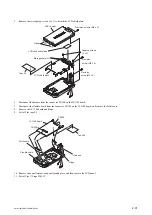
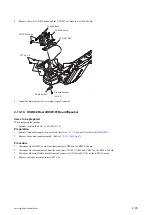
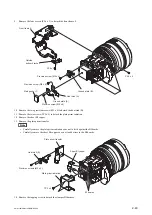
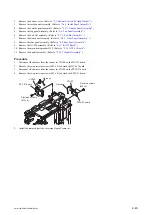
10. Remove the two precision screws (M2 x 4) to detach the heat sink (B).
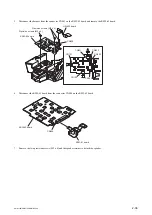
11. Remove the two screws (TP2 x 5) to detach the plate prism radiation.
12. Remove the sheet BI copper.
13. Remove the plate prism transfer.
Note
• Carefully remove the plate prism radiation so as not to hit it against the BI boards.
• Carefully remove the sheet BI copper so as not to add stress to the BI boards.
Plate prism transfer
Heat sink (B)
Precision screws (M2 x 4)
TP2 x 5
Plate prism radiation
Sheet BI copper
BI boards
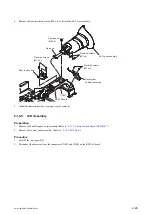
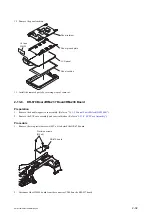
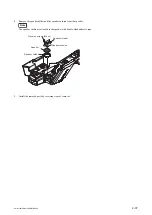
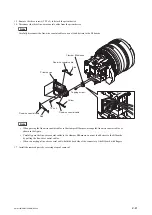
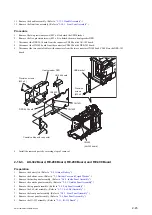
14. Remove the tapping screw to detach the clamper BI harness.
PMW-160/PMW-150/PMW-EX260
2-40
Summary of Contents for XDCAM PMW-160
Page 1: ...SOLID STATE MEMORY CAMCORDER PMW 160 PMW 150 PMW EX260 SERVICE MANUAL 1st Edition ...
Page 4: ......
Page 8: ......
Page 10: ......
Page 30: ......
Page 38: ...3 Install the removed parts by reversing steps of removal PMW 160 PMW 150 PMW EX260 2 8 ...
Page 92: ......
Page 128: ......
Page 130: ......
Page 131: ......

