1-20
82
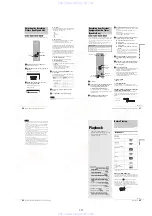
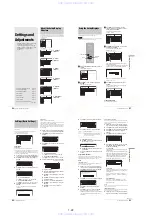
Advanced Program Edit
a
Follow steps 1 to 7 of “Preparing for recording
using the DV IN jack” (page 75), then press
SYSTEM MENU.
Insert a DVD-RW (VR mode) into the recorder.
Make sure that the disc has enough free space to
record the contents of your tape.
b
Press
M
/
m
to select “DV/D8 EDIT,” then
press ENTER.
The DV/D8 Edit menu appears.
c
Press
M
/
m
to select “Advanced Program
Edit,” then press ENTER.
The display asks whether to start recording.
If you want to change the recording mode, press
<
/
,
to move the cursor, then press
M
/
m
to select
the mode.
d
Press
<
/
,
to select “Start,” then press
ENTER.
The recorder starts recording the tape contents.
To quit recording, press
x
REC STOP.
When recording is finished, the display asks if you
want to create scenes within the generated program
automatically or manually, or quit editing.
◆
To create scenes automatically
Press
<
/
,
to select “Auto,” then press ENTER.
The recorder divides the generated program into
scenes, and the Scene List menu appears.
◆
To create scenes manually
A
Press
<
/
,
to select “Manual,” then press
ENTER.
The display for setting the IN point appears. The
scene starts to play in the background.
B
While watching the playback picture, press
m
or
M
to search for the IN point, then
press ENTER.
The IN point is set, and the display for setting the
OUT point (end of the scene) appears.
C
While watching the playback picture, press
m
or
M
to search for the OUT point, then
press ENTER.
The OUT point is set, and the display asks
whether to add the selected scene to the Scene
List menu.
• To preview the scene, select “Preview.”
• To reset either the IN or OUT point, select
“Change IN” or “Change OUT.”
D
Press
<
/
M
/
m
/
,
to select “OK,” then press
ENTER.
A new Scene List menu appears with the selected
scene.
E
Press
<
/
M
/
m
/
,
to select “Add,” then press
ENTER.
The display for selecting the scene insertion point
appears.
F
Press
M
/
m
to select the insertion point in the
Scene List, then press ENTER.
The display for setting the IN point (start of the
scene) appears.
G
Repeat steps
2
to
6
to create all the scenes
you want to add to the Scene List.
You can add up to 50 scenes.
◆
To quit editing
Press
<
/
,
to select “Cancel,” then press ENTER.
e
To edit the Scene List, press
<
/
M
/
m
/
,
to
select a scene in the Scene List menu and
press ENTER.
When the sub-menu appears, select an edit option
you want to apply to the scene.
<
/
M
/
m
/
,
,
ENTER
RETURN
SYSTEM MENU
x
REC STOP
m
/
M
DV/D8 EDIT
Select only the scenes you want to copy
from the DV/D8 tape.
Program Edit
Advanced Program Edit
DV/D8 Edit List
SP
DV/D8 Dubbing
Change the recording mode if necessary.
Select "Start" to start dubbing.
Start
Cancel
Edit
Select the method for dividing scenes.
Auto
Manual
Cancel
DV10/11/02 1:30PM - 11/12/02 Chapter 2
Scenes Selection
Do you want to capture the scene
between IN 0:00:30 and OUT 0:00:52?
OK
Cancel
Preview
Change IN
Change OUT
83
Advanced Program Edit
C
onnecting a Digi
tal Vi
deo Camera or Other Equipmen
t
◆
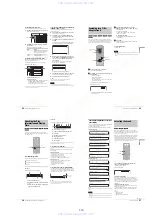
To erase the scene
A
Press
M
/
m
to select “Erase,” then press
ENTER.
B
When the display asks for confirmation, press
<
/
,
to select “OK,” then press ENTER.
◆
To move the scene
A
Press
M
/
m
to select “Move,” then press
ENTER.
The display for selecting the scene insertion point
appears.
B
Press
M
/
m
to select the point, then press
ENTER.
The scene moves to the selected location.
◆
To reset the start or end of the scene
Press
M
/
m
to select “Change IN” or “Change OUT,”
then press ENTER.
◆
To preview the scene
Press
M
/
m
to select “Preview,” then press ENTER.
To cancel, press
<
/
M
/
m
/
,
to select “Quit” in the
Scene List menu, then press ENTER.
f
When you finish creating the Scene List,
press
<
/
M
/
m
/
,
to select “OK,” then press
ENTER.
The edited program is saved, and the display asks if
you want to create a Playlist title.
If you select “No,” the display returns to the DV/D8
Edit menu. Go to step 9.
g
Press
<
/
,
to select “Yes,” then press
ENTER.
The display for entering a Playlist title name appears.
To enter a new name, select “Enter,” and follow the
explanations on page 34.
h
To use the default name, press
<
/
,
to
select “OK,” then press ENTER.
A Playlist title of the default title name is created on
the same disc, and the display returns to the DV/D8
Edit menu.
You now have a disc containing both the entire
contents of the DV/Digital8 format tape and a
Playlist of the selected scenes.
To edit the Playlist title, see “Advanced Editing
(Playlist Edit)” (page 67).
i
Dub the selected scenes to a disc.
Make copies of the selected scenes to a disc of your
choice. Go to step 3 of “Creating a Copy of the
Edited Contents (Copy Dubbing)” (page 86).
Notes
• The disc may not be recorded as programmed if the tape’s time code is
not sequential or there are blanks between the recordings on the tape.
In this case, follow the instructions of “Recording From Equipment
Connected to the LINE IN Jacks” (page 88).
• You cannot set a scene to be shorter than one second.
• The start and end point of a program may be different from what you
have set if the source DV/Digital8 format tape is in any of the
following conditions:
– Recording mode was changed during the recording.
– There is a blank space in the recorded portion.
• This function may not work with certain digital video cameras. In this
case, follow the instructions of “Recording From Equipment
Connected to the LINE IN Jacks” (page 88).
• In step 4, the recorder automatically records a blank for five minutes
before it stops dubbing. When you press
x
REC STOP, the recorder
stops recording.
84
Re-editing the “program” in the DV/D8 Edit List
Re-editing the “program”
in the DV/D8 Edit List
Each time you dub a DV/Digital8 format tape, the start and stop
points of the selected scenes (called a “program”) are saved in a
DV/D8 Edit List. You can make additional changes to these
“programs” if they were created by One Touch Dub or Advanced
Program Edit on a DVD-RW (VR mode). You can reset, erase,
or change the order of the scenes and then dub the re-edited
program to a disc of your choice.
To use this function, you will do the following:
a
Follow steps 1 to 4 of “Preparing for recording
using the DV IN jack” (page 75), then press
SYSTEM MENU.
Be sure to use the original DV/Digital8 format tape
and the DVD-RW (VR mode) that corresponds to the
program in the DV/D8 Edit List.
b
Press
M
/
m
to select “DV/D8 EDIT,” then
press ENTER.
The DV/D8 Edit menu appears.
c
Press
M
/
m
to select “DV/D8 Edit List,” then
press ENTER.
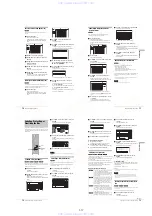
The DV/D8 Edit List menu appears.
A disc mark will appear next to the program that
corresponds to the inserted disc. You can only edit
the programs that display a disc mark (
1
).
Disc mark
Program name
Total playing time
Date of editing or recording
to select the program you want to
edit, then press ENTER.
The sub-menu appears.
to select “Edit,” then press
The Scene List menu appears with all the scenes the
program contains.
◆
To add a new scene to the Scene List
A
Press
<
/
M
/
m
/
,
to select “Add,” then press
ENTER.
The display for selecting the scene insertion point
appears.
B
Press
M
/
m
to select the insertion point in the
Scene List, then press ENTER.
The display for setting the IN point (start of the
scene) appears.
Connect your digital video camera and prepare for editing
Select a program from the DV/D8 Edit List
Edit the program in the DV/D8 Edit List
Dub the selected scenes to a disc
<
/
M
/
m
/
,
,
ENTER
m
/
M
DV/D8 EDIT
Select only the scenes you want to copy
from the DV/D8 tape.
Program Edit
Advanced Program Edit
DV/D8 Edit List
DV10/11/02 1:30PM - 11/12/02 4:46PM
DV12/11/02 1:00PM - 12/11/02 7:05PM
DV12/24/02 11:34AM - 12/25/02 1:24PM
1H12M 6/ 5
1H16M 6/10
1H24M 6/18
SCENE LIST
Total 1:23:30 Scenes 20
OK
Quit
Add
0:00:30-0:00:52
Duration 0:00:22
1
0:01:40-0:06:23
Duration 0:06:43
2
0:07:07-0:10:51
Duration 0:03:44
3
0:11:40-0:16:19
Duration 0:04:39
4
Total number of scenes
Total duration of the program
85
Re-editing the “program” in the DV/D8 Edit List
C
onnecting a Digi
tal Vi
deo Camera or Other Equipmen
t
C
While watching the playback picture, press
m
or
M
to search for the IN point, then
press ENTER.
The IN point is set, and the display for setting the
OUT point (end of the scene) appears.
D
While watching the playback picture, press
m
or
M
to search for the OUT point, then
press ENTER.
The OUT point is set, and the display asks
whether to add the selected scene to the Scene
List menu.
• To preview the scene, select “Preview.”
• To reset either the IN or OUT point, select
“Change IN” or “Change OUT.”
E
Press
<
/
M
/
m
/
,
to select “OK,” then press
ENTER.
A new Scene List menu appears with the selected
scene. To add another scene, repeat from step
1
.
◆
If you select a program that contains no scenes
The display asks whether to generate scenes within
the selected program.
To generate scenes automatically, press
<
/
,
to
select “Auto,” then press ENTER.
Scenes are generated and a new Scene List menu
appears.
To capture scenes manually, select “Manual,” then
press ENTER. The display for adding a scene
appears. Follow steps
3
to
5
above. You can add a
maximum of 50 scenes.
f
Press
M
/
m
to select the scene you want to edit,
then press ENTER.
The sub-menu appears.
g
Press
M
/
m
to select the edit option you want
to apply to the scene, then press ENTER.
◆
To erase the scene
A
Press
M
/
m
to select “Erase,” then press
ENTER.
B
When the display asks for confirmation, press
<
/
,
to select “OK,” then press ENTER.
◆
To move the scene
A
Press
M
/
m
to select “Move,” then press
ENTER.
The display for selecting the scene insertion point
appears.
B
Press
M
/
m
to select the point, then press
ENTER.
The scene moves to the selected location.
◆
To reset the start or end of the scene
Press
M
/
m
to select “Change IN” or “Change OUT,”
then press ENTER.
◆
To preview the scene
Press
M
/
m
to select “Preview,” then press ENTER.
To cancel, press
<
/
M
/
m
/
,
to select “Quit” in the
Scene List menu, then press ENTER.
h
When you finish editing the Scene List, press
<
/
M
/
m
/
,
to select “OK,” then press
ENTER.
The display asks if you want to make a Playlist title.
If you select “No,” the edited program is saved, and
the display returns to the DV/D8 Edit List. Note that
the original program will be rewritten.
To dub the selected scenes to a disc, go to step 4 of
“Creating a Copy of the Edited Contents (Copy
Dubbing)” (page 86).
i
Press
<
/
,
to select “Yes,” then press
ENTER.
The display for entering a Playlist title name appears.
To enter a new name, select “Enter,” and follow the
explanations on page 34.
j
To use the default name, press
<
/
,
to
select “OK,” then press ENTER.
A Playlist title of the default title name is created on
the same disc, and the display returns to the DV/D8
Edit List.
You now have a disc containing both the entire
contents of the DV/Digital8 format tape and a
Playlist of the selected scenes.
To edit the Playlist title, see “Advanced Editing
(Playlist Edit)” (page 67).
k
Dub the selected scenes to a disc.
Make copies of the selected scenes to a disc of your
choice. Go to step 4 of “Creating a Copy of the
Edited Contents (Copy Dubbing)” (page 86).
To preview a program
After you edit a program, you can preview the changes you
made.
1
While the DV/D8 Edit List is displayed, press
M
/
m
to select the program, then press ENTER.
2
Press
M
/
m
to select “Preview,” from the sub-
menu, then press ENTER.
To create a Playlist title of the program
After you edit a program, you can create a Playlist title of the
edited program. The Playlist will be created on the inserted
DVD-RWs (VR mode).
1
While the DV/D8 Edit List is displayed, press
M
/
m
to select the program, then press ENTER.
2
Press
M
/
m
to select “Make a Playlist,” from the
sub-menu, then press ENTER.
The display for entering a Playlist title name appears.
To enter a new name, select “Enter,” and follow the
explanations on page 34.
Scenes Selection
Do you want to capture the scene
between IN 0:00:30 and OUT 0:00:52?
OK
Cancel
Preview
Change IN
Change OUT
,
continued
www. xiaoyu163. com
QQ 376315150
9
9
2
8
9
4
2
9
8
TEL 13942296513
9
9
2
8
9
4
2
9
8
0
5
1
5
1
3
6
7
3
Q
Q
TEL 13942296513 QQ 376315150 892498299
TEL 13942296513 QQ 376315150 892498299


